crwdns2933423:0crwdne2933423:0

Removing Dell Inspiron 15-7537 Bottom Cover

crwdns2862623:0crwdne2862623:0
crwdns2942641:0crwdne2942641:0

crwdns2942213:0crwdne2942213:0

  1. Removing Dell Inspiron 15-7537 Bottom Cover, Bottom Case: crwdns2935265:01crwdnd2935265:01crwdnd2935265:01crwdne2935265:0
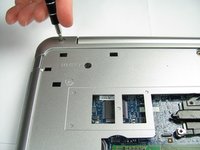
    • Make sure the display is closed. Then, flip the computer over so that you can see the bottom cover.

    • Loosen the two 5 mm Phillips #0 on the upper edge of the cover.

    • These screws will stay captive to the case.

  2. Removing Dell Inspiron 15-7537 Bottom Cover: crwdns2935265:02crwdnd2935265:01crwdnd2935265:01crwdne2935265:0
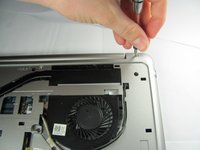
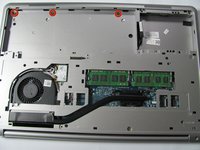
    • Remove the two 5 mm interior screws that connect the cover to the assembly using the same Philips head screwdriver from the previous step.

  3. Removing Dell Inspiron 15-7537 Bottom Cover: crwdns2935265:03crwdnd2935265:01crwdnd2935265:01crwdne2935265:0
    • Use a spudger to remove the base cover from the rest of bottom cover.

  4. Removing Dell Inspiron 15-7537 Bottom Cover, Battery: crwdns2935265:04crwdnd2935265:01crwdnd2935265:01crwdne2935265:0
    • Remove the three 5mm Phillips #0 screws that keep the battery connected to the computer.

  5. Removing Dell Inspiron 15-7537 Bottom Cover: crwdns2935265:05crwdnd2935265:01crwdnd2935265:01crwdne2935265:0
    • Ground the system board by turning over the computer, opening the display, and holding the power button down for about 5 seconds before proceeding.

    • Using the pull tab on the battery, lift the battery out of the computer.

  6. Removing Dell Inspiron 15-7537 Bottom Cover, Hard Drive: crwdns2935265:06crwdnd2935265:01crwdnd2935265:01crwdne2935265:0
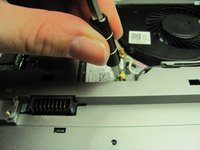
  7. Removing Dell Inspiron 15-7537 Bottom Cover, Remove the WiFi Card: crwdns2935265:07crwdnd2935265:01crwdnd2935265:02crwdne2935265:0 Removing Dell Inspiron 15-7537 Bottom Cover, Remove the WiFi Card: crwdns2935265:07crwdnd2935265:02crwdnd2935265:02crwdne2935265:0
    • Completely unscrew the 2 mm screw that connects the WiFi card to the mother board using a Philips head screwdriver.

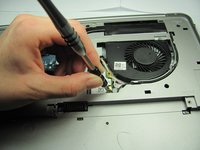
  8. Removing Dell Inspiron 15-7537 Bottom Cover: crwdns2935265:08crwdnd2935265:01crwdnd2935265:01crwdne2935265:0
    • Disconnect the two antennas (one black and one white) from the wireless card.

  9. Removing Dell Inspiron 15-7537 Bottom Cover: crwdns2935265:09crwdnd2935265:01crwdnd2935265:01crwdne2935265:0
    • Remove the WiFi card.

    • To place a new WiFi card, connect the antenna cables to the WiFi card. The white cable goes to the white triangle, and the black cable goes to the black triangle.

    • Avoid damaging the card by not placing any cables underneath the card.

  10. Removing Dell Inspiron 15-7537 Bottom Cover, Removing the Keyboard: crwdns2935265:010crwdnd2935265:01crwdnd2935265:01crwdne2935265:0
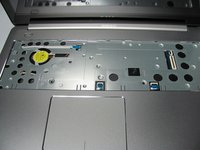
    • Remove the single 5mm screw that connects the keyboard to the palm assembly with the Phillips head screwdriver.

  11. Removing Dell Inspiron 15-7537 Bottom Cover: crwdns2935265:011crwdnd2935265:01crwdnd2935265:01crwdne2935265:0
    • Flip over the computer and open the display as far as it can go.

    • Use the spudger to remove the keyboard from the palm assembly.

  12. Removing Dell Inspiron 15-7537 Bottom Cover: crwdns2935265:012crwdnd2935265:01crwdnd2935265:01crwdne2935265:0
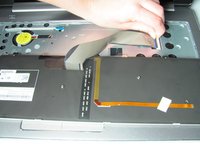
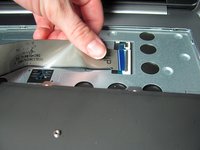
    • Gently flip over the keyboard and place it on the palm rest assembly.

    • Lift the connector latches and disconnect the keyboard and the keyboard back-light cables.

  13. Removing Dell Inspiron 15-7537 Bottom Cover: crwdns2935265:013crwdnd2935265:01crwdnd2935265:03crwdne2935265:0 Removing Dell Inspiron 15-7537 Bottom Cover: crwdns2935265:013crwdnd2935265:02crwdnd2935265:03crwdne2935265:0 Removing Dell Inspiron 15-7537 Bottom Cover: crwdns2935265:013crwdnd2935265:03crwdnd2935265:03crwdne2935265:0
    • Take the keyboard off the palm rest assembly.

  14. Removing Dell Inspiron 15-7537 Bottom Cover, Bottom Cover: crwdns2935265:014crwdnd2935265:01crwdnd2935265:01crwdne2935265:0
    • Unscrew the two black 5 mm screws underneath the keyboard using a Phillips head screwdriver.

  15. Removing Dell Inspiron 15-7537 Bottom Cover: crwdns2935265:015crwdnd2935265:01crwdnd2935265:02crwdne2935265:0 Removing Dell Inspiron 15-7537 Bottom Cover: crwdns2935265:015crwdnd2935265:02crwdnd2935265:02crwdne2935265:0
    • Flip the computer and remove the two silver 5 mm screws on the corners of the base cover with the Phillips head screwdriver.

  16. Removing Dell Inspiron 15-7537 Bottom Cover: crwdns2935265:016crwdnd2935265:01crwdnd2935265:01crwdne2935265:0
    • Unscrew the three black 5 mm screws with the Phillips head screwdriver.

  17. Removing Dell Inspiron 15-7537 Bottom Cover: crwdns2935265:017crwdnd2935265:01crwdnd2935265:02crwdne2935265:0 Removing Dell Inspiron 15-7537 Bottom Cover: crwdns2935265:017crwdnd2935265:02crwdnd2935265:02crwdne2935265:0
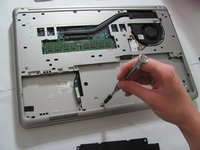
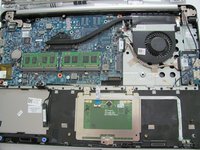
    • Remove the three silver 2 mm screws (with large flat circular heads) from where the battery was taken out with the Phillips head screwdriver.

  18. Removing Dell Inspiron 15-7537 Bottom Cover: crwdns2935265:018crwdnd2935265:01crwdnd2935265:02crwdne2935265:0 Removing Dell Inspiron 15-7537 Bottom Cover: crwdns2935265:018crwdnd2935265:02crwdnd2935265:02crwdne2935265:0
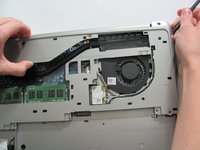
    • Place a plastic spudger underneath the base cover and move it along the outside of the cover. Once the cover is disconnected lift the off the base cover.

    • To fully take off the base cover the wires that connect to the WiFi card need to be pulled off and pulled through its hole in the base cover

crwdns2915888:0crwdne2915888:0

To reassemble your device, follow these instructions in reverse order.

Jean Whitmore

crwdns2935283:001/22/15crwdne2935283:0

984 crwdns2915208:0crwdne2915208:0

crwdns2935297:07crwdne2935297:0

crwdns2915084:0crwdne2915084:0

Cal Poly, Team 18-2, Maness Winter 2015 crwdns2935289:0Cal Poly, Team 18-2, Maness Winter 2015crwdne2935289:0

CPSU-MANESS-W15S18G2

crwdns2931471:04crwdne2931471:0

crwdns2935297:08crwdne2935297:0

crwdns2947412:00crwdne2947412:0

crwdns2917038:0crwdne2917038:0

crwdns2936625:0crwdne2936625:0:

crwdns2936751:024crwdne2936751:0 0

crwdns2936753:07crwdne2936753:0 0

crwdns2936753:030crwdne2936753:0 2

crwdns2942667:0crwdne2942667:0 152