
Removing Dell Inspiron 1150 RAM

crwdns2959932:0crwdnd2959932:0Christophercrwdnd2959932:0crwdnd2959932:0crwdnd2959932:09crwdnd2959932:0crwdne2959932:0
crwdns2959936:0Nhl 17, 2016crwdne2959936:0
crwdns2869540:0crwdne2869540:0: 6.5K
crwdns2959988:0crwdne2959988:0
- crwdns2959990:0crwdne2959990:0
- 0
- crwdns2959992:0crwdne2959992:0
- 4
- crwdns2959994:0crwdne2959994:0
- 45
- crwdns2959996:0crwdne2959996:0
- 6,486
crwdns2955950:0crwdne2955950:0: 0
crwdns2959998:0crwdne2959998:0
crwdns2960000:0crwdne2960000:0crwdns2959984:0crwdne2959984:0: 0 1
crwdns2959956:0crwdne2959956:0
crwdns2959968:01crwdne2959968:0
crwdns2959986:0crwdne2959986:0: 3 4
crwdns2959982:03crwdne2959982:0
crwdns2959978:04crwdne2959978:0
crwdns2959930:0crwdne2959930:0
crwdns2943215:0crwdne2943215:0

-
-
-
Turn the laptop so that the bottom is facing up.
-
Locate the panel that has an M on it and two air vents.
 crwdns2952109:0crwdne2952109:0
-
-
-
-
Take the screw driver and carefully unscrew the screw that is located above the M in order to remove the panel.
-
Remove the panel.
-
-
-
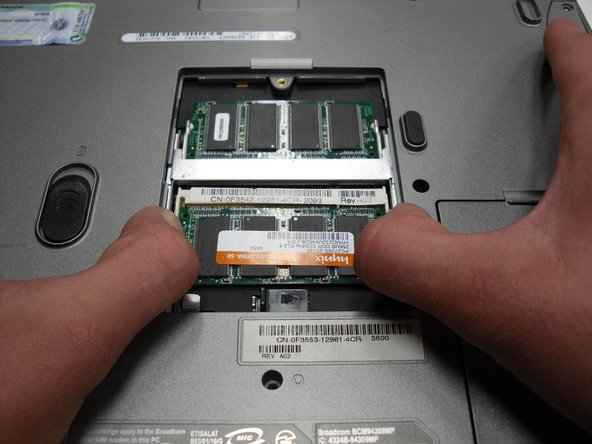
After removing the panel, you will see two memory modules.
-
Locate the four spring clips that are holding the memory modules in place.
-
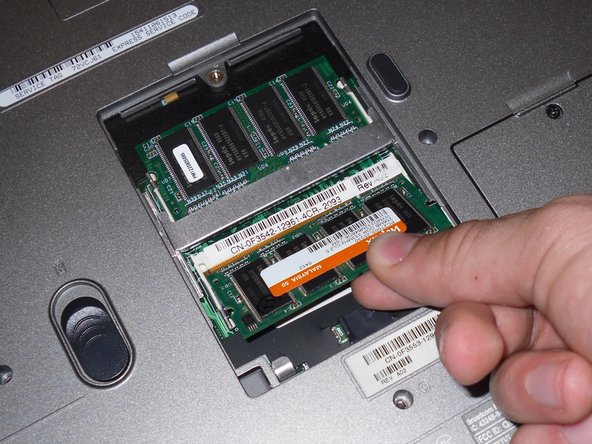
Place your thumb on each of the two spring clips for each memory module and push outward until the memory module pops up.
-
Gently raise the memory module and lift it out of its socket.
-
-




To reassemble your device, follow these instructions in reverse order.

crwdns2935287:0crwdne2935287:0

Cal Poly, Team 16-2, Maness Spring 2010 crwdns2935289:0Cal Poly, Team 16-2, Maness Spring 2010crwdne2935289:0
CPSU-MANESS-S10S16G2
crwdns2931471:04crwdne2931471:0
crwdns2935297:096crwdne2935297:0
