crwdns2915892:0crwdne2915892:0
This guide will give a step by step procedure of how to remove and replace the front and back covers of the Canon PowerShot A550.
crwdns2942213:0crwdne2942213:0
-
-
Unscrew a total of 6 4.45 mm phillips head screws using a #00 phillips head screwdriver.
-
There are 2 screws on the left side (when looking at the front of the camera).
-
There are 3 screws on the bottom
-
There is 1 screw on the right side
-
-
-
Turn to the bottom of the camera.
-
Open the memory card cover by sliding the "CARD/BATT." button up, and then pulling the cover to the left.
-
-
-
This is what the SD card/battery compartment looks like when opened.
-
Remove one 4.45mm phillips head screw from the SD card/battery compartment using a #00 phillips head screwdriver.
-
-
-
-
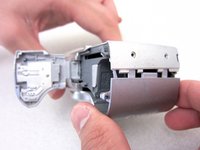
Gently remove the front cover away from the camera body.
-
-
-
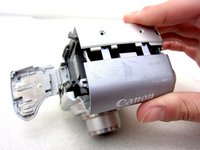
The camera should look like this once the front cover is removed.
-
-
crwdns2935267:0crwdne2935267:0Tweezers$4.99
-
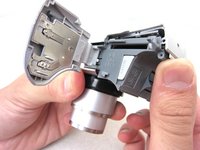
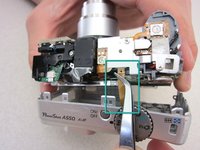
Start from the battery compartment and remove the back cover.
-
Remove the connecting ribbon from the body of the camera using a pair of tweezers.
-
-
-
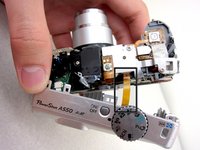
Once the ribbon connecting the back cover is removed, the back of the camera body should look like this.
-


To reassemble your device, follow these instructions in reverse order.
crwdns2935221:0crwdne2935221:0
crwdns2935229:05crwdne2935229:0
crwdns2935287:0crwdne2935287:0

Cal Poly, Team 8-6, Regan Spring 2011 crwdns2935289:0Cal Poly, Team 8-6, Regan Spring 2011crwdne2935289:0
CPSU-REGAN-S11S8G6
crwdns2931471:04crwdne2931471:0
crwdns2935297:022crwdne2935297:0