crwdns2915892:0crwdne2915892:0
Two tools required for the completion of this task include a PH1 screwdriver, and a prying tool.
All screws on this device are 10mm (0.393 in).
crwdns2942213:0crwdne2942213:0
-
-
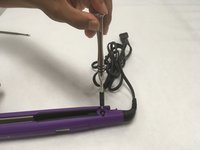
Place the prying tool in between the hair straightener and the aligning cap.
-
Push forwards on the prying tool to pop off the aligning cap.
-
-
-
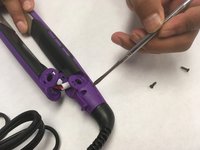
Remove the screws with the Phillips #1 screwdriver located underneath the aligning cap, one on each side of the straightener.
-
Use the prying tool to remove the aligning rods after the removal of the screws.
-
Gently separate each half of the hair straightener.
-
-
-
-
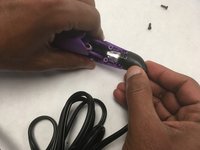
After the hair straightener is separated, use a Phillips #1 screwdriver to remove the two screws located on the lower half of the straightener.
-
Use the prying tool to remove the hinge cover.
-
-
-
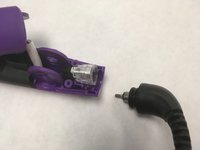
Pull upwards while pulling outwards to disconnect the wire from the housing.
-


To reassemble your device, follow these instructions in reverse order.
To reassemble your device, follow these instructions in reverse order.
crwdns2935221:0crwdne2935221:0
crwdns2935229:02crwdne2935229:0
crwdns2915084:0crwdne2915084:0

IUPUI, Team S3-G3, Wilson Summer 2018 crwdns2935289:0IUPUI, Team S3-G3, Wilson Summer 2018crwdne2935289:0
IUPUI-WILSON-SU18S3G3
crwdns2931471:05crwdne2931471:0
crwdns2935297:02crwdne2935297:0
crwdns2947412:06crwdne2947412:0
Excelente trabajo! Muchas gracias por la información!
is there a place where you can buy and replace the power cable, or the plug ?
the slip ring plug that is ..
Hello,
from where did you get the spare power cord ?
part number would be helpful?