crwdns2915892:0crwdne2915892:0
Is your Razer Phone's speaker blown? If so, here is the guide to replacing it.
crwdns2942213:0crwdne2942213:0
-
-
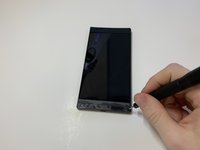
Remove the plastic speaker grills by using the metal spudger to pry underneath the strips.
-
Peel off the plastic speaker grill to reveal the screws.
-
-
-
Pry the top plastic grill off with the metal spudger and reveal the screws.
-
-
-
Remove five (two bottom, three top) 2.5 mm screws with the Phillips #000 screwdriver.
-
Remove five (four bottom, one top) 5.5 mm screws with the Torx Head T5 screwdriver.
-
-
-
Remove the display assembly by using the Jimmy to separate the assembly from the phone's frame.
-
Lift the display assembly away from the other half of the phone.
-
-
crwdns2935267:0crwdne2935267:0Tweezers$4.99
-
Remove one 2.5 mm screw holding down the metal bracket connector using the Phillips #000 screwdriver.
-
Peel back the metallic shielding over the connector using tweezers.
-
Remove the metal bracket connector.
-
-
-
Grab hold of the the screen ribbon with the tweezers and remove it from the rest of the phone to free the assembly display.
I would highly recommend avoid using metal tweezers for this step.
Otherwise, be EXTREMELY careful with them when near the contacts around the ribbon cable.
With the battery still plugged in, trying to unplug the ribbon connector of the screen with a metal tool will cause shorts between the tiny contacts.
-
-
crwdns2935267:0crwdne2935267:0Tweezers$4.99
-
Grab hold of the connector on the right side of the phone (just above the battery) using the tweezers.
-
Remove the connector.
-
-
-
Remove the 2.5 mm screw holding down the bracket with a Phillips #000 screwdriver.
-
Grab the bracket with the tweezers and remove it.
Careful.
There's actually 2 screws you need to remove with this step before you can remove the bracket..
-
-
-
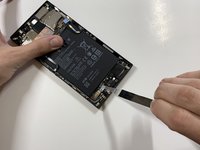
Peel off and pull out the elastic tabs at the bottom of the battery.
-
-
-
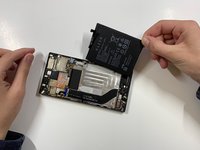
Carefully use the Jimmy to wedge the battery out of the phone.
It isn’t necessary to remove the battery
Thank you very much.
battery razer phone 1 and 2 is the same type?
my phone is razer phone 1, and only see online shop selling the battery for razer phone 2
Where I can get the design specs for the razer phone 1 battery? I think they are not producing it anymore…
It is 376989 in size I brought a 396787 but without the BMS board specs still cannot fix it.
And also what is the Panasonic 777156? It has 6 pins under it, it seems not like a capacitor and cannot find replacement on digi-key.
I used this guide to replace my battery for my Razer 2 phone and the front speaker grills have no screws at all. Had to access the battery from behind the phone. So apparently I have a different version of Razer 2 phone. So followed another guide and replaced the battery. Unfortunately, I had to deal with the speaker grills.
-
-
-
-
Using a Phillips #000 screwdriver, take out the seven 1 mm screws on the bottom panel of the device.
-
-
crwdns2935267:0crwdne2935267:0Tweezers$4.99
-
Grab hold of the blue connector on the upper left side of the phone with the tweezers.
-
Remove the connector.
-
-
-
Use the tweezers to grab hold of the connector for the blue wire (bottom of the device), and remove the connector.
-
Use the tweezers to grab hold of the connector for the white wire, and remove the connector.
-
-
-
Using the tweezers, grab the detached charging port and ribbon.
-
-
-
Remove the one 2.5 mm screw with the Phillips #000 screwdriver.
-
-
-
Remove the protective peel covering the rear cameras using your hands.
-
-
crwdns2935267:0crwdne2935267:0Tweezers$4.99
-
Use the tweezers to remove the white tab connector.
-
-
-
Grab and remove the metal tab with the tweezers.
-
-
-
Grab the connectors with the tweezers and gently lift the connectors loose.
It is only necessary to remove the left connector tab to reveal the screw beneath.
-
-
-
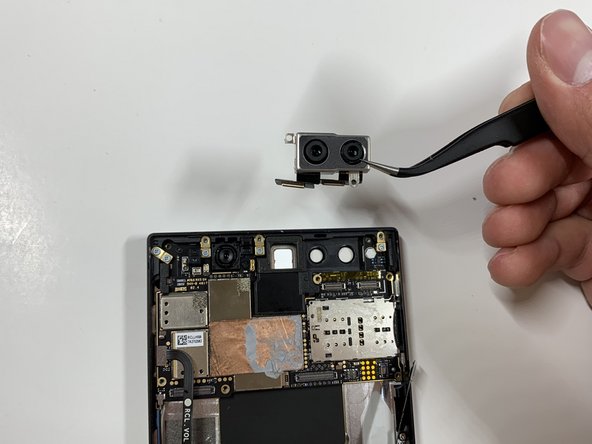
Remove the one 2.5 mm screw with the Phillips #000 screwdriver.
-
-
-
Remove the one 2.5 mm screw underneath the connectors with the Phillips #000 screwdriver.
-
-
-
Grab the loose connectors with a tweezer and gently remove the rear camera unit from the phone.
-
-
crwdns2935267:0crwdne2935267:0Tweezers$4.99
-
Grab and remove the blue connector with the tweezers.
-
-
-
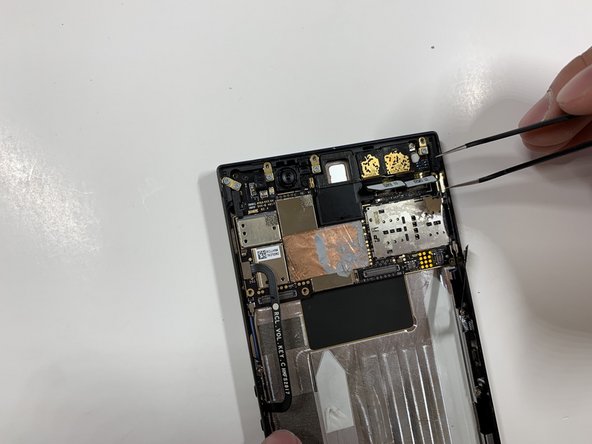
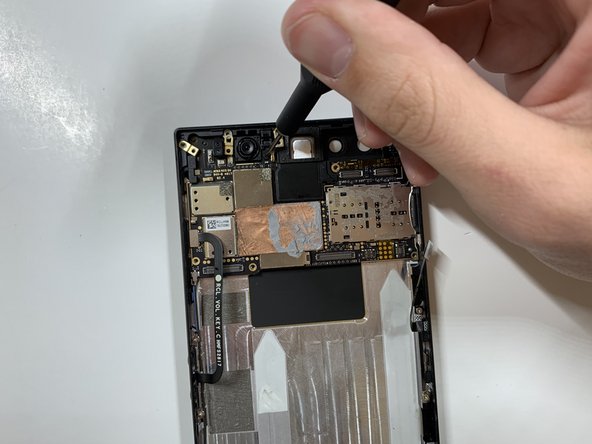
Remove the five 1 mm screws holding down the gold antenna line brackets to the motherboard using the Phillips #000 screwdriver.
-
-
-
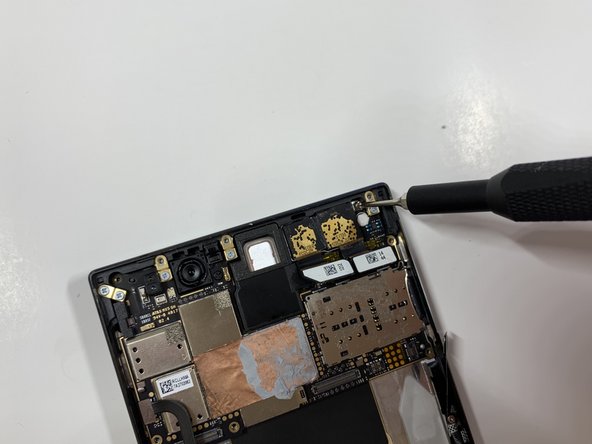
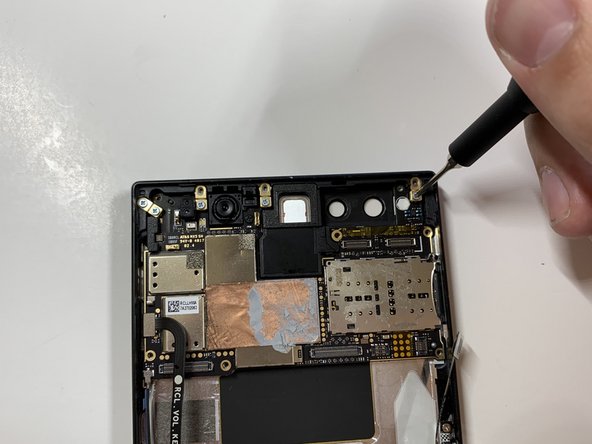
Remove the 2.5 mm screw next to the front-facing camera with the Phillips #000 screwdriver.
-
-
-
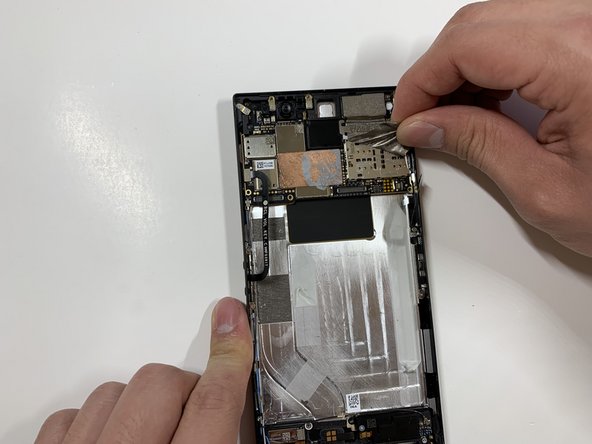
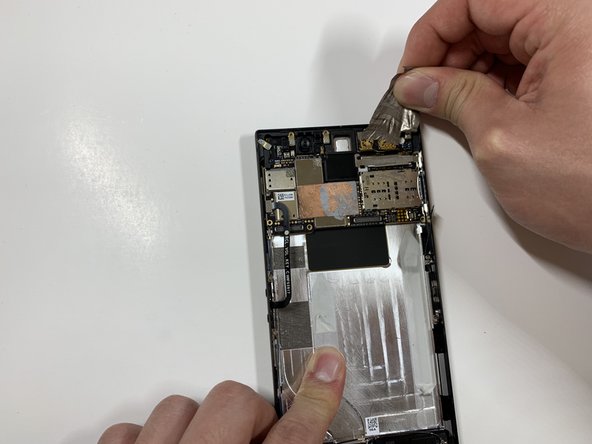
Remove the four gold antenna line brackets with the tweezers.
-
-
-
Using the tweezers remove the SIM card tray from the body of the phone.
-
-
-
Carefully lift up the motherboard away from the device.
-
-
crwdns2935267:0crwdne2935267:0Tweezers$4.99
-
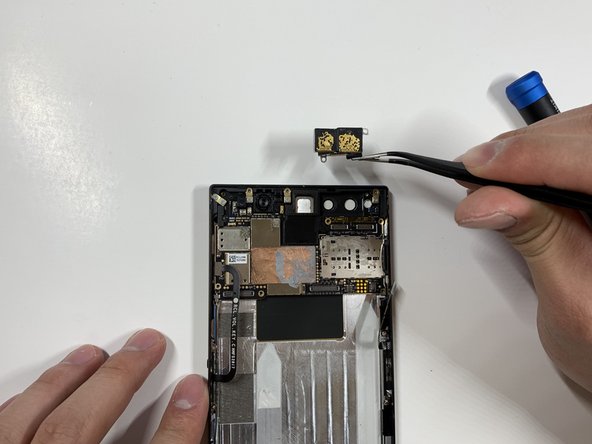
Lift earpiece speaker up with the tweezers.
-


To reassemble your device, follow these instructions in reverse order.
To reassemble your device, follow these instructions in reverse order.
crwdns2935221:0crwdne2935221:0
crwdns2935229:02crwdne2935229:0
crwdns2947410:01crwdne2947410:0
This job shouldn’t take more than an hour.
Double sided tape can be used to adhere the grills in place.
Lucano - crwdns2934203:0crwdne2934203:0
How to make the Another adhesive??? Plz rply
My razed Phone Speaker grills can't put again Perfectly
Ferdi Pongbubun - crwdns2934203:0crwdne2934203:0
Where can i find a Charging Connector for Razer Phone 2 to buy….becouse the only place i când find IT is in India and they only delyver to
curteanuice13 - crwdns2934203:0crwdne2934203:0