crwdns2933423:0crwdne2933423:0

Razer Kishi v2 Pro Front Panel Replacement

crwdns2942213:0crwdne2942213:0

  1. Razer Kishi v2 Pro Front Panel Replacement, Front Panel: crwdns2935265:01crwdnd2935265:01crwdnd2935265:01crwdne2935265:0
    • Put the device down with the bottom facing up.

    • Remove the eight 12 mm screws from the back of the controller using a T5 screwdriver.

  2. Razer Kishi v2 Pro Front Panel Replacement: crwdns2935265:02crwdnd2935265:01crwdnd2935265:03crwdne2935265:0 Razer Kishi v2 Pro Front Panel Replacement: crwdns2935265:02crwdnd2935265:02crwdnd2935265:03crwdne2935265:0 Razer Kishi v2 Pro Front Panel Replacement: crwdns2935265:02crwdnd2935265:03crwdnd2935265:03crwdne2935265:0
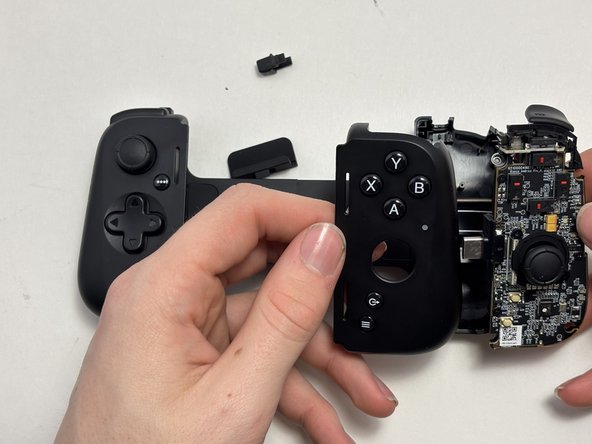
    • Gently apply light pressure to the front top half of the controller and slowly lift it up.

    • When you hear a click, the two halves should be successfully disconnected.

    • When you separate the two parts from each other, two of the back bumpers might fall out. If the bumpers do fall out don't worry because they just snap back in.

    • Be careful when doing this, if you apply too much pressure you could rip the ribbon cable.

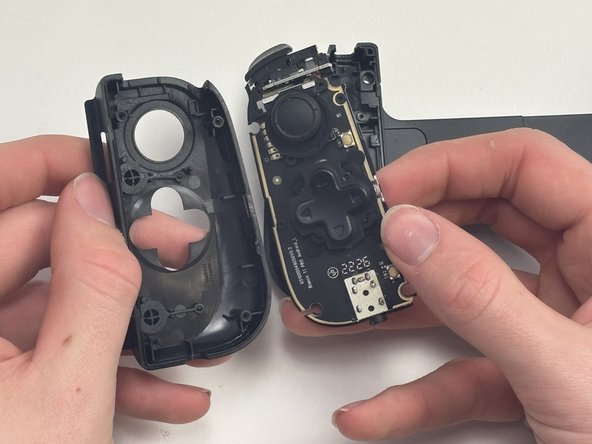
    • Repeat for the opposite side of the controller.

crwdns2915888:0crwdne2915888:0

To reassemble your device, follow these instructions in reverse order.

crwdns2935227:0crwdne2935227:0

Sean Chichurka

crwdns2935283:002/07/25crwdne2935283:0

193 crwdns2915208:0crwdne2915208:0

crwdns2935297:02crwdne2935297:0

crwdns2915084:0crwdne2915084:0

Austin Community College, Team 1-1, Watkins Spring 2025 crwdns2935289:0Austin Community College, Team 1-1, Watkins Spring 2025crwdne2935289:0

AUSTINCC-WATKINS-S25S1G1

crwdns2931471:04crwdne2931471:0

crwdns2935297:05crwdne2935297:0

crwdns2947412:00crwdne2947412:0

crwdns2917038:0crwdne2917038:0

crwdns2936625:0crwdne2936625:0:

crwdns2936751:024crwdne2936751:0 0

crwdns2936753:07crwdne2936753:0 16

crwdns2936753:030crwdne2936753:0 23

crwdns2942667:0crwdne2942667:0 61