crwdns2933423:0crwdne2933423:0
crwdns2947577:0crwdnd2947577:0crwdne2947577:0

Razer BlackShark V2 Cable Replacement

crwdns2942213:0crwdne2942213:0

    1. Razer BlackShark V2 Cable Replacement, Ear Cushion: crwdns2935265:01crwdnd2935265:01crwdnd2935265:01crwdne2935265:0
      • Place the headset so that the left side is facing you.

      • The left side of the headset has the cable attachment and the volume control knob.

      crwdns2952109:0crwdne2952109:0

      crwdns2917038:0crwdne2917038:0

    2. Razer BlackShark V2 Cable Replacement: crwdns2935265:02crwdnd2935265:01crwdnd2935265:01crwdne2935265:0
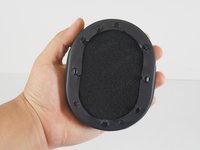
      • Scoop your middle and ring finger underneath the top or bottom inner portion of the ear cushion.

      • You should feel a hard plastic ridge.

      • Pull from the hard plastic ridge, being sure not to pull from the soft cushion.

      • Slowly apply pressure to prevent damage.

      crwdns2952109:0crwdne2952109:0

      crwdns2917038:0crwdne2917038:0

    3. Razer BlackShark V2 Cable Replacement: crwdns2935265:03crwdnd2935265:01crwdnd2935265:01crwdne2935265:0
      • Pull from the hard plastic ridge, being sure not to pull from the soft cushion.

      • Slowly apply pressure to prevent damage.

      crwdns2952109:0crwdne2952109:0

      crwdns2917038:0crwdne2917038:0

    4. Razer BlackShark V2 Cable Replacement: crwdns2935265:04crwdnd2935265:01crwdnd2935265:02crwdne2935265:0 Razer BlackShark V2 Cable Replacement: crwdns2935265:04crwdnd2935265:02crwdnd2935265:02crwdne2935265:0
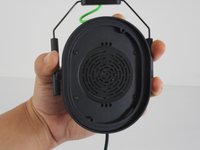
      • Once the cushion is removed, make sure the hard plastic base with the clips is attached to it.

      • If you are replacing both ear cushions, repeat Steps 1-4 for the other side. Then, insert the new ear cushions by lining up the clips in their respective holes and applying even pressure until they audibly click.

      crwdns2952109:0crwdne2952109:0

      crwdns2917038:0crwdne2917038:0

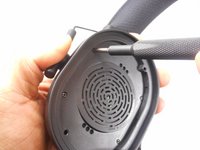
    1. Razer BlackShark V2 Cable Replacement, Speaker: crwdns2935265:05crwdnd2935265:01crwdnd2935265:02crwdne2935265:0 Razer BlackShark V2 Cable Replacement, Speaker: crwdns2935265:05crwdnd2935265:02crwdnd2935265:02crwdne2935265:0
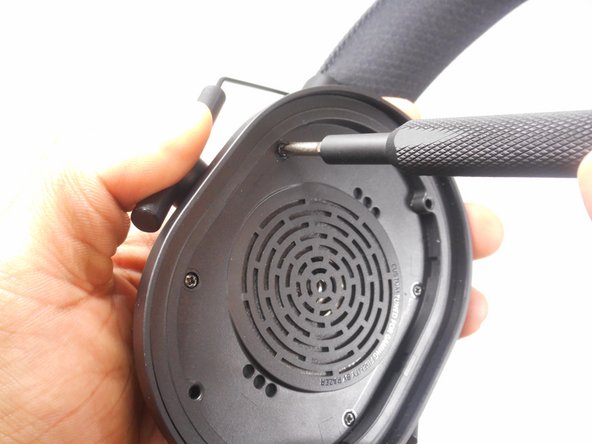
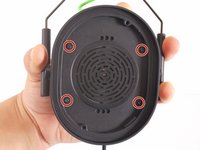
      • Remove the four screws holding the speaker in the headset using a Phillips #1 screwdriver.

      crwdns2952109:0crwdne2952109:0

      crwdns2917038:0crwdne2917038:0

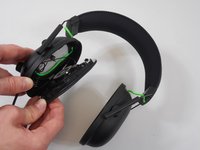
    2. Razer BlackShark V2 Cable Replacement: crwdns2935265:06crwdnd2935265:01crwdnd2935265:02crwdne2935265:0 Razer BlackShark V2 Cable Replacement: crwdns2935265:06crwdnd2935265:02crwdnd2935265:02crwdne2935265:0
      • Gently grab the headset and slowly apply pressure to the speaker cover; it will come off.

      • Be careful of the wires that are attached to the back of the speaker to ensure they won't be damaged when removing the speaker and its cover.

      crwdns2952109:0crwdne2952109:0

      crwdns2917038:0crwdne2917038:0

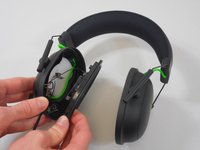
    3. Razer BlackShark V2 Cable Replacement: crwdns2935265:07crwdnd2935265:01crwdnd2935265:03crwdne2935265:0 Razer BlackShark V2 Cable Replacement: crwdns2935265:07crwdnd2935265:02crwdnd2935265:03crwdne2935265:0 Razer BlackShark V2 Cable Replacement: crwdns2935265:07crwdnd2935265:03crwdnd2935265:03crwdne2935265:0
      • After disconnecting the speaker from the headset, it is still connected by the wires that power the speaker itself.

      • With heat or with a sharp tool, remove the glue around the wires that connect the speaker to the headset.

      • Using the new speaker, you can reattach the wires soldering them in with existing glue.

      • If replacing internal components and NOT the speaker, you can do so without severing any wire connections; operate carefully to not sever them unnecessarily!

      crwdns2952109:0crwdne2952109:0

      crwdns2917038:0crwdne2917038:0

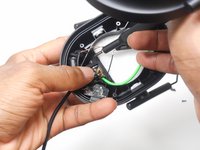
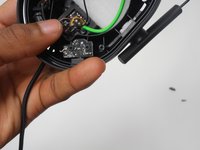
    1. Razer BlackShark V2 Cable Replacement, Cable: crwdns2935265:08crwdnd2935265:01crwdnd2935265:02crwdne2935265:0 Razer BlackShark V2 Cable Replacement, Cable: crwdns2935265:08crwdnd2935265:02crwdnd2935265:02crwdne2935265:0
      • Locate the main cable after it protrudes through the opening in the headset and where the cable is attached to the motherboard.

      crwdns2952109:0crwdne2952109:0

      crwdns2917038:0crwdne2917038:0

    2. Razer BlackShark V2 Cable Replacement: crwdns2935265:09crwdnd2935265:01crwdnd2935265:01crwdne2935265:0
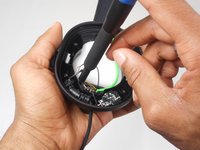
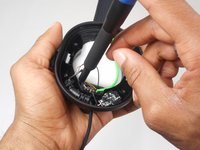
      • Remove the connecting glue attaching the wires to the motherboard with a sharp object or heat.

      • Be careful around the motherboard when removing the connected wires.

      crwdns2952109:0crwdne2952109:0

      crwdns2917038:0crwdne2917038:0

    3. Razer BlackShark V2 Cable Replacement: crwdns2935265:010crwdnd2935265:01crwdnd2935265:02crwdne2935265:0 Razer BlackShark V2 Cable Replacement: crwdns2935265:010crwdnd2935265:02crwdnd2935265:02crwdne2935265:0
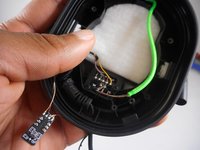
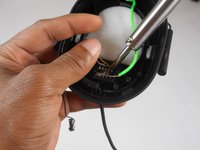
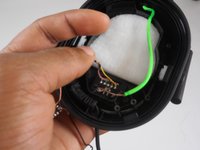
      • Reattach the new cable with the soldering iron.

      • Be sure not to damage the motherboard when resoldering the new cable.

      crwdns2952109:0crwdne2952109:0

      crwdns2917038:0crwdne2917038:0

crwdns2915888:0crwdne2915888:0

To reassemble your device, follow these instructions in reverse order.

crwdns2935221:0crwdne2935221:0

crwdns2935229:05crwdne2935229:0

BlakeB

crwdns2935283:003/08/23crwdne2935283:0

611 crwdns2915208:0crwdne2915208:0

crwdns2935297:03crwdne2935297:0

crwdns2935287:0crwdne2935287:0

University of New Orleans, Team 4-3, McDonald Spring 2023 crwdns2935289:0University of New Orleans, Team 4-3, McDonald Spring 2023crwdne2935289:0

UNO-MCDONALD-S23S4G3

crwdns2931471:04crwdne2931471:0

crwdns2935297:022crwdne2935297:0

crwdns2947412:03crwdne2947412:0

any chance you have a guide to replacing the battery?

Bradix Thresher - crwdns2934203:0crwdne2934203:0 crwdns2950251:0crwdne2950251:0

Never mind figured it out, battery is on the right earpiece... Love all your guides though!!

Bradix Thresher - crwdns2934203:0crwdne2934203:0 crwdns2950251:0crwdne2950251:0

Cuál es el orden del cableado en el plug 3.5 porfavoor! No lo encuentro por ningún lado :(

Panerukk M. - crwdns2934203:0crwdne2934203:0 crwdns2950251:0crwdne2950251:0

crwdns2917038:0crwdne2917038:0

crwdns2936625:0crwdne2936625:0:

crwdns2936751:024crwdne2936751:0 16

crwdns2936753:07crwdne2936753:0 68

crwdns2936753:030crwdne2936753:0 278

crwdns2942667:0crwdne2942667:0 11,379