crwdns2933423:0crwdne2933423:0

Razer Basilisk V3 Backplate Replacement

crwdns2942213:0crwdne2942213:0

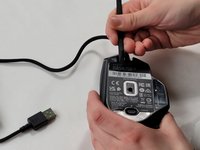
  1. Razer Basilisk V3 Backplate Replacement, Skates: crwdns2935265:01crwdnd2935265:01crwdnd2935265:01crwdne2935265:0
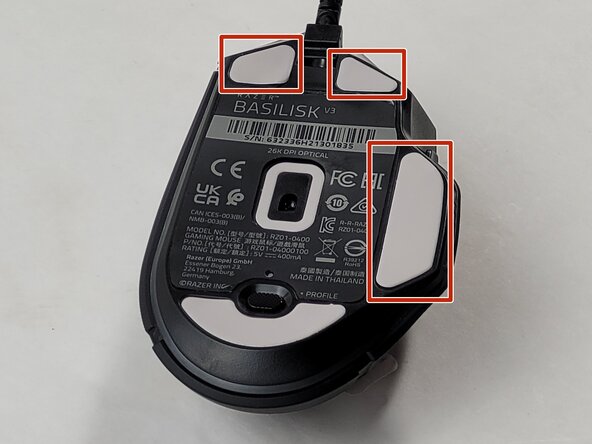
    • Locate each of the skates.

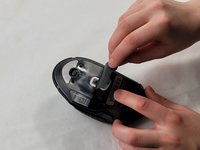
  2. Razer Basilisk V3 Backplate Replacement: crwdns2935265:02crwdnd2935265:01crwdnd2935265:03crwdne2935265:0 Razer Basilisk V3 Backplate Replacement: crwdns2935265:02crwdnd2935265:02crwdnd2935265:03crwdne2935265:0 Razer Basilisk V3 Backplate Replacement: crwdns2935265:02crwdnd2935265:03crwdnd2935265:03crwdne2935265:0
    • Heat the skate using a heat gun or hair dryer.

    • Using the pointy end of the spudger pry away a corner of the skate.

    • If the adhesive does not pull away easily, heat the skate more.

    • Once the corner of the skate comes free use the flat end of the spudger to peel off the rest of the skate.

    • Repeat these steps for each of the skates.

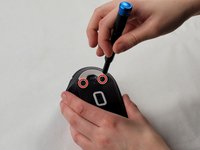
  3. Razer Basilisk V3 Backplate Replacement, Backplate: crwdns2935265:03crwdnd2935265:01crwdnd2935265:01crwdne2935265:0
    • Remove two 4.8 mm screws that were hidden under the skates using a JIS #1 screwdriver.

    • Remove the single 4 mm screw beneath the thumb grip using a JIS #1 screwdriver.

  4. Razer Basilisk V3 Backplate Replacement: crwdns2935265:04crwdnd2935265:01crwdnd2935265:03crwdne2935265:0 Razer Basilisk V3 Backplate Replacement: crwdns2935265:04crwdnd2935265:02crwdnd2935265:03crwdne2935265:0 Razer Basilisk V3 Backplate Replacement: crwdns2935265:04crwdnd2935265:03crwdnd2935265:03crwdne2935265:0
    • Heat the label gently with a heat gun or hair dryer.

    • Once the adhesive is loosened, use a spudger to peel off the label carefully, revealing two additional screws.

    • Remove the two 4.8 mm screws using a JIS #1 screwdriver.

  5. Razer Basilisk V3 Backplate Replacement: crwdns2935265:05crwdnd2935265:01crwdnd2935265:03crwdne2935265:0 Razer Basilisk V3 Backplate Replacement: crwdns2935265:05crwdnd2935265:02crwdnd2935265:03crwdne2935265:0 Razer Basilisk V3 Backplate Replacement: crwdns2935265:05crwdnd2935265:03crwdnd2935265:03crwdne2935265:0
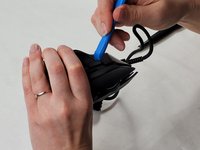
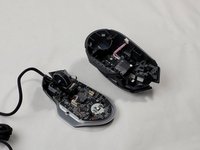
    • Carefully pry apart the mouse's top and bottom halves. Using the iFixit opening tool, start at one corner and work around the edge.

    • Be cautious of the clips that may break during this process.

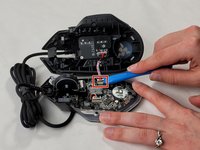
    • Using a plastic opening tool, gently pry the connector apart by moving side to side to avoid bending the pins.

    • When reassembling, be mindful that the connector only fits one way, as shown in the pictures.

crwdns2915888:0crwdne2915888:0

To reassemble your device, follow these instructions in reverse order.
Brendin Costa

crwdns2935283:003/18/24crwdne2935283:0

402 crwdns2915208:0crwdne2915208:0

crwdns2935297:04crwdne2935297:0

crwdns2915084:0crwdne2915084:0

UMass Dartmouth, Team 1-2, Santin Spring 2024 crwdns2935289:0UMass Dartmouth, Team 1-2, Santin Spring 2024crwdne2935289:0

UMASSD-SANTIN-S24S1G2

crwdns2931471:03crwdne2931471:0

crwdns2935297:011crwdne2935297:0

crwdns2947412:00crwdne2947412:0

crwdns2917038:0crwdne2917038:0

crwdns2936625:0crwdne2936625:0:

crwdns2936751:024crwdne2936751:0 4

crwdns2936753:07crwdne2936753:0 30

crwdns2936753:030crwdne2936753:0 185

crwdns2942667:0crwdne2942667:0 1,157