crwdns2933423:0crwdne2933423:0

RYDIS H68 Pro Side Brush Motor Replacement

crwdns2942213:0crwdne2942213:0

  1. RYDIS H68 Pro Side Brush Motor Replacement, Battery: crwdns2935265:01crwdnd2935265:01crwdnd2935265:02crwdne2935265:0 RYDIS H68 Pro Side Brush Motor Replacement, Battery: crwdns2935265:01crwdnd2935265:02crwdnd2935265:02crwdne2935265:0
    • Flip the vacuum over so that the wheels are facing you.

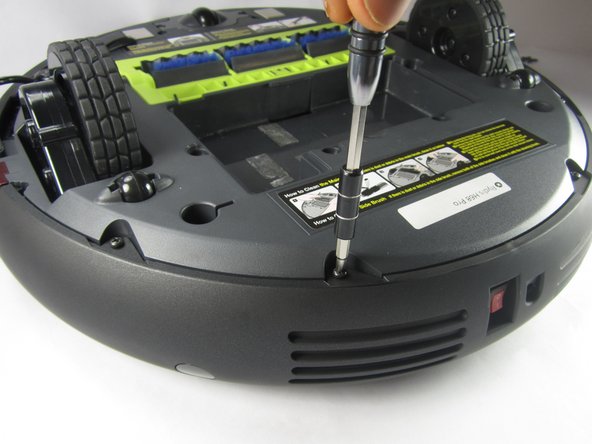
    • Use a Phillips #1 screwdriver to remove the four 10 mm screws that surround the battery cover.

  2. RYDIS H68 Pro Side Brush Motor Replacement: crwdns2935265:02crwdnd2935265:01crwdnd2935265:01crwdne2935265:0
    • Lift the battery cover up to reveal the battery.

    • Remove the battery.

  3. RYDIS H68 Pro Side Brush Motor Replacement, Bumper: crwdns2935265:03crwdnd2935265:01crwdnd2935265:03crwdne2935265:0 RYDIS H68 Pro Side Brush Motor Replacement, Bumper: crwdns2935265:03crwdnd2935265:02crwdnd2935265:03crwdne2935265:0 RYDIS H68 Pro Side Brush Motor Replacement, Bumper: crwdns2935265:03crwdnd2935265:03crwdnd2935265:03crwdne2935265:0
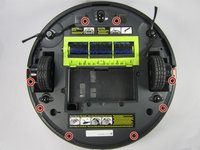
    • Remove the eight 10 mm Phillips #1 screws.

  4. RYDIS H68 Pro Side Brush Motor Replacement: crwdns2935265:04crwdnd2935265:01crwdnd2935265:03crwdne2935265:0 RYDIS H68 Pro Side Brush Motor Replacement: crwdns2935265:04crwdnd2935265:02crwdnd2935265:03crwdne2935265:0 RYDIS H68 Pro Side Brush Motor Replacement: crwdns2935265:04crwdnd2935265:03crwdnd2935265:03crwdne2935265:0
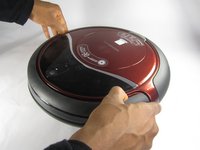
    • Hold the front bumper and pull it off.

    • It requires a lot of force to pull the bumper off.

  5. RYDIS H68 Pro Side Brush Motor Replacement: crwdns2935265:05crwdnd2935265:01crwdnd2935265:03crwdne2935265:0 RYDIS H68 Pro Side Brush Motor Replacement: crwdns2935265:05crwdnd2935265:02crwdnd2935265:03crwdne2935265:0 RYDIS H68 Pro Side Brush Motor Replacement: crwdns2935265:05crwdnd2935265:03crwdnd2935265:03crwdne2935265:0
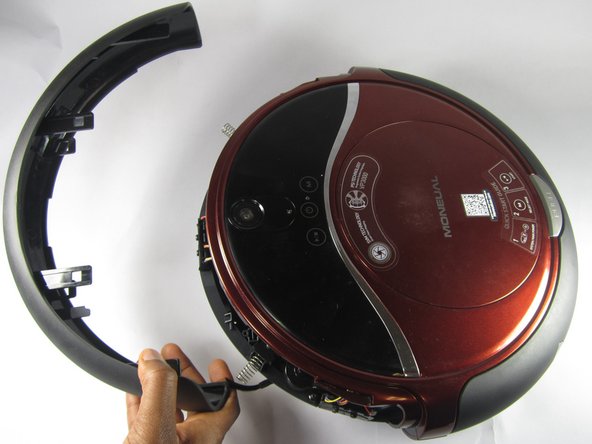
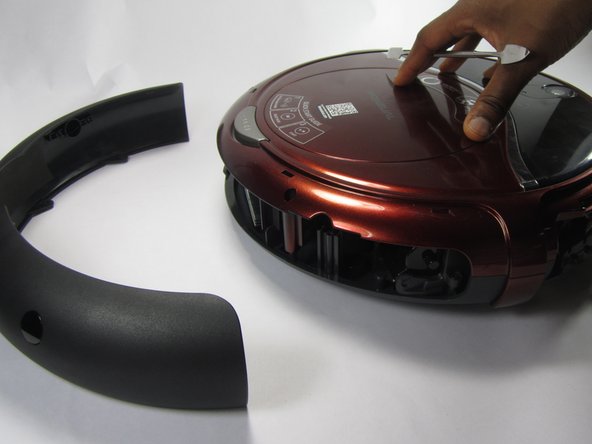
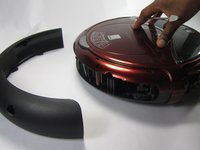
    • Pry off the back bumper by going around the entire top of the bumper with the metal spudger.

  6. RYDIS H68 Pro Side Brush Motor Replacement, Side Brush Motor: crwdns2935265:06crwdnd2935265:01crwdnd2935265:01crwdne2935265:0
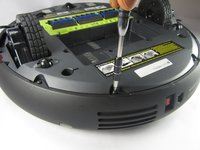
    • Begin by unscrewing the 2 10mm screws using a Phillips #1 screwdriver.

    • Unlatch the latches indicated. It can be easily done with your finger.

    • Once unsecured, the covering for the sensors can easily be removed allowing access to the sensors.

    • The reason for these first few steps is to avoid damaging the signal wires for the sensor.

  7. RYDIS H68 Pro Side Brush Motor Replacement: crwdns2935265:07crwdnd2935265:01crwdnd2935265:01crwdne2935265:0
    • This step just shows you how everything looks after the previous steps were completed.

    • There are sensors on both the left and right side. This can be done for either side.

  8. RYDIS H68 Pro Side Brush Motor Replacement: crwdns2935265:08crwdnd2935265:01crwdnd2935265:01crwdne2935265:0
    • Unscrew the five 10mm screws using a Phillips #1 screwdriver.

  9. RYDIS H68 Pro Side Brush Motor Replacement: crwdns2935265:09crwdnd2935265:01crwdnd2935265:01crwdne2935265:0
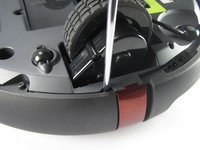
    • The side brush motor can now be removed by lifting it up.

crwdns2915888:0crwdne2915888:0

To reassemble your device, follow these instructions in reverse order.

crwdns2935227:0crwdne2935227:0

jude auguste

crwdns2935283:002/15/17crwdne2935283:0

108 crwdns2915208:0crwdne2915208:0

crwdns2935295:0crwdne2935295:0

crwdns2915084:0crwdne2915084:0

USFT-Lacy-S17S005G2 crwdns2935289:0USFT-Lacy-S17S005G2crwdne2935289:0

Local Repair Groups

crwdns2931471:04crwdne2931471:0

crwdns2935297:010crwdne2935297:0

crwdns2944067:00crwdne2944067:0

crwdns2917038:0crwdne2917038:0

crwdns2936625:0crwdne2936625:0:

crwdns2936751:024crwdne2936751:0 0

crwdns2936753:07crwdne2936753:0 0

crwdns2936753:030crwdne2936753:0 13

crwdns2942667:0crwdne2942667:0 597