crwdns2933423:0crwdne2933423:0

RCA Visys 25212 Handset Disassembly

crwdns2942213:0crwdne2942213:0

  1. RCA Visys 25212 Handset Disassembly, Handset Battery: crwdns2935265:01crwdnd2935265:01crwdnd2935265:01crwdne2935265:0
    • Place your thumb in the groove on the back of handset. Next, push down with your thumb and then slide the battery cover towards the bottom of the phone to remove the battery cover.

  2. RCA Visys 25212 Handset Disassembly: crwdns2935265:02crwdnd2935265:01crwdnd2935265:02crwdne2935265:0 RCA Visys 25212 Handset Disassembly: crwdns2935265:02crwdnd2935265:02crwdnd2935265:02crwdne2935265:0
    • To remove the battery, gently pull up on the white connector located on the left side of the phone.

  3. RCA Visys 25212 Handset Disassembly, Handset: crwdns2935265:03crwdnd2935265:01crwdnd2935265:01crwdne2935265:0
    • Remove the four screws, located at each of the corners within the back encasing, with a small Phillips head screwdriver.

  4. RCA Visys 25212 Handset Disassembly: crwdns2935265:04crwdnd2935265:01crwdnd2935265:02crwdne2935265:0 RCA Visys 25212 Handset Disassembly: crwdns2935265:04crwdnd2935265:02crwdnd2935265:02crwdne2935265:0
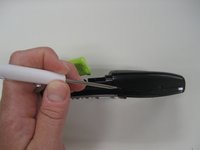
    • Insert a small flathead screwdriver between the face plate and the back of the handset.

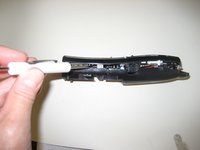
    • Gently pry open the handset. You may need to insert the flathead screwdiver at multiple points in order to open the handset.

  5. RCA Visys 25212 Handset Disassembly: crwdns2935265:05crwdnd2935265:01crwdnd2935265:01crwdne2935265:0
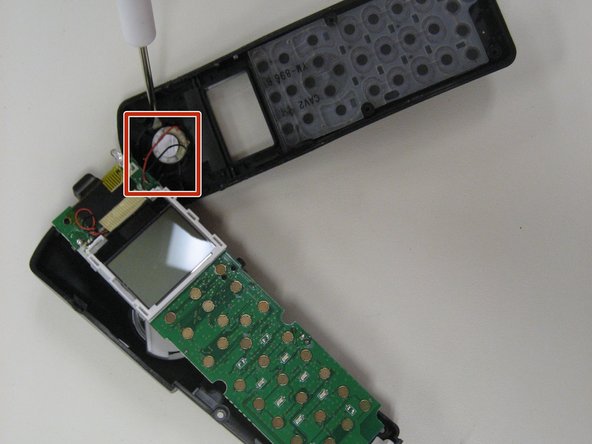
    • Using a small Phillips head screwdriver, remove the single screw (located at the top right) holding the circuit board in place.

  6. RCA Visys 25212 Handset Disassembly: crwdns2935265:06crwdnd2935265:01crwdnd2935265:02crwdne2935265:0 RCA Visys 25212 Handset Disassembly: crwdns2935265:06crwdnd2935265:02crwdnd2935265:02crwdne2935265:0
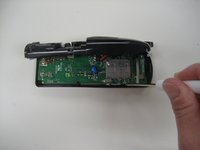
    • Lift up the circuit board to expose the keypad.

    • Be careful not to disconnect the two wires that connect the speaker to the circuit board.

    • Also, notice the two wires located at the bottom when lifting the circuit board, as these are apart of the charger.

crwdns2915888:0crwdne2915888:0

To reassemble your device, follow these instructions in reverse order.

crwdns2935227:0crwdne2935227:0

Sandy South

crwdns2935283:001/26/15crwdne2935283:0

431 crwdns2915208:0crwdne2915208:0

crwdns2935297:04crwdne2935297:0

crwdns2915084:0crwdne2915084:0

Pasco Hernando, Team 5-3, Prince Winter 2015 crwdns2935289:0Pasco Hernando, Team 5-3, Prince Winter 2015crwdne2935289:0

PHSC-PRINCE-W15S5G3

crwdns2931471:06crwdne2931471:0

crwdns2935297:08crwdne2935297:0

crwdns2944067:00crwdne2944067:0

crwdns2917038:0crwdne2917038:0

crwdns2936625:0crwdne2936625:0:

crwdns2936751:024crwdne2936751:0 0

crwdns2936753:07crwdne2936753:0 0

crwdns2936753:030crwdne2936753:0 6

crwdns2942667:0crwdne2942667:0 332