crwdns2915892:0crwdne2915892:0
If you want to customize the parts on your Qanba Crystal then this is the guide for you. This guide will walk you through how to change the buttons, joystick and artwork on this controller.
Both the controller and it’s metal plate on the bottom are heavy and in this guide you will be flipping the controller a couple of times so having a clear workstation would be advised. The use of two boxes (shoeboxes will do fine) to hold up the controller is also advised as it can avoid potential damage to the joystick.
crwdns2942213:0crwdne2942213:0
-
-
Use the Phillips #1 screwdriver to remove the eight 20 mm screws.
-
Remove the metal plate to gain access to the internals of the device.
-
-
crwdns2935267:0crwdne2935267:0Tweezers$4.99
-
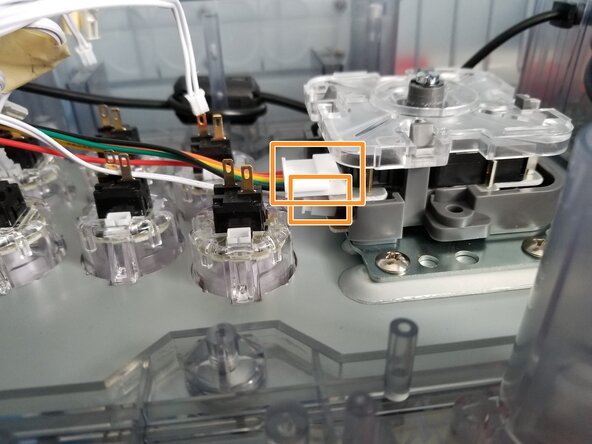
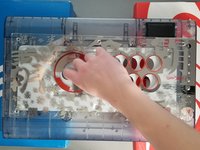
Each button has three cables, unplug these from each one.
-
The joystick has two cables, unplug both of these.
-
-
-
-
Use the Phillips #1 screwdriver to remove the four 10 mm screws.
-
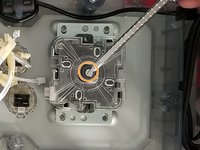
Use a flathead screwdriver to hold the screw in place.
-
Twist off the ball top of the joystick while holding the screw in place with a screwdriver.
-
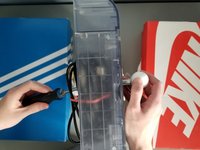
Remove the joystick and all of it's components.
-
-
-
Press in the tabs on the top and bottom of the buttons to remove them.
-
-
-
Flip the controller over.
-
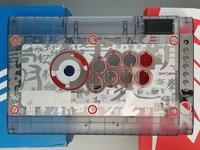
Peel the six shiny stickers and their epoxy glue off of the controller.
-
Remove the six Phillips #1 screws underneath the sticker covers.
-
Remove the acrylic panel.
-


To reassemble your device, follow these instructions in reverse order.
crwdns2935221:0crwdne2935221:0
crwdns2935227:0crwdne2935227:0
crwdns2935287:0crwdne2935287:0

York University, Team S2-G28, Melo-Thaiss Summer 2021 crwdns2935289:0York University, Team S2-G28, Melo-Thaiss Summer 2021crwdne2935289:0
YORK-MELO-THAISS-SU21S2G28
crwdns2934841:01crwdne2934841:0
crwdns2935297:02crwdne2935297:0