crwdns2915892:0crwdne2915892:0
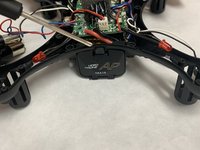
This guide shows how to replace the camera module for the Protocol Videodrone AP Drone. This is a slightly lengthy process as you will have to disassemble most of your drone. The camera module itself is both the sensor housing + the circuit board connected it it. You will only have to replace the circuit board, as the sensor housing is attached to it.
Remember to use the included #0 Phillips screwdriver that came with your drone.
A soldering iron is required, so keep one ready. If you're not experienced with soldering, take a look at this guide for How to Solder and Desolder Connections.
Before you begin, make sure that your drone is turned off and it's unplugged from the charger. You should also remove the battery before you begin.
crwdns2942213:0crwdne2942213:0
-
-
Power off the drone before proceeding with this repair.
-
-
-
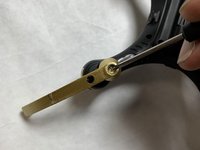
Remove the propeller screws (1 per propeller).
-
-
-
Remove the screws holding on the propeller guards using the Phillips #0 screwdriver (2 per propeller guard).
-
-
-
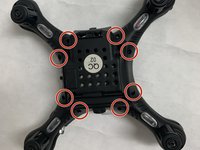
Using the Phillips #0 screwdriver to remove the eight screws securing the body of the drone.
-
-
-
-
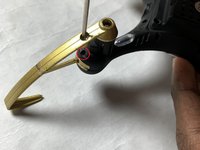
Remove the propeller motor screws (3 per motor).
-
-
-
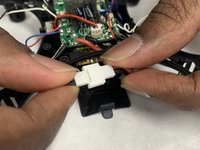
Depress the tab to open the battery housing.
-
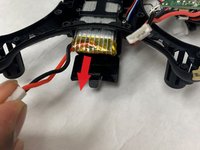
Disconnect the battery connectors
-
Remove the battery.
-
-
-
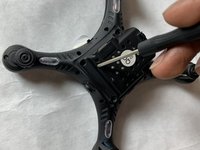
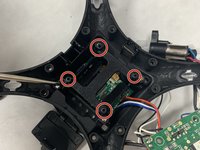
Using the Phillips #0 screwdriver, remove the four circuit board screws.
-
Remove circuit board.
-
-
-
Remove the four battery housing screws with the Phillips #0 screwdriver.
-
Remove the battery housing to reveal the camera circuit board underneath.
-
-
-
Pull upwards on the strip to remove the camera out of its slot.
-
-
-
Remove camera circuit board from housing.
-
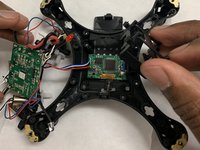
On the main circuit board, desolder the the connection points connecting to camera circuit board.
-
Four wires need to be desoldered. Colours include: Red, white, black and blue.
-


To reassemble your device, follow these instructions in reverse order.

crwdns2935287:0crwdne2935287:0

IUPUI, Team S2-G2, Harley Fall 2019 crwdns2935289:0IUPUI, Team S2-G2, Harley Fall 2019crwdne2935289:0
IUPUI-HARLEY-F19S2G2
crwdns2931471:03crwdne2931471:0
crwdns2935297:02crwdne2935297:0