crwdns2933423:0crwdne2933423:0

ProfiMixx 44 Disassembly

  1. ProfiMixx 44 Disassembly, Removing the scrapers: crwdns2935265:01crwdnd2935265:01crwdnd2935265:03crwdne2935265:0 ProfiMixx 44 Disassembly, Removing the scrapers: crwdns2935265:01crwdnd2935265:02crwdnd2935265:03crwdne2935265:0 ProfiMixx 44 Disassembly, Removing the scrapers: crwdns2935265:01crwdnd2935265:03crwdnd2935265:03crwdne2935265:0
    • Removing the five (TR15) scrapers

  2. ProfiMixx 44 Disassembly, Removing the housing: crwdns2935265:02crwdnd2935265:01crwdnd2935265:02crwdne2935265:0 ProfiMixx 44 Disassembly, Removing the housing: crwdns2935265:02crwdnd2935265:02crwdnd2935265:02crwdne2935265:0
    • Removing the first part of the housing

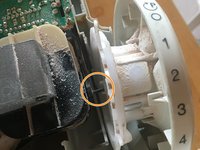
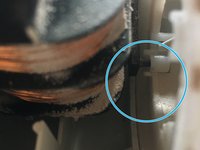
    • Removing the rotary wheel, important pay attention to the black component so that the nose in does not break off (green mark).

    • Removing the second part of the housing

  3. ProfiMixx 44 Disassembly, Assembly of the housing I: crwdns2935265:03crwdnd2935265:01crwdnd2935265:03crwdne2935265:0 ProfiMixx 44 Disassembly, Assembly of the housing I: crwdns2935265:03crwdnd2935265:02crwdnd2935265:03crwdne2935265:0 ProfiMixx 44 Disassembly, Assembly of the housing I: crwdns2935265:03crwdnd2935265:03crwdnd2935265:03crwdne2935265:0
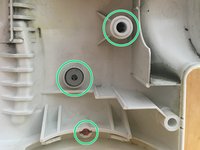
    • Make sure that the green marked elements are in the right place in both housings, the red element is only available once.

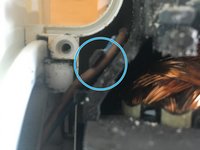
    • Make sure that the two strands run as marked in blue.

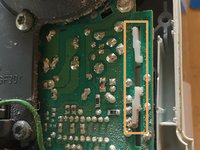
    • The white element must be in the rear position. (marked in orange)

  4. ProfiMixx 44 Disassembly, Assembly of the housing II: crwdns2935265:04crwdnd2935265:01crwdnd2935265:03crwdne2935265:0 ProfiMixx 44 Disassembly, Assembly of the housing II: crwdns2935265:04crwdnd2935265:02crwdnd2935265:03crwdne2935265:0 ProfiMixx 44 Disassembly, Assembly of the housing II: crwdns2935265:04crwdnd2935265:03crwdnd2935265:03crwdne2935265:0
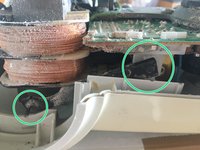
    • Lift the motor-gearbox-unit a little bit upwards so that you can insert the black element with the nose into the hole of the white element. (marked in green)

    • Insert the nose of the black element into the hole of the rotary switch, making sure it is oriented as shown.

    • Gently move the rotary switch so that it fits into the slot in the housing. (marked in blue)

    • Then you can tighten the upper housing part with the five screws (TR15).

crwdns2935217:0crwdne2935217:0

Justus Klingler

crwdns2935283:012/23/20crwdne2935283:0

300 crwdns2915208:0crwdne2915208:0

crwdns2935295:0crwdne2935295:0

crwdns2944067:00crwdne2944067:0

crwdns2917038:0crwdne2917038:0

crwdns2936625:0crwdne2936625:0:

crwdns2936751:024crwdne2936751:0 3

crwdns2936753:07crwdne2936753:0 15

crwdns2936753:030crwdne2936753:0 33

crwdns2942667:0crwdne2942667:0 582