crwdns2933423:0crwdne2933423:0

crwdns2931315:0crwdnd2931315:0crwdne2931315:0

crwdns2942213:0crwdne2942213:0

  1. crwdns2935201:0crwdne2935201:0 crwdns2935203:0crwdne2935203:0

    : crwdns2935265:01crwdnd2935265:01crwdnd2935265:03crwdne2935265:0 : crwdns2935265:01crwdnd2935265:02crwdnd2935265:03crwdne2935265:0 : crwdns2935265:01crwdnd2935265:03crwdnd2935265:03crwdne2935265:0
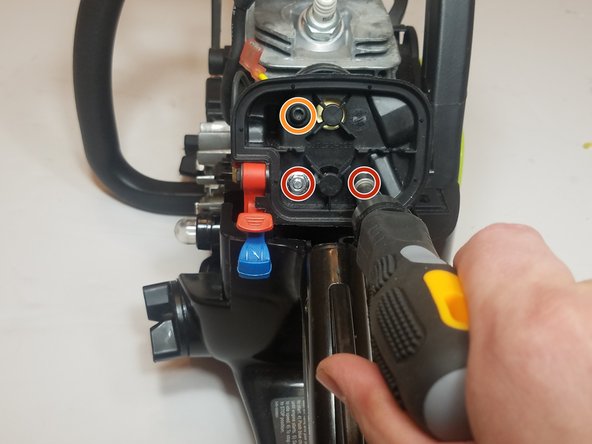
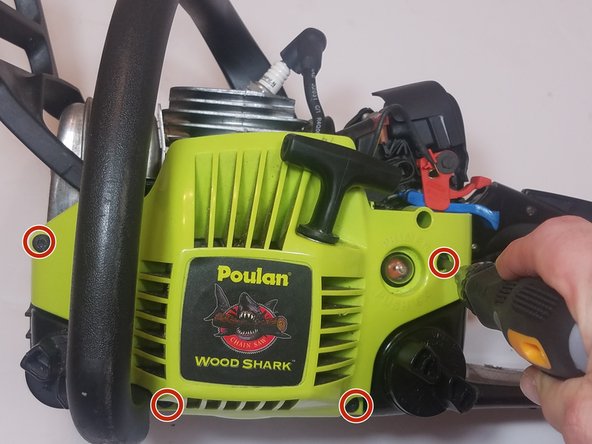
    • Unscrew the three T25 screws on the top cover.

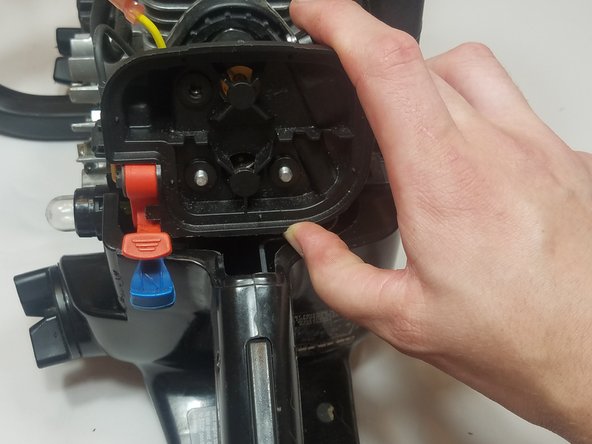
    • Remove the top cover and set aside.

  2. crwdns2935201:0crwdne2935201:0 crwdns2935203:0crwdne2935203:0

    : crwdns2935265:02crwdnd2935265:01crwdnd2935265:02crwdne2935265:0 : crwdns2935265:02crwdnd2935265:02crwdnd2935265:02crwdne2935265:0
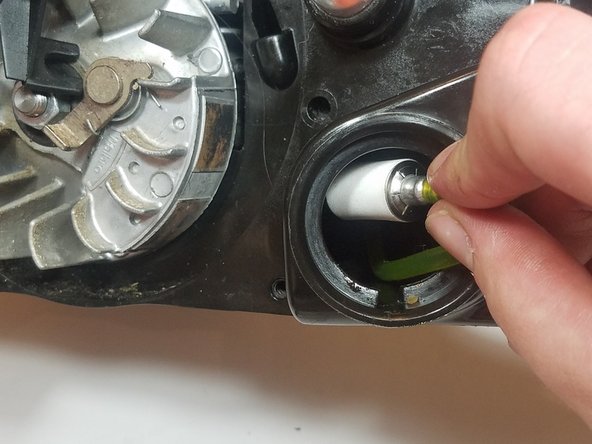
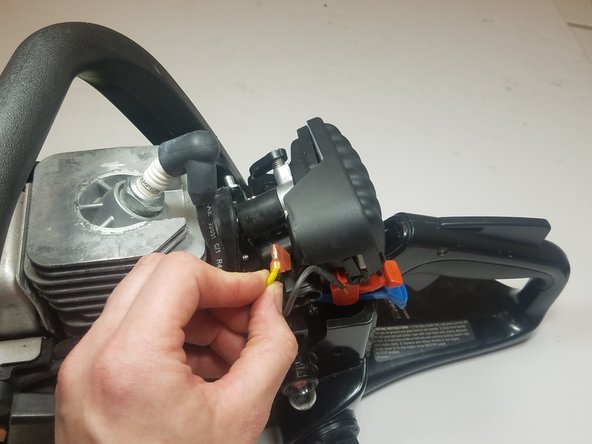
    • With the top cover off, disconnect the spark plug.

  3. crwdns2935201:0crwdne2935201:0 crwdns2935203:0crwdne2935203:0

    : crwdns2935265:03crwdnd2935265:01crwdnd2935265:03crwdne2935265:0 : crwdns2935265:03crwdnd2935265:02crwdnd2935265:03crwdne2935265:0 : crwdns2935265:03crwdnd2935265:03crwdnd2935265:03crwdne2935265:0
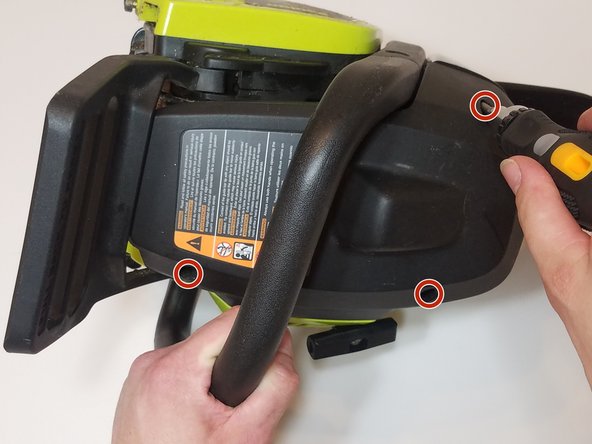
    • Remove the four T25 screws securing the starter assembly to the (side) of the chainsaw.

    • Remove the starter assembly and set aside.

  4. crwdns2935201:0crwdne2935201:0 crwdns2935203:0crwdne2935203:0

    : crwdns2935265:04crwdnd2935265:01crwdnd2935265:03crwdne2935265:0 : crwdns2935265:04crwdnd2935265:02crwdnd2935265:03crwdne2935265:0 : crwdns2935265:04crwdnd2935265:03crwdnd2935265:03crwdne2935265:0
    • Remove the air filter cover and set aside.

    • Remove the air filter from the housing and set aside.

  5. crwdns2935201:0crwdne2935201:0 crwdns2935203:0crwdne2935203:0

    : crwdns2935265:05crwdnd2935265:01crwdnd2935265:02crwdne2935265:0 : crwdns2935265:05crwdnd2935265:02crwdnd2935265:02crwdne2935265:0
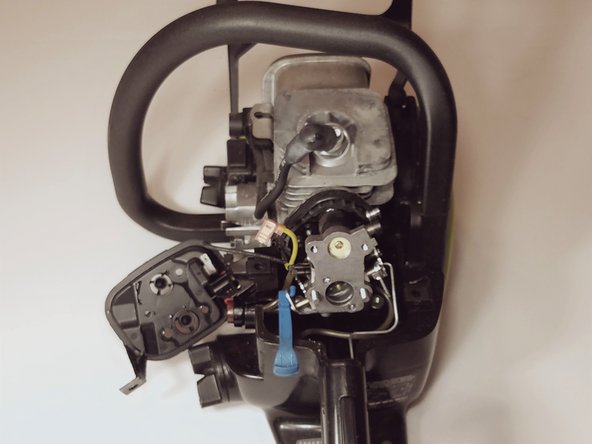
    • Unscrew the single T25 screw securing the air filter housing to the carburetor.

    • Remove the two 5/16"nuts securing the air filter housing to the carburetor.

  6. crwdns2935201:0crwdne2935201:0 crwdns2935203:0crwdne2935203:0

    : crwdns2935265:06crwdnd2935265:01crwdnd2935265:01crwdne2935265:0
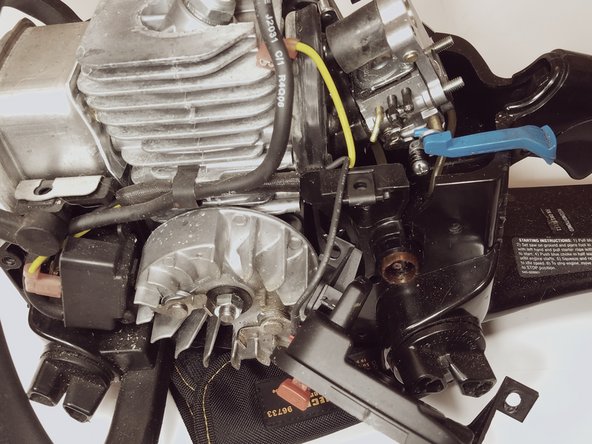
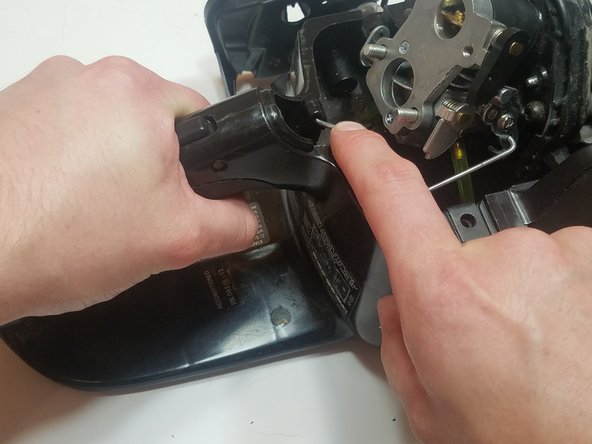
    • Use a spudger or flat head screwdriver to disconnect the kill switch wire.

  7. crwdns2935201:0crwdne2935201:0 crwdns2935203:0crwdne2935203:0

    : crwdns2935265:07crwdnd2935265:01crwdnd2935265:02crwdne2935265:0 : crwdns2935265:07crwdnd2935265:02crwdnd2935265:02crwdne2935265:0
    • Remove the air filter housing from the carburetor.

    • Let the air filter housing rest on the side of the chainsaw.

  8. crwdns2935201:0crwdne2935201:0 crwdns2935203:0crwdne2935203:0

    : crwdns2935265:08crwdnd2935265:01crwdnd2935265:02crwdne2935265:0 : crwdns2935265:08crwdnd2935265:02crwdnd2935265:02crwdne2935265:0
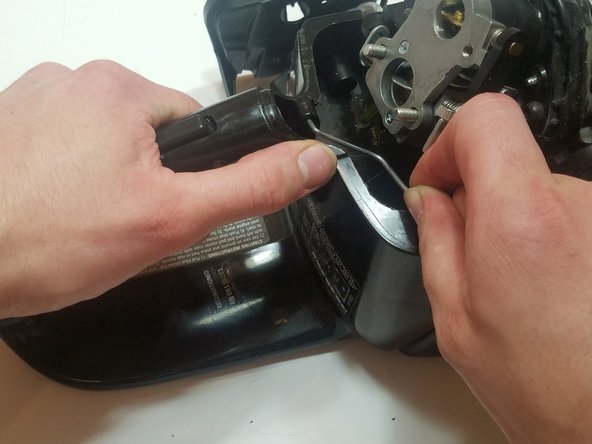
    • Using a flat head screw driver or opening tool to disconnect the (primer-side) fuel line from the carburetor.

  9. crwdns2935201:0crwdne2935201:0 crwdns2935203:0crwdne2935203:0

    : crwdns2935265:09crwdnd2935265:01crwdnd2935265:02crwdne2935265:0 : crwdns2935265:09crwdnd2935265:02crwdnd2935265:02crwdne2935265:0
    • Remove the choke lever from the carburetor and set aside.

  10. crwdns2935201:0crwdne2935201:0 crwdns2935203:0crwdne2935203:0

    : crwdns2935265:010crwdnd2935265:01crwdnd2935265:03crwdne2935265:0 : crwdns2935265:010crwdnd2935265:02crwdnd2935265:03crwdne2935265:0 : crwdns2935265:010crwdnd2935265:03crwdnd2935265:03crwdne2935265:0
    • Pull and hold the throttle trigger to expose the throttle linkage attachment point (on the trigger).

    • Disconnect the linkage from the throttle trigger.

    • Disconnect and remove the throttle linkage from the carburetor.

    • Set the throttle linkage aside.

  11. crwdns2935201:0crwdne2935201:0 crwdns2935203:0crwdne2935203:0

    : crwdns2935265:011crwdnd2935265:01crwdnd2935265:01crwdne2935265:0
    • Slide the carburetor assembly off the mounting bolts and away from the engine.

    • The fuel return line may still be attached to the carburetor. In my case the fuel line was disintegrated. If it is still attached remove with a flat head screw driver or spudger.

  12. crwdns2935201:0crwdne2935201:0 crwdns2935203:0crwdne2935203:0

    : crwdns2935265:012crwdnd2935265:01crwdnd2935265:03crwdne2935265:0 : crwdns2935265:012crwdnd2935265:02crwdnd2935265:03crwdne2935265:0 : crwdns2935265:012crwdnd2935265:03crwdnd2935265:03crwdne2935265:0
    • Using a flat head screwdriver or spudger to press the tabs on the inside of the primer bulb assembly. (This will release the primer bulb from the housing).

    • Pull the damaged primer bulb out of the engine housing.

    • Use long needle nosed pliers to disconnect the two fuel lines from the primer bulb.

  13. crwdns2935201:0crwdne2935201:0 crwdns2935203:0crwdne2935203:0

    : crwdns2935265:013crwdnd2935265:01crwdnd2935265:03crwdne2935265:0 : crwdns2935265:013crwdnd2935265:02crwdnd2935265:03crwdne2935265:0 : crwdns2935265:013crwdnd2935265:03crwdnd2935265:03crwdne2935265:0
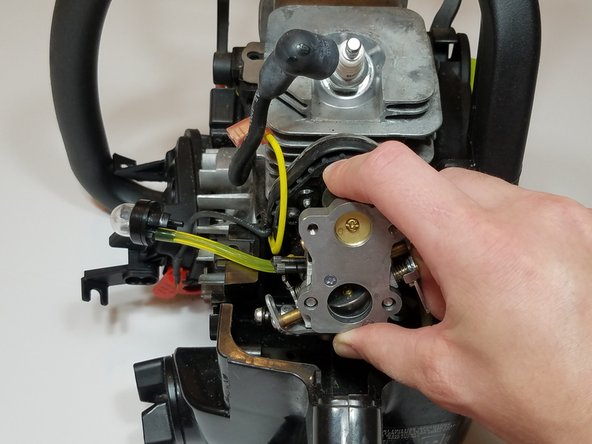
    • If the primer suction line was damaged, slide the carburetor back onto the mounting bolts.

    • Attach one end of the new fuel line to the incoming fuel port on the carburetor.

    • Move the fuel line through the primer bulb housing and hold the primer bulb up to the fuel line.

    • Mark desired length and cut to size.

    • If the old primer suction line was intact, you can measure and cut a new piece of fuel line to the same length and attach it to the intake port on the primer bulb and intake port on the carburetor.

  14. crwdns2935201:0crwdne2935201:0 crwdns2935203:0crwdne2935203:0

    : crwdns2935265:014crwdnd2935265:01crwdnd2935265:03crwdne2935265:0 : crwdns2935265:014crwdnd2935265:02crwdnd2935265:03crwdne2935265:0 : crwdns2935265:014crwdnd2935265:03crwdnd2935265:03crwdne2935265:0
    • Attach the cut end of the primer fuel line to the intake port of the primer bulb (shorter nipple).

    • Slide the carburetor back off of the mounting bolts.

    • Cut and remove the remaining old fuel lines by pulling them through the housing.

  15. crwdns2935201:0crwdne2935201:0 crwdns2935203:0crwdne2935203:0

    : crwdns2935265:015crwdnd2935265:01crwdnd2935265:02crwdne2935265:0 : crwdns2935265:015crwdnd2935265:02crwdnd2935265:02crwdne2935265:0
    • Unscrew and remove the gas cap.

    • Pull out and remove old fuel lines and fuel filter.

  16. crwdns2935201:0crwdne2935201:0 crwdns2935203:0crwdne2935203:0

    : crwdns2935265:016crwdnd2935265:01crwdnd2935265:02crwdne2935265:0 : crwdns2935265:016crwdnd2935265:02crwdnd2935265:02crwdne2935265:0
    • This is an example of how the fuel lines will attach to the carburetor and primer bulb.

  17. crwdns2935201:0crwdne2935201:0 crwdns2935203:0crwdne2935203:0

    : crwdns2935265:017crwdnd2935265:01crwdnd2935265:03crwdne2935265:0 : crwdns2935265:017crwdnd2935265:02crwdnd2935265:03crwdne2935265:0 : crwdns2935265:017crwdnd2935265:03crwdnd2935265:03crwdne2935265:0
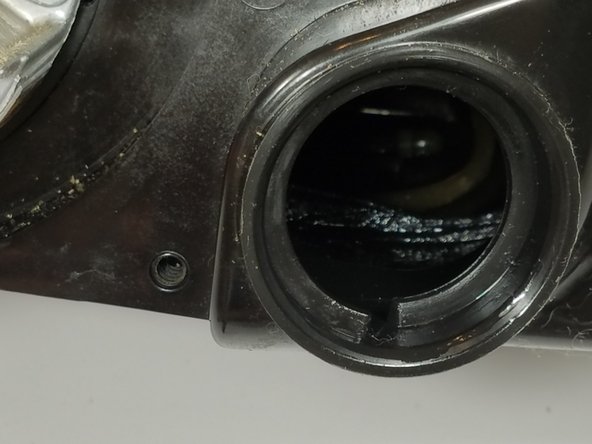
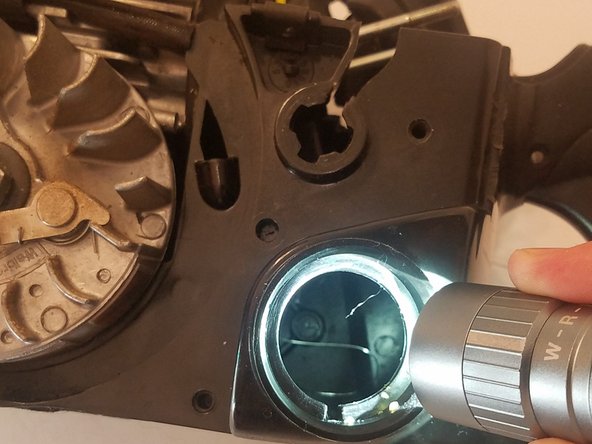
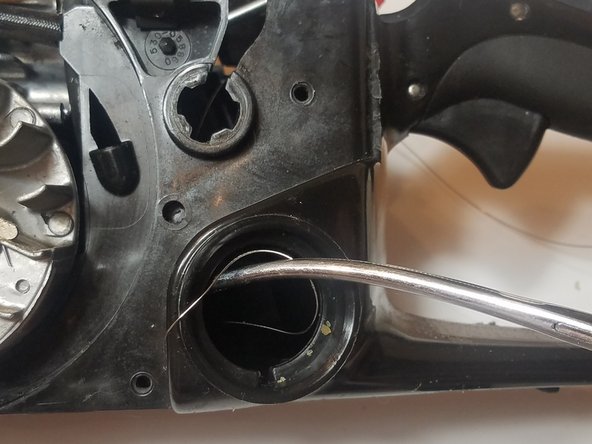
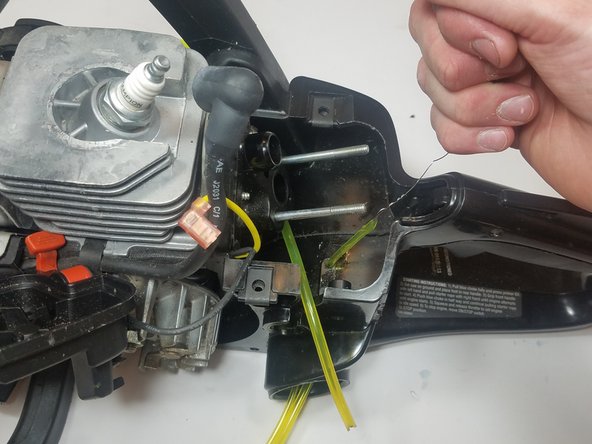
    • Push a piece of scrap wire through the larger hole (fuel filter line).

    • Use a pair of long needle nose pliers or hemostats to grab the other end through the gas tank.

  18. crwdns2935201:0crwdne2935201:0 crwdns2935203:0crwdne2935203:0

    : crwdns2935265:018crwdnd2935265:01crwdnd2935265:03crwdne2935265:0 : crwdns2935265:018crwdnd2935265:02crwdnd2935265:03crwdne2935265:0 : crwdns2935265:018crwdnd2935265:03crwdnd2935265:03crwdne2935265:0
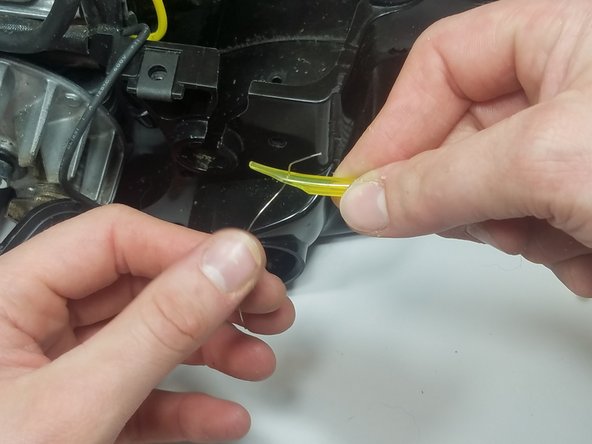
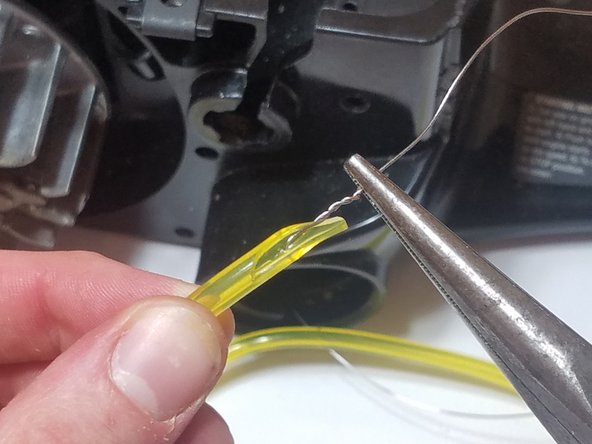
    • Cut a piece of the thicker diameter fuel line at a sharp angle.

    • Pierce the wire through the fuel line and twist the wire with pliers.

  19. crwdns2935201:0crwdne2935201:0 crwdns2935203:0crwdne2935203:0

    : crwdns2935265:019crwdnd2935265:01crwdnd2935265:02crwdne2935265:0 : crwdns2935265:019crwdnd2935265:02crwdnd2935265:02crwdne2935265:0
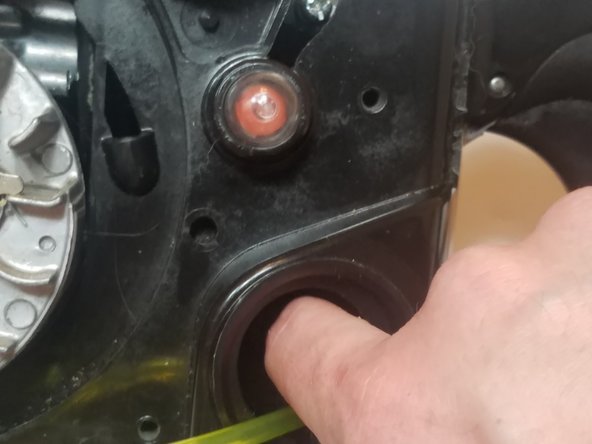
    • Feed the fuel line through the gas tank while pulling the wire.

    • Use pliers to continue to pull the fuel line through the housing.

  20. crwdns2935201:0crwdne2935201:0 crwdns2935203:0crwdne2935203:0

    : crwdns2935265:020crwdnd2935265:01crwdnd2935265:03crwdne2935265:0 : crwdns2935265:020crwdnd2935265:02crwdnd2935265:03crwdne2935265:0 : crwdns2935265:020crwdnd2935265:03crwdnd2935265:03crwdne2935265:0
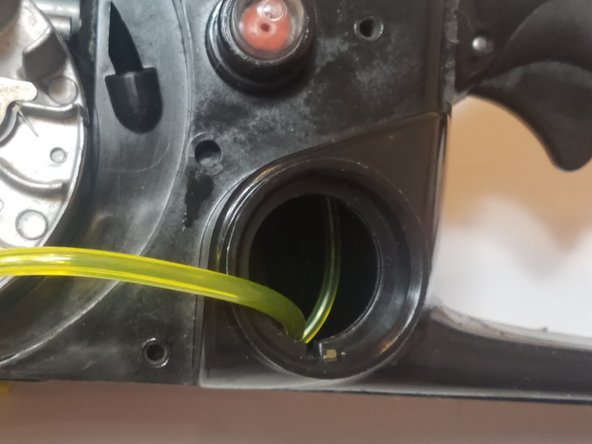
    • Feed the wire through the small hole (fuel return).

    • Attach the wire to the cut end of the thinner diameter fuel line as in the previous step.

    • Feed the fuel line through the gas tank while pulling the wire as in the previous step.

    • Pull both fuel lines up through the housing.

  21. crwdns2935201:0crwdne2935201:0 crwdns2935203:0crwdne2935203:0

    : crwdns2935265:021crwdnd2935265:01crwdnd2935265:01crwdne2935265:0
    • Using 2-cycle oil as lubricant on the fuel lines will make it easier to pull them through the housing.

  22. crwdns2935201:0crwdne2935201:0 crwdns2935203:0crwdne2935203:0

    : crwdns2935265:022crwdnd2935265:01crwdnd2935265:02crwdne2935265:0 : crwdns2935265:022crwdnd2935265:02crwdnd2935265:02crwdne2935265:0
    • Cut both of the fuel lines flush (removing the angle that was previously cut).

  23. crwdns2935201:0crwdne2935201:0 crwdns2935203:0crwdne2935203:0

    : crwdns2935265:023crwdnd2935265:01crwdnd2935265:03crwdne2935265:0 : crwdns2935265:023crwdnd2935265:02crwdnd2935265:03crwdne2935265:0 : crwdns2935265:023crwdnd2935265:03crwdnd2935265:03crwdne2935265:0
    • Attach the larger diameter fuel line (fuel filter line) to the intake inlet on the carburetor.

    • Attach the smaller diameter fuel line (fuel return line) to the return port on the primer bulb (longer nipple).

    • Slide the carburetor back onto the mounting bolts while pulling out the slack out of the fuel lines from the gas tank.

  24. crwdns2935201:0crwdne2935201:0 crwdns2935203:0crwdne2935203:0

    : crwdns2935265:024crwdnd2935265:01crwdnd2935265:03crwdne2935265:0 : crwdns2935265:024crwdnd2935265:02crwdnd2935265:03crwdne2935265:0 : crwdns2935265:024crwdnd2935265:03crwdnd2935265:03crwdne2935265:0
    • Push the primer bulb back into the housing.

    • Cut the smaller diameter fuel line (fuel return line) and push it into the gas tank.

    • The fuel return line should be at the bottom of the tank.

  25. crwdns2935201:0crwdne2935201:0 crwdns2935203:0crwdne2935203:0

    : crwdns2935265:025crwdnd2935265:01crwdnd2935265:03crwdne2935265:0 : crwdns2935265:025crwdnd2935265:02crwdnd2935265:03crwdne2935265:0 : crwdns2935265:025crwdnd2935265:03crwdnd2935265:03crwdne2935265:0
    • Cut the fuel filter line and attach the new fuel filter.

    • Push the fuel filter line into the gas tank.

    • The fuel filter should rest at the bottom of the gas tank.

  26. crwdns2935201:0crwdne2935201:0 crwdns2935203:0crwdne2935203:0

    : crwdns2935265:026crwdnd2935265:01crwdnd2935265:03crwdne2935265:0 : crwdns2935265:026crwdnd2935265:02crwdnd2935265:03crwdne2935265:0 : crwdns2935265:026crwdnd2935265:03crwdnd2935265:03crwdne2935265:0
    • Reconnect the throttle linkage to the carburetor linkage.

    • Pull and hold the throttle trigger to expose the attachment point for the trigger-portion of the throttle linkage.

    • Connect the throttle linkage to the throttle trigger.

  27. crwdns2935201:0crwdne2935201:0 crwdns2935203:0crwdne2935203:0

    : crwdns2935265:027crwdnd2935265:01crwdnd2935265:03crwdne2935265:0 : crwdns2935265:027crwdnd2935265:02crwdnd2935265:03crwdne2935265:0 : crwdns2935265:027crwdnd2935265:03crwdnd2935265:03crwdne2935265:0
    • Reconnect the choke lever.

    • Slide the air filter housing back onto the carburetor mounting bolts.

    • Secure the air filter housing with the two 5/16" nuts.

    • Secure air filter housing with one T25 screw.

  28. crwdns2935201:0crwdne2935201:0 crwdns2935203:0crwdne2935203:0

    : crwdns2935265:028crwdnd2935265:01crwdnd2935265:03crwdne2935265:0 : crwdns2935265:028crwdnd2935265:02crwdnd2935265:03crwdne2935265:0 : crwdns2935265:028crwdnd2935265:03crwdnd2935265:03crwdne2935265:0
    • Install the new air filter onto the air filter housing.

    • Install the air filter cover.

    • Connect the kills switch wire.

  29. crwdns2935201:0crwdne2935201:0 crwdns2935203:0crwdne2935203:0

    : crwdns2935265:029crwdnd2935265:01crwdnd2935265:02crwdne2935265:0 : crwdns2935265:029crwdnd2935265:02crwdnd2935265:02crwdne2935265:0
    • Install the starter assembly onto the engine.

    • Secure the starter assembly with four T25 screws.

    • Pull the starter rope slowly until the flywheel engages the starter assembly.

  30. crwdns2935201:0crwdne2935201:0 crwdns2935203:0crwdne2935203:0

    : crwdns2935265:030crwdnd2935265:01crwdnd2935265:02crwdne2935265:0 : crwdns2935265:030crwdnd2935265:02crwdnd2935265:02crwdne2935265:0
    • Reconnect the spark plug.

    • Install the top cover and secure with three T25 screws.

crwdns2935217:0crwdne2935217:0

crwdns2935229:038crwdne2935229:0

Chad Monteleone

crwdns2935283:009/18/17crwdne2935283:0

1,148 crwdns2915208:0crwdne2915208:0

crwdns2935295:0crwdne2935295:0

crwdns2915084:0crwdne2915084:0

Pasco Hernando, Team S4-G44, Prince Fall 2017 crwdns2935289:0Pasco Hernando, Team S4-G44, Prince Fall 2017crwdne2935289:0

PHSC-PRINCE-F17S4G44

crwdns2934841:01crwdne2934841:0

crwdns2935297:04crwdne2935297:0

crwdns2944067:020crwdne2944067:0

Any idea where I downloaded shop manuals for small engin repairs looking for stihl 039 manual

Daniel - crwdns2934203:0crwdne2934203:0

Yes I would try manuals.lib at the Google play store.

Randy Clawson -

Excellent instructions

Thank You

Ron Bishop - crwdns2934203:0crwdne2934203:0

How do you choose the best choose the best product among the ones listed here? <a href="https://onlychainsaw.com/best-scroll-saw... ">https://onlychainsaw.com/best-scroll-saw... </a>

ross jonnes - crwdns2934203:0crwdne2934203:0

crwdns2917038:0crwdne2917038:0

crwdns2936625:0crwdne2936625:0:

crwdns2936751:024crwdne2936751:0 27

crwdns2936753:07crwdne2936753:0 205

crwdns2936753:030crwdne2936753:0 967

crwdns2942667:0crwdne2942667:0 84,555