crwdns2915892:0crwdne2915892:0
If the screen fails to display properly, consider using this guide to replace it.
crwdns2942213:0crwdne2942213:0
-
-
Flip the device so that the screen faces down, with the back facing up.
-
Unscrew the four screws with a PH000 screwdriver.
-
-
-
Flip the device over so that the screen faces up, and the back faces down.
-
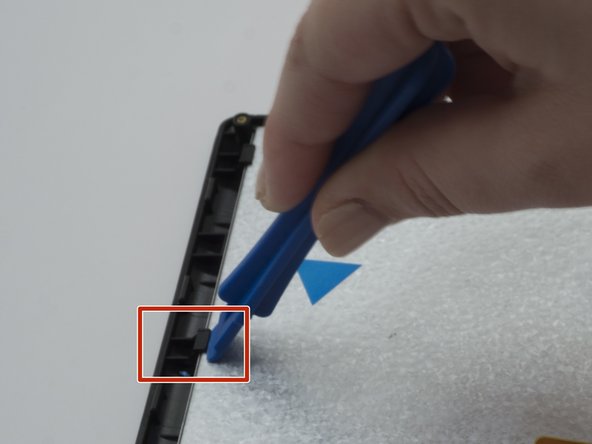
Separate the front panel using the Opening Tool on a corner to create an opening.
-
Run the tool along the seams of the device to open up all the sides.
-
-
-
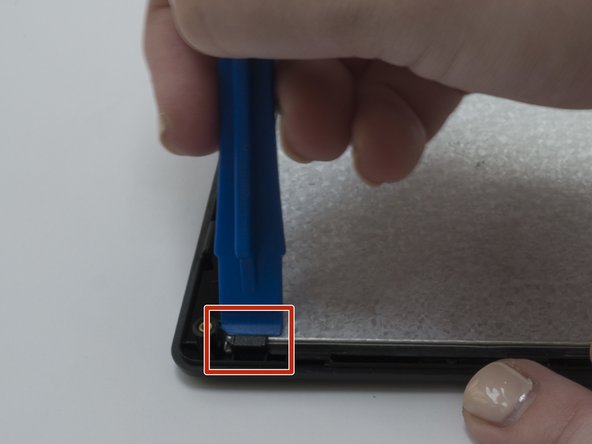
Gently lift the top panel from the bottom panel.
-
-
-
-
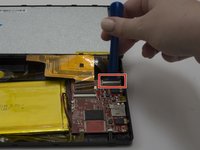
Use the Opening tool to flip up the black retaining flap on the smaller connector.
-
Gently lift the cable, parallel to the panel, to detach it.
-
-
-
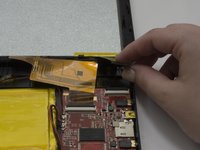
Use the Opening tool to flip up the black retaining flap on the larger connector.
-
Gently lift the cable, parallel to the panel, to detach it.
-
-
-
Set the top panel down so that the interior faces up, and the exterior of the screen faces down.
-
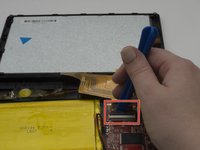
Using the Opening Tool, gently lift up each of the snaps to release the screen from the panel.
-
-
-
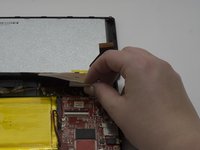
Remove the screen from the frame by lifting it from the side.
-


To reassemble your device, follow these instructions in reverse order.
To reassemble your device, follow these instructions in reverse order.
crwdns2935221:0crwdne2935221:0
crwdns2935227:0crwdne2935227:0
crwdns2915084:0crwdne2915084:0

Baylor, Team 3-4, Whitney Spring 2017 crwdns2935289:0Baylor, Team 3-4, Whitney Spring 2017crwdne2935289:0
BU-WHITNEY-S17S3G4
crwdns2931471:03crwdne2931471:0
crwdns2935297:010crwdne2935297:0
crwdns2947410:01crwdne2947410:0
In terms of removing the screen, we found the plastic opening tool didn't help to lift the snaps to release the screen from the panel. It worked better when we used our hands to snap it out.