crwdns2915892:0crwdne2915892:0
This guide will walk you through the video quality switch on your Polaroid Cube. Make sure the device is completely powered off before disassembly, and that you have all of the required tools.
crwdns2942213:0crwdne2942213:0
-
-
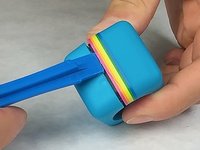
Remove the SD card cover by twisting it using a Plastic Opening Tool
-
-
-
Use the Plastic Opening tool to pry off and remove the front cover.
-
-
-
Using a J00 head screwdriver, remove the four 3.27mm screws from the front of the camera near the lens.
-
-
-
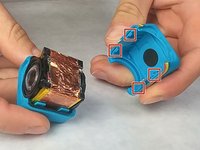
Use the Plastic Opening Tool to pry open the shell of the camera.
-
There are four latches, one at each corner, that you will need to detach.
-
-
-
Remove shell from top and bottom of camera.
-
-
-
-
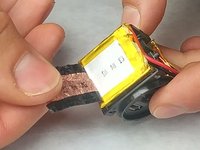
Remove the rubber seal wrapped around the camera.
-
-
-
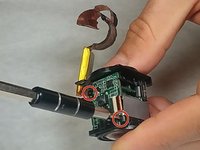
Remove the tape wrapped around the battery.
-
-
-
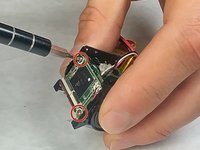
Using a J00 head screwdriver, unscrew the four 3.46mm screws from the top and bottom circuit board.
-
-
-
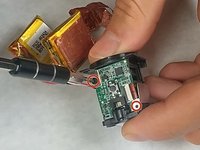
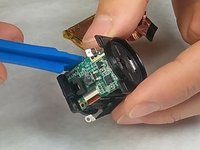
Use the plastic opening tool to remove the circuit board that the battery is connected to.
-
-
-
Gently remove the battery pin connector from the circuit board.
-
-
-
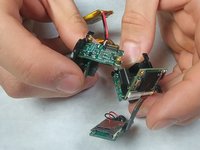
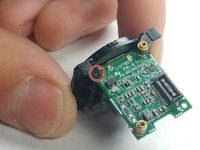
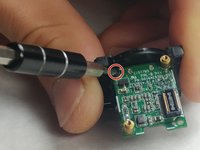
Using a J00 head screwdriver, unscrew the 3.46mm screw that connects the top circuit board to the video quality switch board.
-
-
-
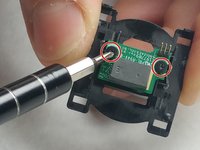
Using a J00 head screwdriver, unscrew the two 3.46mm screws connecting the video quality switch to the case.
-
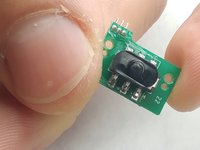
Remove and replace the broken video quality switch.
-


To reassemble your device, follow these instructions in reverse order.
To reassemble your device, follow these instructions in reverse order.
crwdns2935221:0crwdne2935221:0
crwdns2935229:04crwdne2935229:0
crwdns2915084:0crwdne2915084:0

IUPUI, Team 3-2, Harley Fall 2016 crwdns2935289:0IUPUI, Team 3-2, Harley Fall 2016crwdne2935289:0
IUPUI-HARLEY-F16S3G2
crwdns2931471:04crwdne2931471:0
crwdns2935297:03crwdne2935297:0