crwdns2933423:0crwdne2933423:0
crwdns2947577:0crwdnd2947577:0crwdne2947577:0

Polaroid A10 Front/Back Camera Replacement

crwdns2942213:0crwdne2942213:0

    1. Polaroid A10 Front/Back Camera Replacement, Back Cover: crwdns2935265:01crwdnd2935265:01crwdnd2935265:03crwdne2935265:0 Polaroid A10 Front/Back Camera Replacement, Back Cover: crwdns2935265:01crwdnd2935265:02crwdnd2935265:03crwdne2935265:0 Polaroid A10 Front/Back Camera Replacement, Back Cover: crwdns2935265:01crwdnd2935265:03crwdnd2935265:03crwdne2935265:0
      • Begin by having the side with volume and power button face up towards you.

      • Insert a plastic opening tool between the display and the back cover.

      • Once you have one plastic opening tool in, you can insert another one. While holding one in place, slide the other along the gap to release the tabs.

      • It is easier to remove the back cover, if the display screen is faced down.

      • The tabs must be released from all four sides before removing the back cover.

      crwdns2952109:0crwdne2952109:0

      crwdns2917038:0crwdne2917038:0

    1. Polaroid A10 Front/Back Camera Replacement, Battery: crwdns2935265:02crwdnd2935265:01crwdnd2935265:03crwdne2935265:0 Polaroid A10 Front/Back Camera Replacement, Battery: crwdns2935265:02crwdnd2935265:02crwdnd2935265:03crwdne2935265:0 Polaroid A10 Front/Back Camera Replacement, Battery: crwdns2935265:02crwdnd2935265:03crwdnd2935265:03crwdne2935265:0
      crwdns2935267:0crwdne2935267:0
      Plastic Cards
      $2.99
      • Begin by inserting the flat end of a spudger underneath the battery to separate the glue from the battery.

      • It is better to use a plastic card if you have one.

      • Gently lift up the battery as you continue to separate the glue from the battery.

      • Lift up just enough to see where the glue is, so that you don't bend the battery.

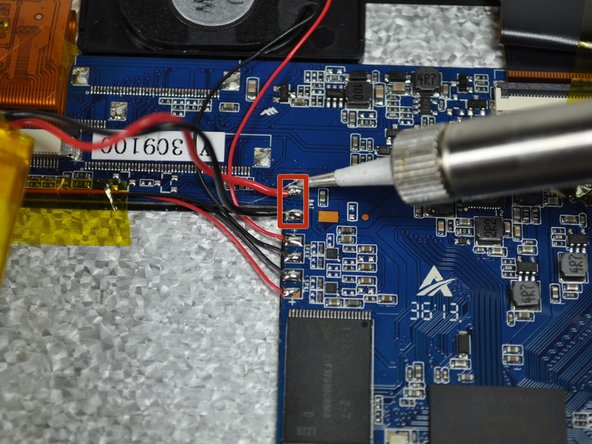
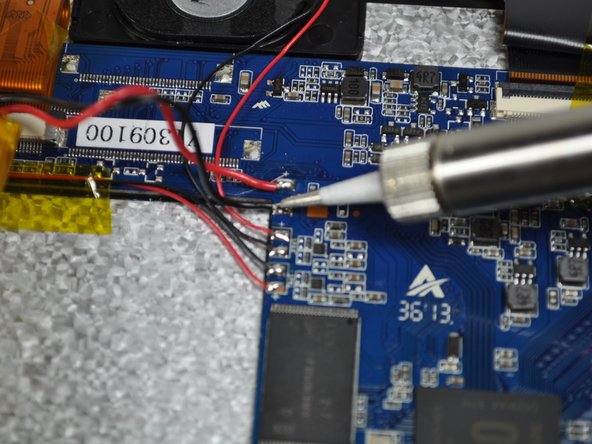
      • Once the glue has been separated, gently lift up the battery and you will notice two wires attached to the motherboard.

      crwdns2952109:0crwdne2952109:0

      crwdns2917038:0crwdne2917038:0

    2. Polaroid A10 Front/Back Camera Replacement: crwdns2935265:03crwdnd2935265:01crwdnd2935265:03crwdne2935265:0 Polaroid A10 Front/Back Camera Replacement: crwdns2935265:03crwdnd2935265:02crwdnd2935265:03crwdne2935265:0 Polaroid A10 Front/Back Camera Replacement: crwdns2935265:03crwdnd2935265:03crwdnd2935265:03crwdne2935265:0
      crwdns2952109:0crwdne2952109:0

      crwdns2917038:0crwdne2917038:0

    3. Polaroid A10 Front/Back Camera Replacement: crwdns2935265:04crwdnd2935265:01crwdnd2935265:01crwdne2935265:0
      • Gently lift the battery up and out of the device.

      crwdns2952109:0crwdne2952109:0

      crwdns2917038:0crwdne2917038:0

    1. Polaroid A10 Front/Back Camera Replacement, Front/Back Camera: crwdns2935265:05crwdnd2935265:01crwdnd2935265:01crwdne2935265:0
      • The camera head is located on the upper middle section of the device, close to the battery.

      crwdns2952109:0crwdne2952109:0

      crwdns2917038:0crwdne2917038:0

    2. Polaroid A10 Front/Back Camera Replacement: crwdns2935265:06crwdnd2935265:01crwdnd2935265:02crwdne2935265:0 Polaroid A10 Front/Back Camera Replacement: crwdns2935265:06crwdnd2935265:02crwdnd2935265:02crwdne2935265:0
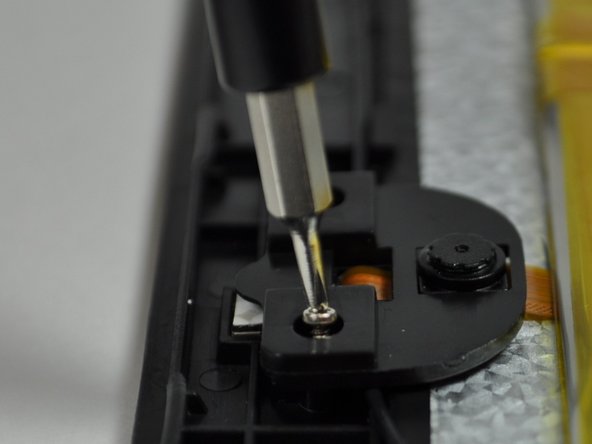
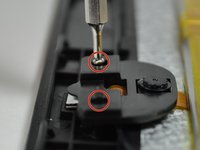
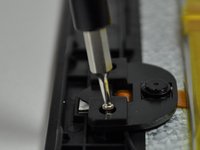
      • Start by locating the two left and right screws which hold the camera head in place.

      • Using the Phillip's 000 screwdriver, remove the two 7 mm screws located in the picture by rotating the screw counter-clockwise.

      crwdns2952109:0crwdne2952109:0

      crwdns2917038:0crwdne2917038:0

    3. Polaroid A10 Front/Back Camera Replacement: crwdns2935265:07crwdnd2935265:01crwdnd2935265:03crwdne2935265:0 Polaroid A10 Front/Back Camera Replacement: crwdns2935265:07crwdnd2935265:02crwdnd2935265:03crwdne2935265:0 Polaroid A10 Front/Back Camera Replacement: crwdns2935265:07crwdnd2935265:03crwdnd2935265:03crwdne2935265:0
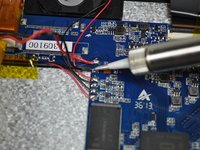
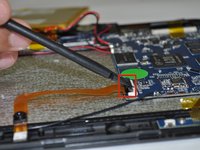
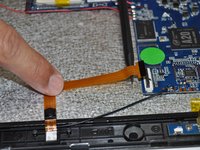
      • Locate the camera ribbon cable that is connected to the motherboard.

      • With a spudger, remove the camera ribbon cable base from the motherboard connector.

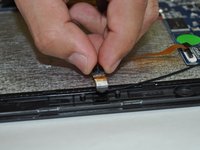
      • With one finger, delicately remove the camera ribbon cable by sliding down.

      crwdns2952109:0crwdne2952109:0

      crwdns2917038:0crwdne2917038:0

crwdns2915888:0crwdne2915888:0

To reassemble your device, follow these instructions in reverse order.

crwdns2935221:0crwdne2935221:0

Shilpa Verma

crwdns2935283:001/22/15crwdne2935283:0

353 crwdns2915208:0crwdne2915208:0

crwdns2935297:03crwdne2935297:0

crwdns2935287:0crwdne2935287:0

UW Tacoma, Team 3-3, Rose Winter 2015 crwdns2935289:0UW Tacoma, Team 3-3, Rose Winter 2015crwdne2935289:0

UWT-ROSE-W15S3G3

crwdns2931471:04crwdne2931471:0

crwdns2935297:072crwdne2935297:0

crwdns2947412:00crwdne2947412:0

crwdns2917038:0crwdne2917038:0

crwdns2936625:0crwdne2936625:0:

crwdns2936751:024crwdne2936751:0 4

crwdns2936753:07crwdne2936753:0 21

crwdns2936753:030crwdne2936753:0 89

crwdns2942667:0crwdne2942667:0 668