crwdns2933423:0crwdne2933423:0

Pneumatic Door Closer Replacement

crwdns2942213:0crwdne2942213:0

  1. Pneumatic Door Closer Replacement, Pneumatic Door Closer: crwdns2935265:01crwdnd2935265:01crwdnd2935265:02crwdne2935265:0 Pneumatic Door Closer Replacement, Pneumatic Door Closer: crwdns2935265:01crwdnd2935265:02crwdnd2935265:02crwdne2935265:0
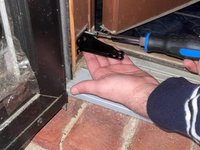
    • Identify the broken part of the door.

  2. Pneumatic Door Closer Replacement: crwdns2935265:02crwdnd2935265:01crwdnd2935265:02crwdne2935265:0 Pneumatic Door Closer Replacement: crwdns2935265:02crwdnd2935265:02crwdnd2935265:02crwdne2935265:0
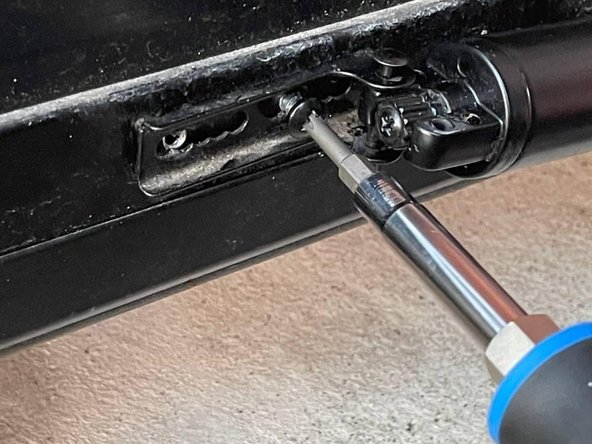
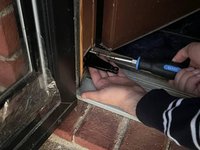
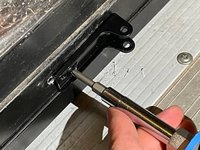
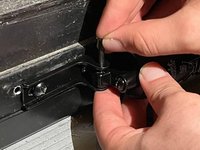
    • Remove the screws from the inner brackets that connect to the door closer using a screwdriver.

  3. Pneumatic Door Closer Replacement: crwdns2935265:03crwdnd2935265:01crwdnd2935265:03crwdne2935265:0 Pneumatic Door Closer Replacement: crwdns2935265:03crwdnd2935265:02crwdnd2935265:03crwdne2935265:0 Pneumatic Door Closer Replacement: crwdns2935265:03crwdnd2935265:03crwdnd2935265:03crwdne2935265:0
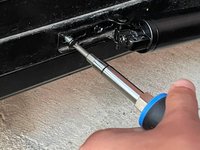
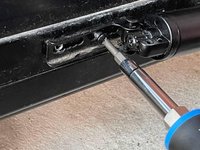
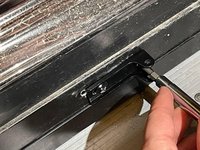
    • Remove the screws from the outer bracket that connect to the door closer using a screwdriver.

  4. Pneumatic Door Closer Replacement: crwdns2935265:04crwdnd2935265:01crwdnd2935265:02crwdne2935265:0 Pneumatic Door Closer Replacement: crwdns2935265:04crwdnd2935265:02crwdnd2935265:02crwdne2935265:0
    • Install the inner bracket that attaches to the door closer by screwing the inner part into the wall using a screwdriver.

  5. Pneumatic Door Closer Replacement: crwdns2935265:05crwdnd2935265:01crwdnd2935265:03crwdne2935265:0 Pneumatic Door Closer Replacement: crwdns2935265:05crwdnd2935265:02crwdnd2935265:03crwdne2935265:0 Pneumatic Door Closer Replacement: crwdns2935265:05crwdnd2935265:03crwdnd2935265:03crwdne2935265:0
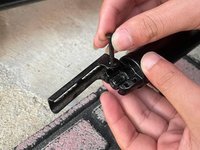
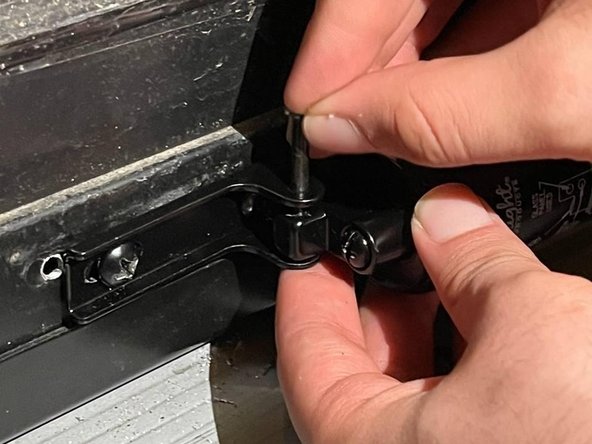
    • Plug the smallest included screw into the inner bracket to attach the door closer.

  6. Pneumatic Door Closer Replacement: crwdns2935265:06crwdnd2935265:01crwdnd2935265:03crwdne2935265:0 Pneumatic Door Closer Replacement: crwdns2935265:06crwdnd2935265:02crwdnd2935265:03crwdne2935265:0 Pneumatic Door Closer Replacement: crwdns2935265:06crwdnd2935265:03crwdnd2935265:03crwdne2935265:0
    • Close the door.

    • Install the outer bracket that attaches to the door closer by screwing it into the door using a screwdriver.

  7. Pneumatic Door Closer Replacement: crwdns2935265:07crwdnd2935265:01crwdnd2935265:03crwdne2935265:0 Pneumatic Door Closer Replacement: crwdns2935265:07crwdnd2935265:02crwdnd2935265:03crwdne2935265:0 Pneumatic Door Closer Replacement: crwdns2935265:07crwdnd2935265:03crwdnd2935265:03crwdne2935265:0
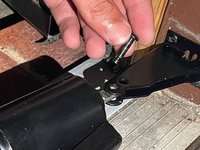
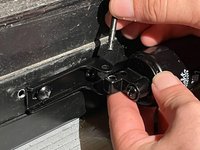
    • Attach the door closer into the installed outer bracket by plugging the larger included screw into the inner part.

  8. Pneumatic Door Closer Replacement: crwdns2935265:08crwdnd2935265:01crwdnd2935265:02crwdne2935265:0 Pneumatic Door Closer Replacement: crwdns2935265:08crwdnd2935265:02crwdnd2935265:02crwdne2935265:0
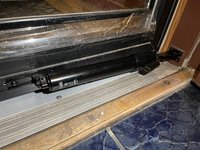
    • Make sure the door closes and opens properly.

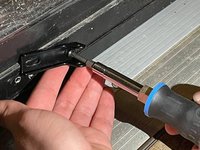
    • Adjust the hydraulics by loosening or tightening the screw on the top of the hydraulic axle to have optimal performance.

crwdns2935217:0crwdne2935217:0

Abdullah Kaddura

crwdns2935283:002/24/21crwdne2935283:0

157 crwdns2915208:0crwdne2915208:0

crwdns2935295:0crwdne2935295:0

crwdns2915084:0crwdne2915084:0

University of North Texas, Team S1-G17, Raign Spring 2021 crwdns2935289:0University of North Texas, Team S1-G17, Raign Spring 2021crwdne2935289:0

UNT-RAIGN-S21S1G17

crwdns2931471:02crwdne2931471:0

crwdns2935297:02crwdne2935297:0

crwdns2944067:00crwdne2944067:0

crwdns2917038:0crwdne2917038:0

crwdns2936625:0crwdne2936625:0:

crwdns2936751:024crwdne2936751:0 4

crwdns2936753:07crwdne2936753:0 9

crwdns2936753:030crwdne2936753:0 31

crwdns2942667:0crwdne2942667:0 595