crwdns2933423:0crwdne2933423:0

PlayStation Portal L1 and R1 Bumpers Replacement

crwdns2942213:0crwdne2942213:0

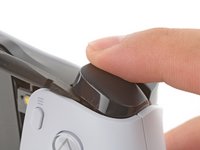
  1. PlayStation Portal L1 and R1 Bumpers Replacement, Power off your PlayStation Portal: crwdns2935265:01crwdnd2935265:01crwdnd2935265:02crwdne2935265:0 PlayStation Portal L1 and R1 Bumpers Replacement, Power off your PlayStation Portal: crwdns2935265:01crwdnd2935265:02crwdnd2935265:02crwdne2935265:0
    • Before you begin repairs, power off your PlayStation Portal and unplug any cables.

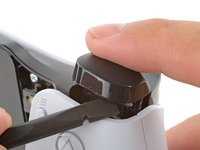
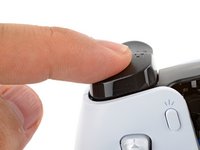
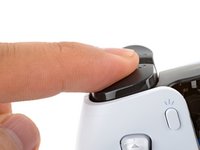
  2. PlayStation Portal L1 and R1 Bumpers Replacement, Pry up the L1 bumper: crwdns2935265:02crwdnd2935265:01crwdnd2935265:03crwdne2935265:0 PlayStation Portal L1 and R1 Bumpers Replacement, Pry up the L1 bumper: crwdns2935265:02crwdnd2935265:02crwdnd2935265:03crwdne2935265:0 PlayStation Portal L1 and R1 Bumpers Replacement, Pry up the L1 bumper: crwdns2935265:02crwdnd2935265:03crwdnd2935265:03crwdne2935265:0
    • Both bumpers are held in place with clips.

    • Rest a finger over the L1 bumper to prevent it from flying off when you pry.

    • Insert the flat end of a spudger between the top edge of the bumper and the white shell.

    • Pry up to unclip the bumper.

    • Slide the spudger along the seam to release any remaining clips.

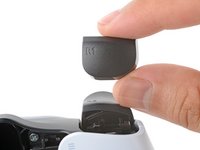
  3. PlayStation Portal L1 and R1 Bumpers Replacement: crwdns2935265:03crwdnd2935265:01crwdnd2935265:01crwdne2935265:0
    • Remove the L1 bumper.

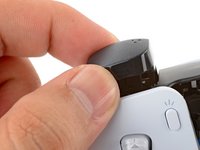
  4. PlayStation Portal L1 and R1 Bumpers Replacement, Pry up the R1 bumper: crwdns2935265:04crwdnd2935265:01crwdnd2935265:03crwdne2935265:0 PlayStation Portal L1 and R1 Bumpers Replacement, Pry up the R1 bumper: crwdns2935265:04crwdnd2935265:02crwdnd2935265:03crwdne2935265:0 PlayStation Portal L1 and R1 Bumpers Replacement, Pry up the R1 bumper: crwdns2935265:04crwdnd2935265:03crwdnd2935265:03crwdne2935265:0
    • Repeat the procedure to pry up and remove the R1 bumper.

  5. PlayStation Portal L1 and R1 Bumpers Replacement, Reassembly information: crwdns2935265:05crwdnd2935265:01crwdnd2935265:03crwdne2935265:0 PlayStation Portal L1 and R1 Bumpers Replacement, Reassembly information: crwdns2935265:05crwdnd2935265:02crwdnd2935265:03crwdne2935265:0 PlayStation Portal L1 and R1 Bumpers Replacement, Reassembly information: crwdns2935265:05crwdnd2935265:03crwdnd2935265:03crwdne2935265:0
    • To install a bumper during reassembly:

    • Align the bumper into its slot.

    • Use a finger to press the bumper down firmly until it clicks into place.

crwdns2915888:0crwdne2915888:0

Repair didn’t go as planned? Try some basic troubleshooting, or ask our Answers community for help.

Arthur Shi

crwdns2935283:001/03/18crwdne2935283:0

256.309 crwdns2915208:0crwdne2915208:0

crwdns2935297:0529crwdne2935297:0

crwdns2915084:0crwdne2915084:0

iFixit crwdns2935289:0iFixitcrwdne2935289:0

Staff

crwdns2931471:0138crwdne2931471:0

crwdns2935297:017.679crwdne2935297:0

crwdns2944067:00crwdne2944067:0

crwdns2917038:0crwdne2917038:0

crwdns2936625:0crwdne2936625:0:

crwdns2936751:024crwdne2936751:0 0

crwdns2936753:07crwdne2936753:0 1

crwdns2936753:030crwdne2936753:0 17

crwdns2942667:0crwdne2942667:0 70