crwdns2915892:0crwdne2915892:0
This guide shows how to remove and replace the joystick trim strips on your PlayStation Portal. These are the black plastic strips that surround each joystick.
crwdns2942213:0crwdne2942213:0
-
-
Before you begin repairs, power off your PlayStation Portal and unplug any cables.
-
-
-
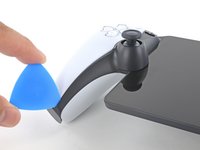
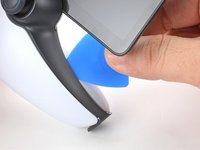
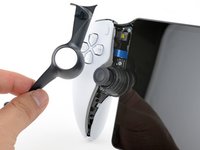
Insert the tip of an opening pick underneath the left joystick trim strip, where it wraps below the grip.
-
Twist the opening pick to release the bottom clip.
-
-
-
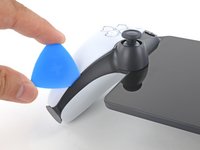
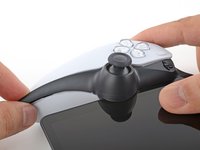
Insert the tip of an opening pick underneath the outer edge of the trim strip.
-
Slide the opening pick along the edge to release the clips.
-
-
-
-
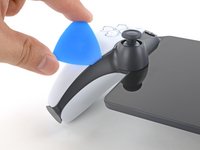
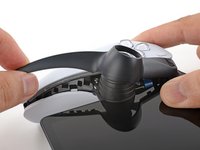
Insert the tip of an opening pick under the inner edge of the strip.
-
Slide the opening pick along the edge to release the clips.
-
-
-
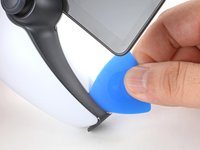
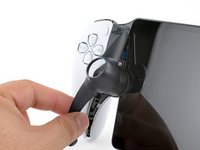
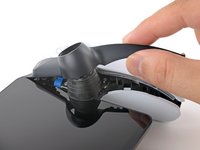
Grasp the bottom edge of the trim strip and slowly lift to release any remaining clips.
-
-
-
Lift and remove the left joystick trim strip.
-
-
-
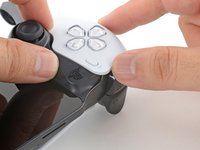
Repeat the procedure to unclip and remove the right joystick trim strip.
-
-
-
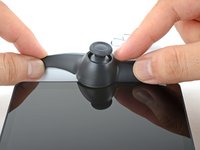
Use your fingers to align and clip the top edge in place.
-
Firmly press along the remaining edges to clip the strip in place.
-


To reassemble your device, follow these instructions in reverse order.
Repair didn’t go as planned? Try some basic troubleshooting, or ask our Answers community for help.

