crwdns2915892:0crwdne2915892:0
Use this guide to remove and replace the fan system in your PS4 Slim.
crwdns2942213:0crwdne2942213:0
-
-
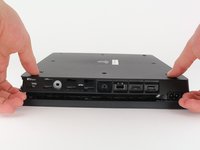
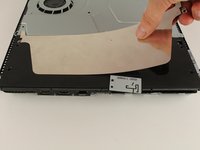
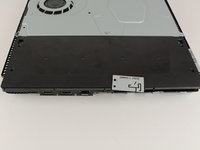
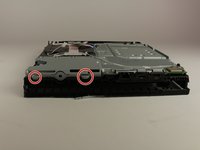
Locate the plastic warranty sticker next to the three ports on the side of the console.
-
Remove the warranty sticker by peeling it off with any kind of spudger.
-
-
-
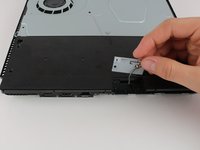
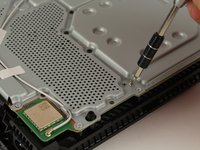
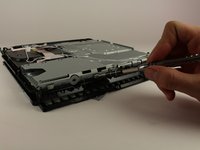
Unscrew and remove the now exposed 5.0mm screw using a TR8 security Torx screwdriver with a counter-clockwise motion.
-
-
-
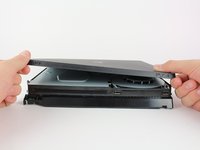
Place the Playstation 4 Slim upside down with the side of the screw you just removed facing you.
-
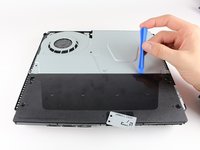
Pry up on the two corners that are facing you with your fingers.
-
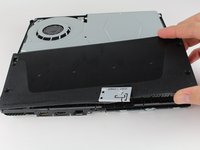
Remove the bottom cover by sliding it towards the back corners and lifting up.
-
-
-
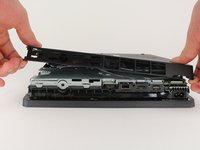
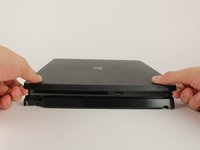
Place the Playstation 4 Slim right side up, with the PS logo on top and the side with the words "SONY" and "PS4" facing you.
-
Pry up on the two corners that are facing you with your fingers.
-
Remove the top cover by sliding it towards the back corners and lifting up.
-
-
-
Unscrew and remove the two screws (left one 31.0mm and right one 24.0mm) using a T8 screwdriver with a counter-clockwise motion.
-
Unscrew and remove the 3.0mm screw using a Phillips #1 screwdriver with a counter-clockwise motion.
-
-
-
Remove the four 16mm Philips screws holding the power supply in place.
-
-
-
Remove the metal sheet from the top of the power supply by grabbing and lifting up with your hands.
-
-
-
Remove the antenna from the top of the power supply by guiding the wire with your fingers through the groves underneath the metal panel.
-
-
-
Flip the Playstation 4 Slim onto its back.
-
Unscrew and remove the 4.0mm screw using a Phillips #1 screwdriver with a counter-clockwise motion.
-
-
-
-
Use a plastic opening tool to make space between the power supply and console by wedging and wiggling it in-between the two.
-
Lift the power supply up and onto its back on the metal sheet using your hands.
-
-
crwdns2935267:0crwdne2935267:0Tweezers$4.99
-
Disconnect the wire connection from the power supply by firmly gripping it with your fingers or tweezers and pulling out.
-
Remove the power supply completely by grabbing and lifting up with your hands.
-
-
-
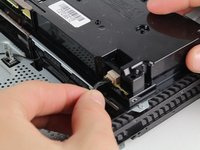
Unscrew and remove the 31.0mm safety screw using a T8 screwdriver with a counter-clockwise motion.
-
-
crwdns2935267:0crwdne2935267:0Tweezers$4.99
-
Locate the two wires connected to the bottom of the motherboard.
-
Remove the wires by firmly grasping the metal connections with your fingers or tweezers and pulling up until they disconnect.
-
-
-
Flip the device to the backside.
-
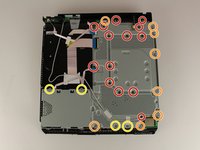
Unscrew and remove 14x (19x for CUH-21xx) 4.0mm black screws using a Phillips #1 screwdriver with a counter-clockwise motion.
-
Unscrew and remove 8x (7x for CUH-21xx) 6.0mm silver screws using a Phillips #1 screwdriver with a counter-clockwise motion.
-
Unscrew and remove 4x 3.0mm silver screws using a Phillips #1 screwdriver with a counter-clockwise motion.
-
-
-
Unscrew and remove the two 5.0mm screws on the side of the console using a Phillips #1 screwdriver with a counter-clockwise motion.
-
-
-
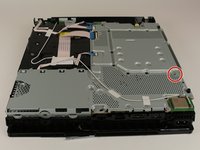
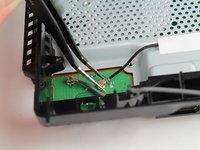
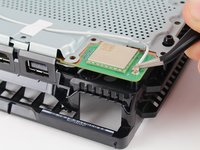
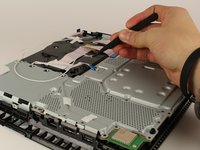
Locate the white wire connected to the corner of the top of the motherboard.
-
Disconnect the wire by firmly grasping the metal connection with your fingers or tweezers and pulling up until it detaches.
-
Unthread the wire from the tape and move it off to the side using tweezers or your fingers.
-
-
-
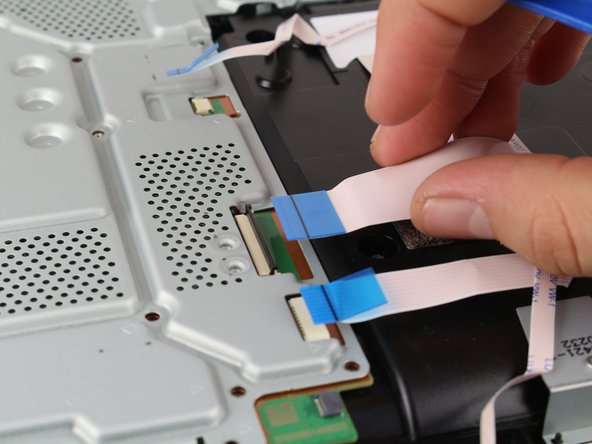
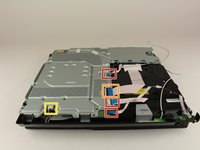
Remove the connections by pulling out on the blue tabs with your fingers.
-
Flip up the black clip on the largest tab with your finger before removing it.
-
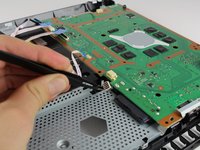
Remove this wire connection by firmly gripping the wire with your fingers and pulling it out.
-
-
-
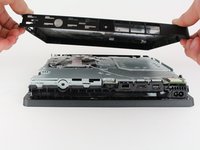
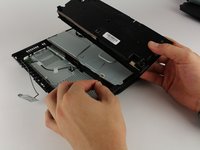
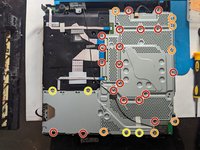
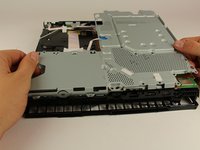
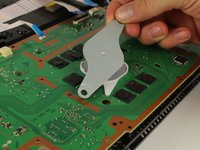
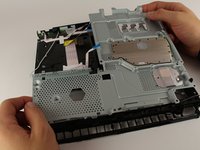
Remove the metal plate by grabbing two sides of the plate and lifting up and away from yourself.
-
-
-
Unscrew and remove the two 10.0mm screws (one silver and one black) using a Phillips #1 screwdriver with a counter-clockwise motion.
-
Remove the small metal plate by grabbing it with your fingers and lifting up.
-
-
-
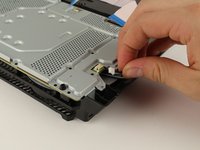
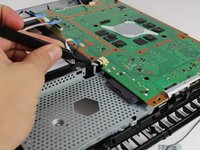
Remove this wire connection by firmly grasping it with tweezers and pulling out.
-
-
-
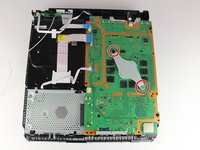
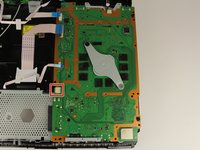
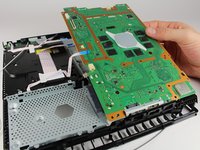
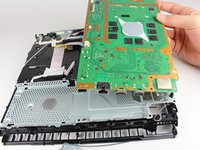
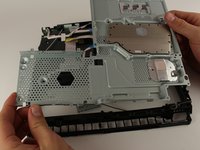
Remove the motherboard by grabbing the edge of the board with one or two hands and pulling away and up.
-
-
-
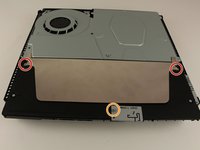
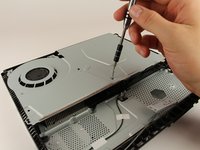
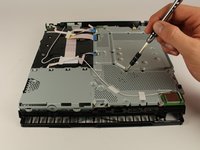
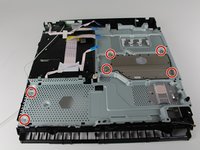
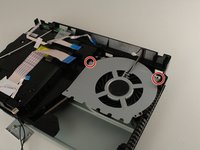
Unscrew and remove the six 4.0mm screws using a PH00 screwdriver with a counter-clockwise motion.
-
-
-
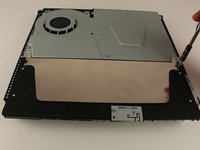
Remove the metal plate by grabbing the edges and lifting up with your hands.
-
-
-
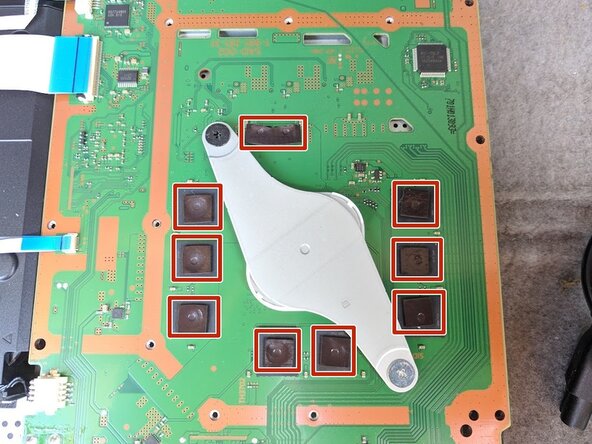
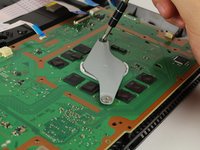
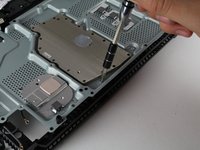
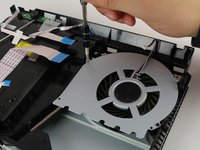
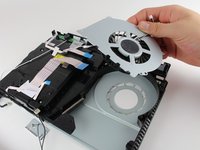
Unscrew and remove the two 40 mm screws using a PH00 screwdriver with a counter-clockwise motion.
-
-
-
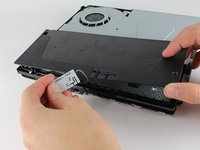
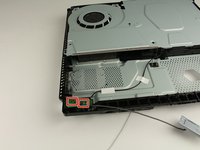
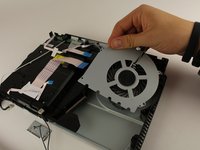
Remove the fan system by grabbing the edge of the top metal plate and lifting up with your hands.
-


To reassemble your device, follow these instructions in reverse order.
crwdns2935221:0crwdne2935221:0
crwdns2935229:078crwdne2935229:0
crwdns2935287:0crwdne2935287:0

Cal Poly, Team S19-G4, Livingston Winter 2018 crwdns2935289:0Cal Poly, Team S19-G4, Livingston Winter 2018crwdne2935289:0
CPSU-LIVINGSTON-W18S19G4
crwdns2931471:04crwdne2931471:0
crwdns2935297:036crwdne2935297:0
crwdns2947412:06crwdne2947412:0
Thank you so much for this guide! It was very helpful!
Deine Schrauben großen machen gar kein Sinn du hast mehr verschiedene Schrauben als es gibt
My PS4 “Slim” is quite different internally than the one shown. But regardless, this guide is an excellent resource for us diy’ers. And don’t forget any parts when reassembling, like I did. Took four tries to get everything back where it belonged. And man, was it dusty in there! Regular cleaniings are a must.
My ps4 slim is different it has some extra parts, now I don’t know how to put it back, hahahahahhahaha
This guide gets you 90% of the way there. Some really important pieces are missing though, primarily:
- How you dont need to unplug the power supply cable from the motherboard, you can just unhook it from the plastic clips on the case.
- It never mentions cleaning the old Thermal Paste off the heatsink + cpu and replacing with a new dab.
Both of these are essential for a proper tear-down. If you dont replace the thermal paste, your PS4 is guaranteed to break down irreparably in the future. I had to know or discover them for myself. Please, please update this guide with that info.