crwdns2915892:0crwdne2915892:0
Use this guide to remove and replace the fan system in your PS4 Slim.
crwdns2942213:0crwdne2942213:0
-
-
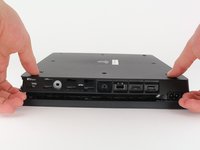
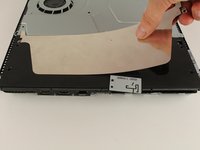
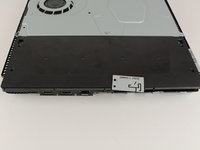
Locate the plastic warranty sticker next to the three ports on the side of the console.
-
Remove the warranty sticker by peeling it off with any kind of spudger.
 crwdns2952109:0crwdne2952109:0
-
-
-
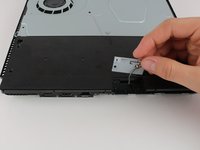
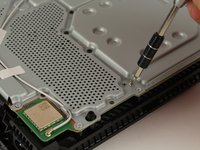
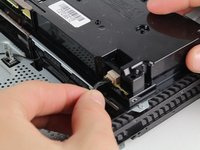
Unscrew and remove the now exposed 5.0mm screw using a TR8 security Torx screwdriver with a counter-clockwise motion.
-
-
-
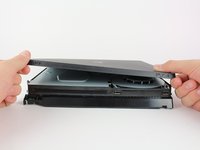
Place the Playstation 4 Slim upside down with the side of the screw you just removed facing you.
-
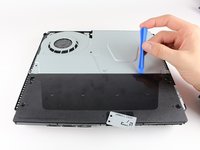
Pry up on the two corners that are facing you with your fingers.
-
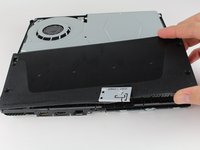
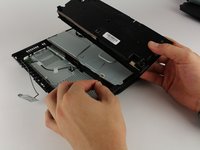
Remove the bottom cover by sliding it towards the back corners and lifting up.
-
-
-
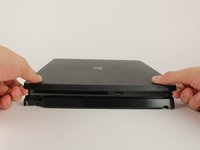
Place the Playstation 4 Slim right side up, with the PS logo on top and the side with the words "SONY" and "PS4" facing you.
-
Pry up on the two corners that are facing you with your fingers.
-
Remove the top cover by sliding it towards the back corners and lifting up.
-
-
-
Unscrew and remove the two screws (left one 31.0mm and right one 24.0mm) using a T8 screwdriver with a counter-clockwise motion.
-
Unscrew and remove the 3.0mm screw using a Phillips #1 screwdriver with a counter-clockwise motion.
-
-
-
Remove the four 16mm Philips screws holding the power supply in place.
-
-
-
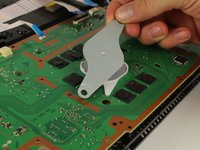
Remove the metal sheet from the top of the power supply by grabbing and lifting up with your hands.
-
-
-
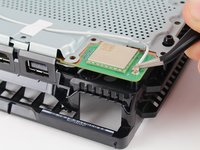
Remove the antenna from the top of the power supply by guiding the wire with your fingers through the groves underneath the metal panel.
-
-
-
Flip the Playstation 4 Slim onto its back.
-
Unscrew and remove the 4.0mm screw using a Phillips #1 screwdriver with a counter-clockwise motion. This screw holds the power supply in place
-
-
-
-
Use a plastic opening tool to make space between the power supply and console by wedging and wiggling it in-between the two.
-
Lift the power supply up and onto its back on the metal sheet using your hands.
-
-
crwdns2935267:0crwdne2935267:0Tweezers$4.99
-
Disconnect the wire connection from the power supply by firmly gripping it with your fingers or tweezers and pulling out.
-
Remove the power supply completely by grabbing and lifting up with your hands.
-
-
-
Unscrew and remove the 31.0mm safety screw using a T8 screwdriver with a counter-clockwise motion.
-
-
crwdns2935267:0crwdne2935267:0Tweezers$4.99
-
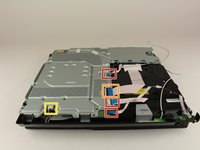
Locate the two wires connected to the bottom of the motherboard.
-
Remove the wires by firmly grasping the metal connections with your fingers or tweezers and pulling up until they disconnect.
-
-
-
Flip the device to the backside.
-
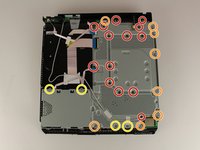
Unscrew and remove 14x (19x for CUH-21xx) 4.0mm black screws using a Phillips #1 screwdriver with a counter-clockwise motion.
-
Unscrew and remove 8x (7x for CUH-21xx) 6.0mm silver screws using a Phillips #1 screwdriver with a counter-clockwise motion.
-
Unscrew and remove 4x 3.0mm silver screws using a Phillips #1 screwdriver with a counter-clockwise motion.
-
-
-
Unscrew and remove the two 5.0mm screws on the side of the console using a Phillips #1 screwdriver with a counter-clockwise motion.
-
-
-
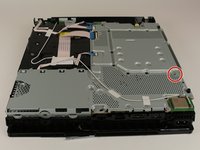
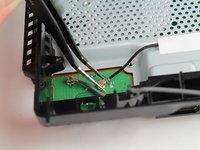
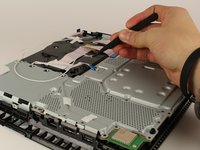
Locate the white wire connected to the corner of the top of the motherboard.
-
Disconnect the wire by firmly grasping the metal connection with your fingers or tweezers and pulling up until it detaches.
-
Unthread the wire from the tape and move it off to the side using tweezers or your fingers.
-
-
-
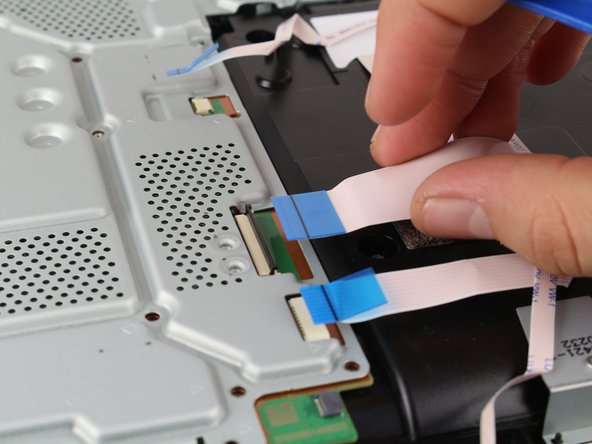
Remove the connections by pulling out on the blue tabs with your fingers.
-
Flip up the black clip on the largest tab with your finger before removing it.
-
Remove this wire connection by firmly gripping the wire with your fingers and pulling it out.
-
-
-
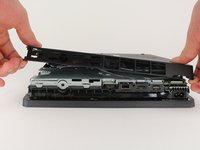
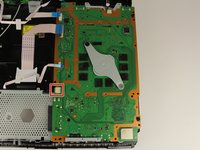
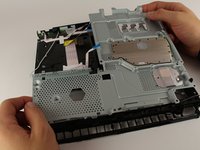
Remove the metal plate by grabbing two sides of the plate and lifting up and away from yourself.
-
-
-
Unscrew and remove the two 10.0mm screws (one silver and one black) using a Phillips #1 screwdriver with a counter-clockwise motion.
-
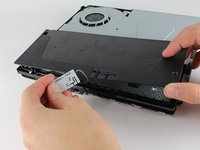
Remove the small metal plate by grabbing it with your fingers and lifting up.
-
-
-
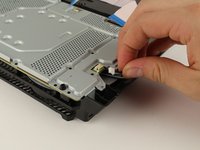
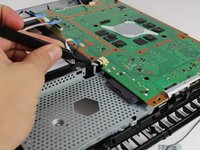
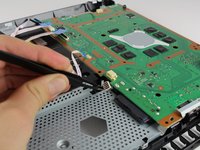
Remove this wire connection by firmly grasping it with tweezers and pulling out.
-
-
-
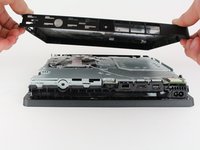
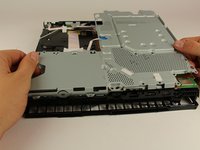
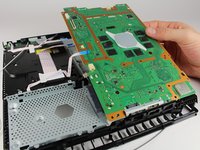
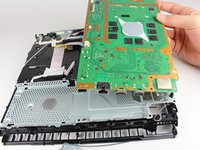
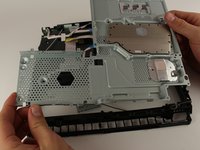
Remove the motherboard by grabbing the edge of the board with one or two hands and pulling away and up.
-
-
-
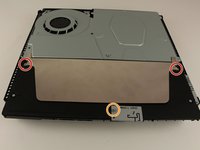
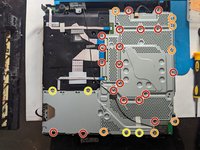
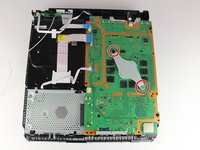
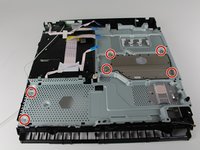
Unscrew and remove the six 4.0mm screws using a PH00 screwdriver with a counter-clockwise motion.
-
-
-
Remove the metal plate by grabbing the edges and lifting up with your hands.
-
-
-
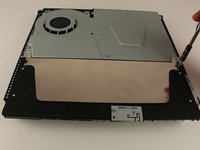
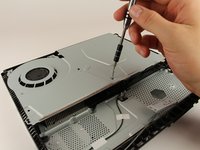
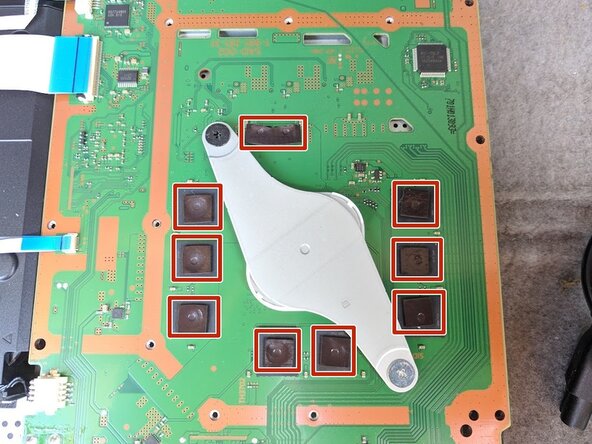
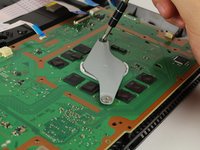
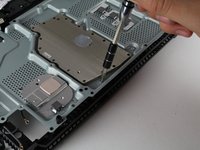
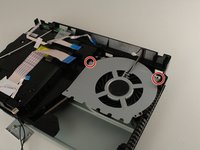
Unscrew and remove the two 40 mm screws using a PH00 screwdriver with a counter-clockwise motion.
-
-
-
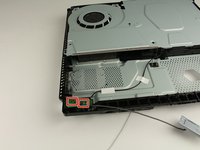
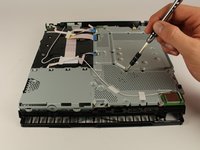
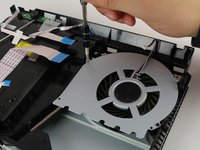
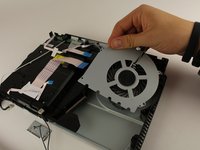
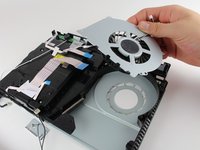
Remove the fan system by grabbing the edge of the top metal plate and lifting up with your hands.
-


To reassemble your device, follow these instructions in reverse order.
crwdns2935221:0crwdne2935221:0
crwdns2935229:086crwdne2935229:0
crwdns2935287:0crwdne2935287:0

Cal Poly, Team S19-G4, Livingston Winter 2018 crwdns2935289:0Cal Poly, Team S19-G4, Livingston Winter 2018crwdne2935289:0
CPSU-LIVINGSTON-W18S19G4
crwdns2931471:04crwdne2931471:0
crwdns2935297:036crwdne2935297:0
crwdns2947412:06crwdne2947412:0
Thank you so much for this guide! It was very helpful!
David Rodriguez - crwdns2934203:0crwdne2934203:0 crwdns2950251:0crwdne2950251:0
Deine Schrauben großen machen gar kein Sinn du hast mehr verschiedene Schrauben als es gibt
Andre Hollmann - crwdns2934203:0crwdne2934203:0 crwdns2950251:0crwdne2950251:0
My PS4 “Slim” is quite different internally than the one shown. But regardless, this guide is an excellent resource for us diy’ers. And don’t forget any parts when reassembling, like I did. Took four tries to get everything back where it belonged. And man, was it dusty in there! Regular cleaniings are a must.
Patrick Ogren - crwdns2934203:0crwdne2934203:0 crwdns2950251:0crwdne2950251:0
My ps4 slim is different it has some extra parts, now I don’t know how to put it back, hahahahahhahaha
Lancelotte Fabros - crwdns2934203:0crwdne2934203:0 crwdns2950251:0crwdne2950251:0
This guide gets you 90% of the way there. Some really important pieces are missing though, primarily:
- How you dont need to unplug the power supply cable from the motherboard, you can just unhook it from the plastic clips on the case.
- It never mentions cleaning the old Thermal Paste off the heatsink + cpu and replacing with a new dab.
Both of these are essential for a proper tear-down. If you dont replace the thermal paste, your PS4 is guaranteed to break down irreparably in the future. I had to know or discover them for myself. Please, please update this guide with that info.
Zoey Schlemper - crwdns2934203:0crwdne2934203:0 crwdns2950251:0crwdne2950251:0