crwdns2933423:0crwdne2933423:0

PlayStation 4 Pro Fan Replacement

crwdns2942213:0crwdne2942213:0

  1. PlayStation 4 Pro Fan Replacement, Hard Drive Caddy: crwdns2935265:01crwdnd2935265:01crwdnd2935265:03crwdne2935265:0 PlayStation 4 Pro Fan Replacement, Hard Drive Caddy: crwdns2935265:01crwdnd2935265:02crwdnd2935265:03crwdne2935265:0 PlayStation 4 Pro Fan Replacement, Hard Drive Caddy: crwdns2935265:01crwdnd2935265:03crwdnd2935265:03crwdne2935265:0
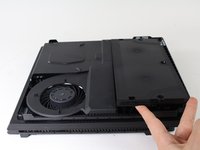
    • Flip the console upside down.

    • Use your finger to pull and snap off the plastic cover over the hard drive.

  2. PlayStation 4 Pro Fan Replacement: crwdns2935265:02crwdnd2935265:01crwdnd2935265:02crwdne2935265:0 PlayStation 4 Pro Fan Replacement: crwdns2935265:02crwdnd2935265:02crwdnd2935265:02crwdne2935265:0
    • Use a Phillips #1 Screwdriver to remove the single screw securing the hard drive caddy.

    • Pull the hard drive caddy straight out.

  3. PlayStation 4 Pro Fan Replacement, Power Supply Assembly: crwdns2935265:03crwdnd2935265:01crwdnd2935265:03crwdne2935265:0 PlayStation 4 Pro Fan Replacement, Power Supply Assembly: crwdns2935265:03crwdnd2935265:02crwdnd2935265:03crwdne2935265:0 PlayStation 4 Pro Fan Replacement, Power Supply Assembly: crwdns2935265:03crwdnd2935265:03crwdnd2935265:03crwdne2935265:0
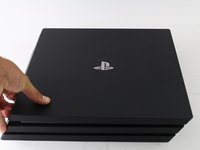
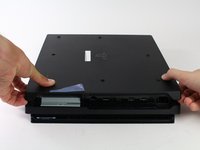
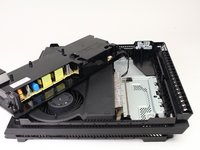
    • Flip the console right side up.

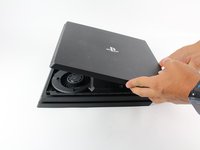
    • Grip the two corners located at the front of the device.

    • Pull upwards until a loud click is heard.

    • This may require a lot of force, so do not be afraid to get a little rough with your console.

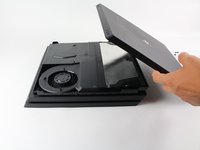
    • After both corners detach, slide the cover backwards and lift off.

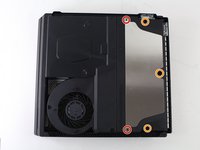
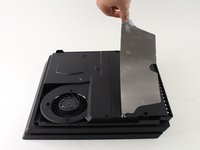
  4. PlayStation 4 Pro Fan Replacement: crwdns2935265:04crwdnd2935265:01crwdnd2935265:03crwdne2935265:0 PlayStation 4 Pro Fan Replacement: crwdns2935265:04crwdnd2935265:02crwdnd2935265:03crwdne2935265:0 PlayStation 4 Pro Fan Replacement: crwdns2935265:04crwdnd2935265:03crwdnd2935265:03crwdne2935265:0
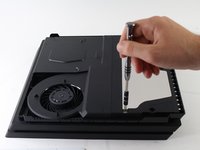
    • Use a T8 Torx Security screwdriver to remove five screws from the rear of the device.

    • Two 31mm screws.

    • Three 10mm screws for the 7000 models; Two gray 10mm screws (upper and lower screws on the illustration) if the PS4 Pro is a 7100-series model.

    • Remove the metal plate by pulling it up.

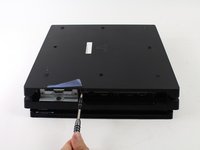
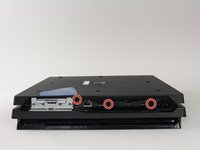
  5. PlayStation 4 Pro Fan Replacement: crwdns2935265:05crwdnd2935265:01crwdnd2935265:03crwdne2935265:0 PlayStation 4 Pro Fan Replacement: crwdns2935265:05crwdnd2935265:02crwdnd2935265:03crwdne2935265:0 PlayStation 4 Pro Fan Replacement: crwdns2935265:05crwdnd2935265:03crwdnd2935265:03crwdne2935265:0
    • Flip the console over so the bottom is facing up.

    • Use a T8 Torx Security screwdriver to remove the three black 7mm screws in the back panel. (7000-series models only); or one 7mm screw (the middle one) with 7100-series models and the warranty sticker to the left.

    • Remove the bottom cover in the same way as the top cover. Grip the cover on both sides and pull up until it clicks. Then slide the cover off; With 7100-series models, pay attention to the two clips that replace the corresponding screws.

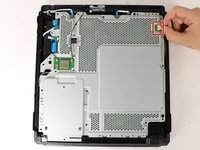
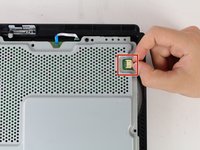
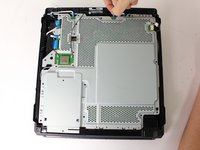
  6. PlayStation 4 Pro Fan Replacement: crwdns2935265:06crwdnd2935265:01crwdnd2935265:03crwdne2935265:0 PlayStation 4 Pro Fan Replacement: crwdns2935265:06crwdnd2935265:02crwdnd2935265:03crwdne2935265:0 PlayStation 4 Pro Fan Replacement: crwdns2935265:06crwdnd2935265:03crwdnd2935265:03crwdne2935265:0
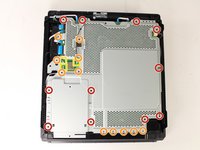
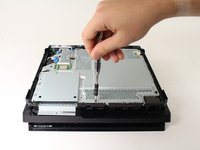
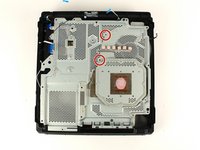
    • Use a T8 Torx security screwdriver to remove the eleven 10mm silver screws from the metal plate.

    • Use a Phillips #1 screwdriver to remove the eleven 4mm black screws from the metal plate.

    • 7200-series models have 13 additional 4mm screws around the top and right of the metal plate. These screws are are indicated with a triangle. This may apply to other models.

    • Use a spudger to disconnect the three antenna cables (two black and one white) by prying them straight up from their sockets.

  7. PlayStation 4 Pro Fan Replacement: crwdns2935265:07crwdnd2935265:01crwdnd2935265:02crwdne2935265:0 PlayStation 4 Pro Fan Replacement: crwdns2935265:07crwdnd2935265:02crwdnd2935265:02crwdne2935265:0
    • Pull the white fan connector straight out of the yellow mount on the motherboard.

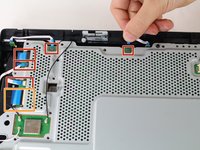
  8. PlayStation 4 Pro Fan Replacement: crwdns2935265:08crwdnd2935265:01crwdnd2935265:02crwdne2935265:0 PlayStation 4 Pro Fan Replacement: crwdns2935265:08crwdnd2935265:02crwdnd2935265:02crwdne2935265:0
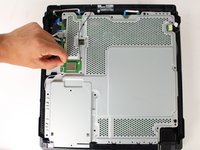
    • Pull out the five small, blue low profile cables connected to the metal plate.

    • Lift the retaining flap on the ZIF connector of the large ribbon cable.

    • Pull the large ribbon cable from its socket.

    • Do not pull on the biggest blue cable without lifting the tab first. Doing so can damage the connection.

  9. PlayStation 4 Pro Fan Replacement: crwdns2935265:09crwdnd2935265:01crwdnd2935265:01crwdne2935265:0
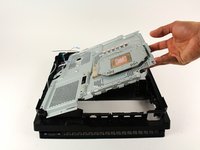
    • Pull up and remove the metal plate.

  10. PlayStation 4 Pro Fan Replacement: crwdns2935265:010crwdnd2935265:01crwdnd2935265:03crwdne2935265:0 PlayStation 4 Pro Fan Replacement: crwdns2935265:010crwdnd2935265:02crwdnd2935265:03crwdne2935265:0 PlayStation 4 Pro Fan Replacement: crwdns2935265:010crwdnd2935265:03crwdnd2935265:03crwdne2935265:0
    • Flip the console over to continue working on the top side.

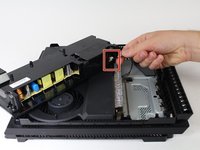
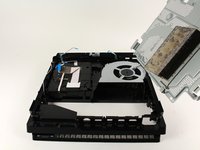
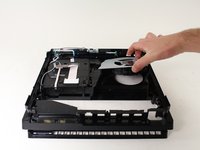
    • Pull up on the power supply unit and set it on the console.

    • Be careful not to pull too far, the assembly is still connected at one point.

    • Grip the connector behind the power supply and pull straight out.

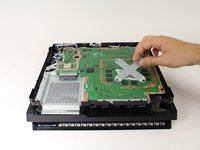
  11. PlayStation 4 Pro Fan Replacement, Motherboard: crwdns2935265:011crwdnd2935265:01crwdnd2935265:03crwdne2935265:0 PlayStation 4 Pro Fan Replacement, Motherboard: crwdns2935265:011crwdnd2935265:02crwdnd2935265:03crwdne2935265:0 PlayStation 4 Pro Fan Replacement, Motherboard: crwdns2935265:011crwdnd2935265:03crwdnd2935265:03crwdne2935265:0
    • If you are working on the 7200-series model, this metal plate will have been already removed as part of the removing the larger motherboard plate. You may skip this step if this is the case.

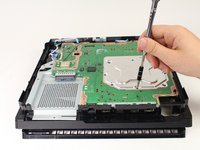
    • Carefully flip the console over so the bottom is facing up.

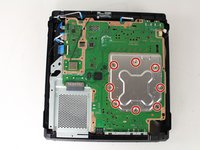
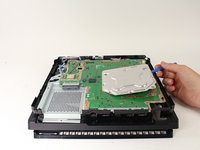
    • Use a Phillips #1 screwdriver to remove the eight 4mm screws on the metal plate with the X-like symbol.

    • Use a plastic opening tool to remove the metal plate with the X-like shape.

  12. PlayStation 4 Pro Fan Replacement: crwdns2935265:012crwdnd2935265:01crwdnd2935265:03crwdne2935265:0 PlayStation 4 Pro Fan Replacement: crwdns2935265:012crwdnd2935265:02crwdnd2935265:03crwdne2935265:0 PlayStation 4 Pro Fan Replacement: crwdns2935265:012crwdnd2935265:03crwdnd2935265:03crwdne2935265:0
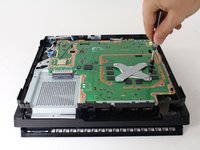
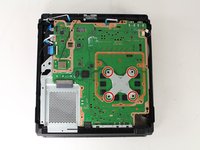
    • Use a Phillips #1 screwdriver to remove the four 13mm screws on the X-shaped metal plate underneath.

    • For 7200-series models this is instead a S-shaped metal plate with 2 screws.

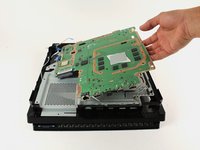
    • Grip the X-shaped retaining bracket and lift straight up.

  13. PlayStation 4 Pro Fan Replacement: crwdns2935265:013crwdnd2935265:01crwdnd2935265:02crwdne2935265:0 PlayStation 4 Pro Fan Replacement: crwdns2935265:013crwdnd2935265:02crwdnd2935265:02crwdne2935265:0
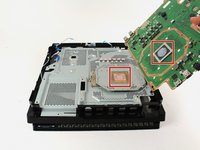
    • Grip the edge of the motherboard and slowly lift upwards to remove it from the device.

    • For reassembly, use this guide to reapply thermal paste between the motherboard and the metal plate underneath.

  14. PlayStation 4 Pro Fan Replacement, Heat Pipe: crwdns2935265:014crwdnd2935265:01crwdnd2935265:02crwdne2935265:0 PlayStation 4 Pro Fan Replacement, Heat Pipe: crwdns2935265:014crwdnd2935265:02crwdnd2935265:02crwdne2935265:0
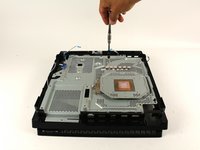
    • Use a Phillips #1 screwdriver to remove the two 6 mm silver screws from the metal plate.

  15. PlayStation 4 Pro Fan Replacement: crwdns2935265:015crwdnd2935265:01crwdnd2935265:02crwdne2935265:0 PlayStation 4 Pro Fan Replacement: crwdns2935265:015crwdnd2935265:02crwdnd2935265:02crwdne2935265:0
    • Lift the metal plate that is connected to the heat pipe straight up to remove it.

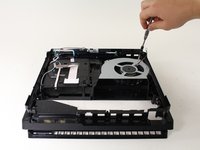
  16. PlayStation 4 Pro Fan Replacement, Fan: crwdns2935265:016crwdnd2935265:01crwdnd2935265:03crwdne2935265:0 PlayStation 4 Pro Fan Replacement, Fan: crwdns2935265:016crwdnd2935265:02crwdnd2935265:03crwdne2935265:0 PlayStation 4 Pro Fan Replacement, Fan: crwdns2935265:016crwdnd2935265:03crwdnd2935265:03crwdne2935265:0
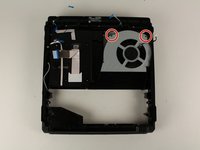
    • Use a Phillips #0 screwdriver to remove the two 6mm screws on the fan.

    • On 7200-series models these screws will be on the right of the fan.

    • Grab the fan and lift up to remove it.

crwdns2915888:0crwdne2915888:0

To reassemble your device, follow these instructions in reverse order.

crwdns2935229:0109crwdne2935229:0

Thomas

crwdns2935283:004/26/17crwdne2935283:0

3,841 crwdns2915208:0crwdne2915208:0

crwdns2935297:05crwdne2935297:0

crwdns2915084:0crwdne2915084:0

Cal Poly, Team S21-G5, Livingston Spring 2017 crwdns2935289:0Cal Poly, Team S21-G5, Livingston Spring 2017crwdne2935289:0

CPSU-LIVINGSTON-S17S21G5

crwdns2931471:04crwdne2931471:0

crwdns2935297:049crwdne2935297:0

crwdns2944067:013crwdne2944067:0

Danke für die Anleitung. hat alles super geklappt. Bloß beim letzten Schritt ist die Schraube vom Lüfter nicht oben links sondern unten rechts. Mfg

Camorrista31 - crwdns2934203:0crwdne2934203:0

Thanks for the guide. Very comprehensive.

Paul Swinglehurst - crwdns2934203:0crwdne2934203:0

I’m clueless with electronics but my PS4 was on its death throes with overheating. I read this guide and watched the video (coffee break included) and got to work. The only trouble I had was that my husband (he’s a good guy normally) decided to help and used too big pliers and broke the connector between the power supply and PS4. Ok, so 5 days wait for replacement. I replaced the fan, thermal paste, and pads and put it back together (shaking like a leaf in a hurricane). It’s quiet and works thanks to ifixit.com. Thank you so much!

K. Birks - crwdns2934203:0crwdne2934203:0

This was super helpful! For the power supply, I was trying to pull at the socket the cable was plugged into (same color plastic). I think it would have worked better just wiggling the cable.

Also, T8 worked fine, but putting it back together, I noticed T9 was better fit, so if you have a T9, use that instead. After cleaning and repasting, it’s so much quieter. Thanks!

Phil - crwdns2934203:0crwdne2934203:0

Great guide. I did have a little difficulty getting the power supply connector removed, but I tried to be patient and eventually got it. Thanks!

JTG - crwdns2934203:0crwdne2934203:0

crwdns2917038:0crwdne2917038:0

crwdns2936625:0crwdne2936625:0:

crwdns2936751:024crwdne2936751:0 56

crwdns2936753:07crwdne2936753:0 356

crwdns2936753:030crwdne2936753:0 1,317

crwdns2942667:0crwdne2942667:0 155,094