crwdns2933423:0crwdne2933423:0

PlayStation 3 Hard Drive Replacement

crwdns2862587:0crwdne2862587:0
crwdns2862588:0crwdne2862588:0

crwdns2942213:0crwdne2942213:0

  1. PlayStation 3 Hard Drive Replacement, Hard Drive: crwdns2935265:01crwdnd2935265:01crwdnd2935265:01crwdne2935265:0
    • Locate the hard drive bay cover on the side of the PS3.

  2. PlayStation 3 Hard Drive Replacement: crwdns2935265:02crwdnd2935265:01crwdnd2935265:03crwdne2935265:0 PlayStation 3 Hard Drive Replacement: crwdns2935265:02crwdnd2935265:02crwdnd2935265:03crwdne2935265:0 PlayStation 3 Hard Drive Replacement: crwdns2935265:02crwdnd2935265:03crwdnd2935265:03crwdne2935265:0
    • Remove the cover with a spudger.

  3. PlayStation 3 Hard Drive Replacement: crwdns2935265:03crwdnd2935265:01crwdnd2935265:03crwdne2935265:0 PlayStation 3 Hard Drive Replacement: crwdns2935265:03crwdnd2935265:02crwdnd2935265:03crwdne2935265:0 PlayStation 3 Hard Drive Replacement: crwdns2935265:03crwdnd2935265:03crwdnd2935265:03crwdne2935265:0
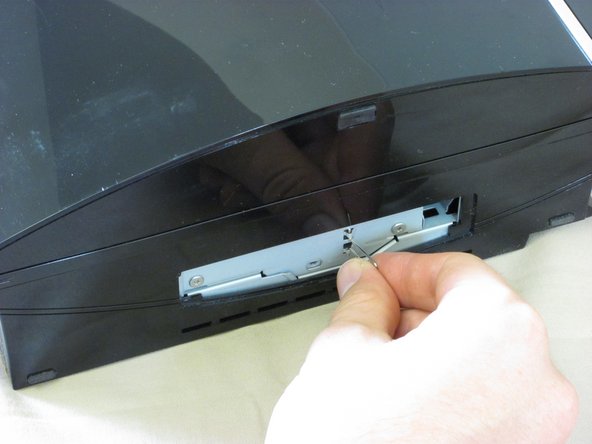
    • Lift the metal tab on the hard drive enclosure.

    • Pull the tab to slide the hard drive enclosure to the right.

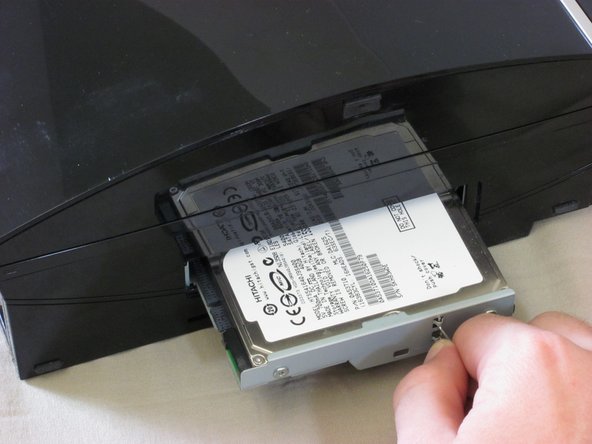
    • Pull the hard drive enclosure out of the PS3.

  4. PlayStation 3 Hard Drive Replacement: crwdns2935265:04crwdnd2935265:01crwdnd2935265:03crwdne2935265:0 PlayStation 3 Hard Drive Replacement: crwdns2935265:04crwdnd2935265:02crwdnd2935265:03crwdne2935265:0 PlayStation 3 Hard Drive Replacement: crwdns2935265:04crwdnd2935265:03crwdnd2935265:03crwdne2935265:0
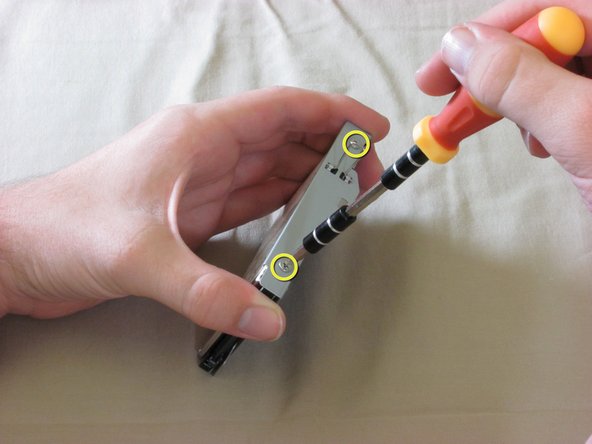
    • There are four screws on the side of the hard drive enclosure.

    • Two of the screws are shown here. The other two are on the opposite side.

    • The screws are very tight. Be careful not to strip them!

    • Remove the two screws on one side of the hard drive enclosure with a Phillips #1 screwdriver.

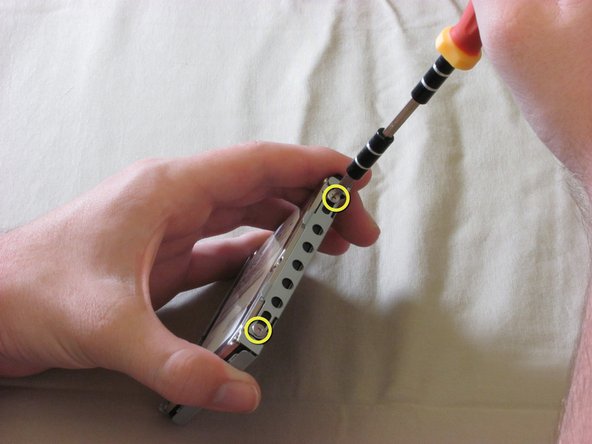
    • Flip over the hard drive enclosure and remove the remaining two screws on the other side.

  5. PlayStation 3 Hard Drive Replacement: crwdns2935265:05crwdnd2935265:01crwdnd2935265:01crwdne2935265:0
    • Carefully slide the hard drive out of the metal enclosure.

    • Note the orientation of the hard drive when sliding it out of the enclosure.

crwdns2915888:0crwdne2915888:0

To reassemble your device, follow these instructions in reverse order.

crwdns2935229:04crwdne2935229:0

iDeleted

crwdns2935283:007/07/10crwdne2935283:0

2.101 crwdns2915208:0crwdne2915208:0

crwdns2935297:039crwdne2935297:0

crwdns2917034:0crwdne2917034:0

I dont suppose u can do one for a lughtning zapped power bs upply replace me nt all of my gran turismo amd well all games i play ma6be with a upgrade the speed power and make it ps4 with out the crap of online

Audiophile - crwdns2934203:0crwdne2934203:0

crwdns2917038:0crwdne2917038:0

crwdns2936625:0crwdne2936625:0:

crwdns2936751:024crwdne2936751:0 0

crwdns2936753:07crwdne2936753:0 0

crwdns2936753:030crwdne2936753:0 0

crwdns2942667:0crwdne2942667:0 1,794