crwdns2933423:0crwdne2933423:0
crwdns2947577:0crwdnd2947577:0crwdne2947577:0
PlayStation 3 Control Board Replacement

PlayStation 3 Control Board Replacement

Walter Galan

crwdns2944107:0crwdnd2944107:0Walter Galancrwdnd2944107:0crwdnd2944107:0crwdnd2944107:04crwdnd2944107:0crwdne2944107:0

crwdns2944111:0Maw 1, 2020crwdne2944111:0

15 - 30 crwdns2931279:0crwdne2931279:0
crwdns2937801:0crwdne2937801:0

crwdns2915892:0crwdne2915892:0

crwdns2942287:0crwdne2942287:0

Use this guide to replace a broken control board.

crwdns2942213:0crwdne2942213:0

crwdns2943213:0crwdne2943213:0

crwdns2943215:0crwdne2943215:0

  • Phillips #1 Screwdriver
    Phillips #1 Screwdriver
  • Spudger
    Spudger
  • TR10 Torx Security Screwdriver
    TR10 Torx Security Screwdriver

crwdns2944105:0crwdne2944105:0

  1. PlayStation 3 Control Board Replacement, Smart Plate: crwdns2935265:01crwdnd2935265:01crwdnd2935265:02crwdne2935265:0 PlayStation 3 Control Board Replacement, Smart Plate: crwdns2935265:01crwdnd2935265:02crwdnd2935265:02crwdne2935265:0
    • Use the tip of a spudger to remove the black rubber screw cover from the side of the PS3.

    • The screw cover may be underneath a warranty sticker. This sticker will change appearance, and show "VOID" after it has been removed.

  2. PlayStation 3 Control Board Replacement: crwdns2935265:02crwdnd2935265:01crwdnd2935265:01crwdne2935265:0
    • Remove the single 8.5 mm T10 Security Torx screw from the smart plate.

  3. PlayStation 3 Control Board Replacement: crwdns2935265:03crwdnd2935265:01crwdnd2935265:03crwdne2935265:0 PlayStation 3 Control Board Replacement: crwdns2935265:03crwdnd2935265:02crwdnd2935265:03crwdne2935265:0 PlayStation 3 Control Board Replacement: crwdns2935265:03crwdnd2935265:03crwdnd2935265:03crwdne2935265:0
    • Pull the smart plate toward the hard drive bay, then lift it off the body of the PS3.

  4. PlayStation 3 Control Board Replacement: crwdns2935265:04crwdnd2935265:01crwdnd2935265:01crwdne2935265:0
    • Be sure to keep track of the small metal bracket loosely held in the top cover, if equipped.

    That small metal bracket/socket set up looks completely different in the ps3 I'm working on. Model: CECHK01.

    Any suggestions?

    Marcus - crwdns2934203:0crwdne2934203:0

    different in mine too, Model: CECHP01

    Link Adrian - crwdns2934203:0crwdne2934203:0

    1How to Delid and fix the Yellow Light of Death for good (NEC TOKIN Replacement) https://gbatemp.net/threads/how-to-delid...

    Player - crwdns2934203:0crwdne2934203:0

    I don’t have this bracket, where I can get it ?

    Paul Bidny - crwdns2934203:0crwdne2934203:0

  5. PlayStation 3 Control Board Replacement, Top Cover: crwdns2935265:05crwdnd2935265:01crwdnd2935265:01crwdne2935265:0
    • Remove the following seven screws:

    • Six 52 mm Phillips screws

    • One 30 mm Phillips screw

  6. PlayStation 3 Control Board Replacement: crwdns2935265:06crwdnd2935265:01crwdnd2935265:01crwdne2935265:0
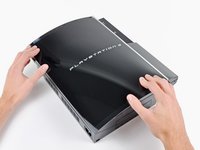
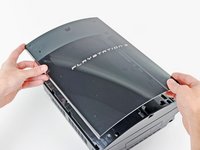
    • Lift the top cover from its rear edge and rotate it toward the front of the PS3.

    • Remove the top cover.

    • There is a plastic hook located in a hole on the top back right hand side corner. Carefully push the plastic hook a bit from the rear of the machine with a spudger to release the rear right of the casing.

  7. PlayStation 3 Control Board Replacement, Control Board: crwdns2935265:07crwdnd2935265:01crwdnd2935265:02crwdne2935265:0 PlayStation 3 Control Board Replacement, Control Board: crwdns2935265:07crwdnd2935265:02crwdnd2935265:02crwdne2935265:0
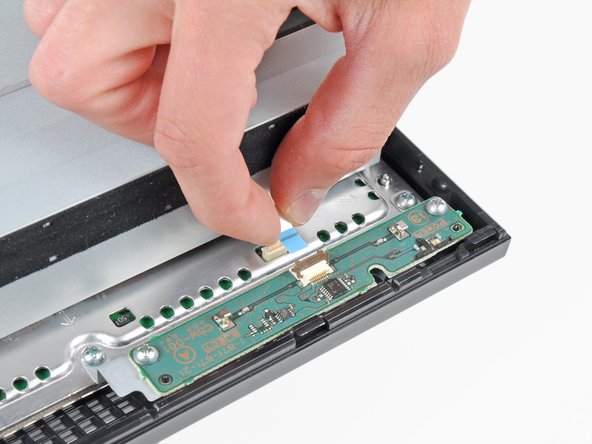
    • Use your fingernail to flip up the retaining flap on the control board ribbon cable socket.

    • Be sure you are prying up on the retaining flap, not the socket itself.

    • Pull the control board ribbon cable out of its socket.

  8. PlayStation 3 Control Board Replacement: crwdns2935265:08crwdnd2935265:01crwdnd2935265:01crwdne2935265:0
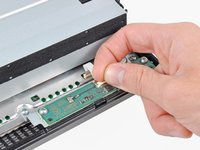
    • Remove the two 12 mm Phillips screws securing the control board to the lower case.

  9. PlayStation 3 Control Board Replacement: crwdns2935265:09crwdnd2935265:01crwdnd2935265:01crwdne2935265:0
    • Remove the control board from the lower case.

crwdns2915888:0crwdne2915888:0

To reassemble your device, follow these instructions in reverse order.

crwdns2935229:021crwdne2935229:0

crwdns2947821:0crwdne2947821:0

crwdns2947823:0crwdne2947823:0

Walter Galan

705,400 crwdns2915208:0crwdne2915208:0

crwdns2935297:01,203crwdne2935297:0

crwdns2947412:02crwdne2947412:0

I don't have the same ps3 as in the tutorial and my control board is broken. What can i do now?

McGarvey - crwdns2934203:0crwdne2934203:0

Could anyone tell me if they would have the connection pin of this board, as I would like to fit it into a motherboard.

Allan Fabian Santos Souza - crwdns2934203:0crwdne2934203:0

crwdns2917038:0crwdne2917038:0

crwdns2936625:0crwdne2936625:0:

crwdns2936751:024crwdne2936751:0 3

crwdns2936753:07crwdne2936753:0 41

crwdns2936753:030crwdne2936753:0 169

crwdns2942667:0crwdne2942667:0 51,678