crwdns2942213:0crwdne2942213:0
-
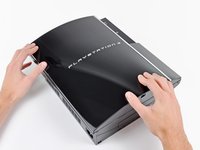
crwdns2935201:0crwdne2935201:0 crwdns2935203:0crwdne2935203:0
-
Use the tip of a spudger to remove the black rubber screw cover from the side of the PS3.
-
-
crwdns2935201:0crwdne2935201:0 crwdns2935203:0crwdne2935203:0
-
Remove the single 8.5 mm T10 Security Torx screw from the smart plate.
-
-
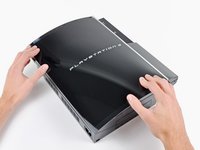
crwdns2935201:0crwdne2935201:0 crwdns2935203:0crwdne2935203:0
-
Pull the smart plate toward the hard drive bay, then lift it off the body of the PS3.
-
-
crwdns2935201:0crwdne2935201:0 crwdns2935203:0crwdne2935203:0
-
Remove the following seven screws:
-
Six 52 mm Phillips screws
-
One 30 mm Phillips screw
-
-
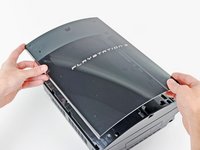
crwdns2935201:0crwdne2935201:0 crwdns2935203:0crwdne2935203:0
-
Lift the top cover from its rear edge and rotate it toward the front of the PS3.
-
Remove the top cover.
-
There is a plastic hook located in a hole on the top back right hand side corner. Carefully push the plastic hook a bit from the rear of the machine with a spudger to release the rear right of the casing.
-
-
-
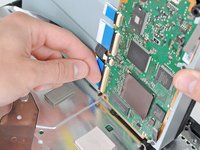
crwdns2935201:0crwdne2935201:0 crwdns2935203:0crwdne2935203:0
-
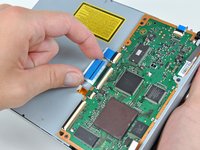
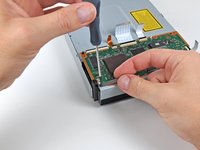
Disconnect the Blu-ray power cable from the motherboard.
-
-
crwdns2935201:0crwdne2935201:0 crwdns2935203:0crwdne2935203:0
-
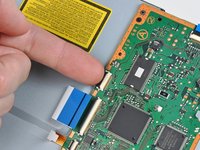
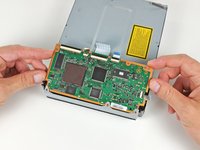
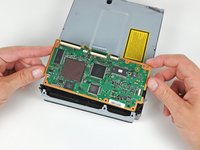
Lift the Blu-ray drive from the edge nearest the power supply and rotate it away from the chassis enough to access its ribbon cable.
-
-
crwdns2935201:0crwdne2935201:0 crwdns2935203:0crwdne2935203:0
-
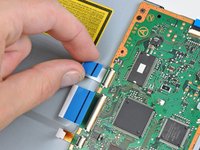
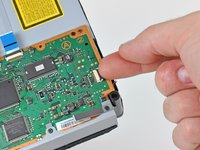
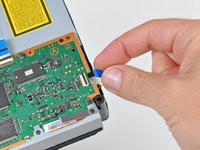
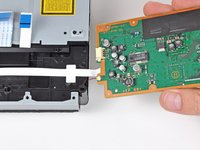
Use your fingernail to flip up the retaining flap on the Blu-ray ribbon cable socket.
-
Pull the ribbon cable out of its socket.
-
Remove the Blu-ray drive from the PS3.
-
-
crwdns2935201:0crwdne2935201:0 crwdns2935203:0crwdne2935203:0
-
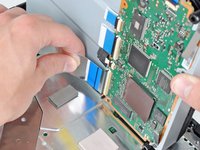
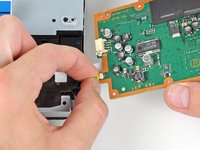
Using your fingernail, lift the flap on the ZIF connector holding the Blu-ray lens motor cable to the Blu-ray control daughterboard.
-
Pull the ribbon cable straight away from its socket on the daughterboard.
-
-
crwdns2935201:0crwdne2935201:0 crwdns2935203:0crwdne2935203:0
-
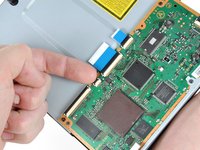
Using your fingernail, lift the flap on the ZIF connector holding the Blu-ray lens Data cable to the Blu-ray control daughterboard.
-
Pull the ribbon cable straight away from its socket on the daughterboard.
-
-
crwdns2935201:0crwdne2935201:0 crwdns2935203:0crwdne2935203:0
-
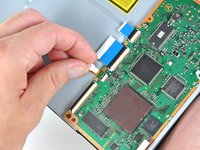
Using your fingernail, lift the flap on the ZIF connector holding the Blu-ray drive motor cable to the Blu-ray control daughterboard.
-
Pull the ribbon cable straight away from its socket on the daughterboard.
-
-
crwdns2935201:0crwdne2935201:0 crwdns2935203:0crwdne2935203:0
-
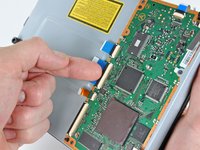
Using your fingernail, lift the flap on the ZIF connector holding the Blu-ray IR sensor cable to the Blu-ray control daughterboard.
-
Pull the ribbon cable straight away from its socket on the daughterboard.
-
-
crwdns2935201:0crwdne2935201:0 crwdns2935203:0crwdne2935203:0
-
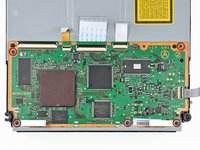
Remove the five 8.4mm phillips screws securing the Blu-ray control board to the Blu-ray drive.
-
-
crwdns2935201:0crwdne2935201:0 crwdns2935203:0crwdne2935203:0
-
Carefully lift the daughterboard from the rear edge.
-
Slide the daughterboard out from under the top case.
-
-
crwdns2935201:0crwdne2935201:0 crwdns2935203:0crwdne2935203:0
-
Carefully turn the daughterboard over, making sure to not tear the attached cable.
-
Pull the IR Sensor cable straight away from its socket on the board.
-
Blu-Ray drive remains.
-


crwdns2935221:0crwdne2935221:0
crwdns2935229:084crwdne2935229:0


crwdns2947412:07crwdne2947412:0
Is there a thermal pad replacement for the bond between the Optical Drive and the metal housing of around the motherboard? I can play Borderlands for hours, but if I use a disc based game or one with more intensive graphics the overheat light comes on. I’m thinking of reapplying the thermal paste with the squish method as well. Already by replacing the thermal pads (some were missing or just like clay) has reduced the fan noise. Any suggestions? The thermal pad currently is also claylike.
That's your GPU, not the disk drive.
The IR sensor cable broke ; how to fix it?
Id probably just buy a new disc drive for the ps3 fat, you can find them on sites like amazon and eBay for reasonable prices
John Doe -
I have a CECHC04 that does not accept discs. If i replace the BD drive with another one from a CECHC03 will it work, or do i have to keep my original daughterboard as well? What if my problem is the daughterboard?