crwdns2933423:0crwdne2933423:0

PlayStation 2 Top Cover Replacement

crwdns2942213:0crwdne2942213:0

  1. PlayStation 2 Top Cover Replacement, Top Cover: crwdns2935265:01crwdnd2935265:01crwdnd2935265:03crwdne2935265:0 PlayStation 2 Top Cover Replacement, Top Cover: crwdns2935265:01crwdnd2935265:02crwdnd2935265:03crwdne2935265:0 PlayStation 2 Top Cover Replacement, Top Cover: crwdns2935265:01crwdnd2935265:03crwdnd2935265:03crwdne2935265:0
    • Flip the PlayStation 2 over so it lays with the bottom of the device facing upwards.

    • Use the flat edge of a metal spudger to pry the eight flat screw covers out.

    • Remove the following eight screws securing the top cover to the bottom case:

    • Four 55.4 mm Philips screws

    • Four 18.0 mm Phillips screws

  2. PlayStation 2 Top Cover Replacement: crwdns2935265:02crwdnd2935265:01crwdnd2935265:01crwdne2935265:0
    • Some models have a different number of screws and feet. Remove all the feet and screws in the bottom of the case.

    • The 10 screw model has 6 screws in the bottom-most portion and 4 in the upper tray.

  3. PlayStation 2 Top Cover Replacement: crwdns2935265:03crwdnd2935265:01crwdnd2935265:01crwdne2935265:0
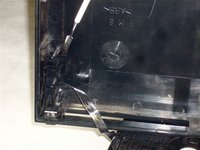
    • Peel the warranty sticker (located next to the main power switch) straight away from the case.

    • To avoid activating the VOID that may come up, heat it carefully to remove and replace it clean

  4. PlayStation 2 Top Cover Replacement: crwdns2935265:04crwdnd2935265:01crwdnd2935265:02crwdne2935265:0 PlayStation 2 Top Cover Replacement: crwdns2935265:04crwdnd2935265:02crwdnd2935265:02crwdne2935265:0
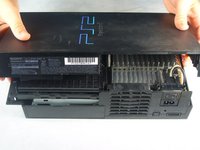
    • Flip the PlayStation 2 back to its original upside position.

    • Lift the top cover off the bottom case.

    • To facilitate the removal, it is recommended to pry open the half closer to the power switch first while rocking the top cover towards the front of the bottom case.

    • Carefully remove the power cord that attaches the top and bottom halves by disconnecting the power cord assembly from the top case.

crwdns2915888:0crwdne2915888:0

To reassemble your device, follow these instructions in reverse order.

crwdns2935229:031crwdne2935229:0

jwyoung

crwdns2935283:011/04/09crwdne2935283:0

2,809 crwdns2915208:0crwdne2915208:0

crwdns2935297:05crwdne2935297:0

crwdns2915084:0crwdne2915084:0

Cal Poly, Team 19-1, Maness Fall 2009 crwdns2935289:0Cal Poly, Team 19-1, Maness Fall 2009crwdne2935289:0

CPSU-MANESS-F09S19G1

crwdns2931471:04crwdne2931471:0

crwdns2935297:034crwdne2935297:0

crwdns2944067:00crwdne2944067:0

crwdns2917038:0crwdne2917038:0

crwdns2936625:0crwdne2936625:0:

crwdns2936751:024crwdne2936751:0 3

crwdns2936753:07crwdne2936753:0 30

crwdns2936753:030crwdne2936753:0 145

crwdns2942667:0crwdne2942667:0 18,332