crwdns2915892:0crwdne2915892:0
In the need that you need to replace the entire disc drive, here's what you need to do. You may need to do a little eBay perusing first, but when you find that replacement, these steps will show you how to remove your old one.
crwdns2942213:0crwdne2942213:0
crwdns2936621:0crwdne2936621:0
-
-
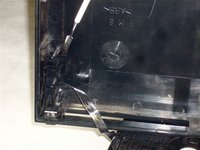
Use the flat edge of a metal spudger to pry the eight flat screw covers out.
-
Remove the following eight screws securing the top cover to the bottom case:
-
Four 55.4 mm Philips screws
-
Four 18.0 mm Phillips screws
-
-
-
Some models have a different number of screws and feet. Remove all the feet and screws in the bottom of the case.
-
The 10 screw model has 6 screws in the bottom-most portion and 4 in the upper tray.
-
-
-
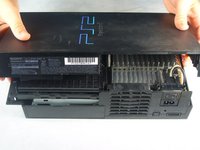
Peel the warranty sticker (located next to the main power switch) straight away from the case.
-
-
-
Lift the top cover off the bottom case.
-
Carefully remove the power cord that attaches the top and bottom halves by disconnecting the power cord assembly from the top case.
-
-
-
Remove the two 6.4 mm black Phillips screws securing the optical disc drive to the bottom case.
-
Lift and remove the optical disc drive straight up out of the bottom case.
-
-
-
Remove the two 14.6 mm gold-headed Phillips securing the controller ports to the bottom case.
-
-
-
-
Gently lift the controller port board out of its recess within the bottom case.
-
Pull the controller port ribbon cable straight away from its socket on the controller port board.
-
Remove the controller port board out of the bottom case.
-
-
-
Remove the two 14.6 mm gold Phillips screws securing the fan to the bottom case.
-
-
-
Pry and remove the expansion bay cover away from its posts on the bottom case.
-
-
-
Lift the motherboard assembly from its front edge and remove it from the lower case.
-
-
-
Remove the four 7.6 mm gold-head Phillips securing the power supply to the motherboard assembly.
-
-
-
Lift the expansion bay cage up off the motherboard assembly.
-
-
-
Pull the power board connector straight to lift it out of its socket on the power board.
-
-
-
Underneath where the power supply once was is a transparent piece of plastic. This is the heat shield, and it can now be removed.
-
-
-
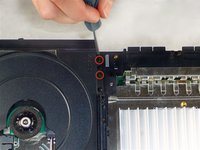
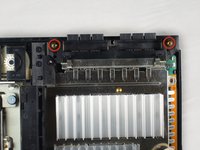
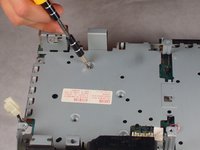
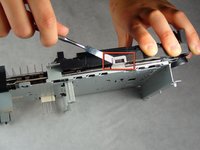
Remove the following screws securing the metal chassis to the logic board:
-
Seven 5.8 mm Phillips silver screws.
-
Two 7.4 mm Phillips gold screws.
-
-
-
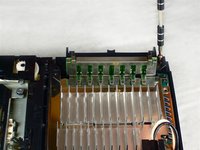
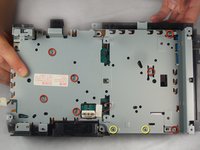
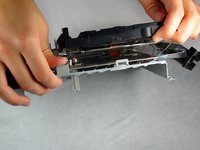
Carefully begin to lift out the disc drive.
-
-
-
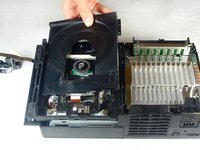
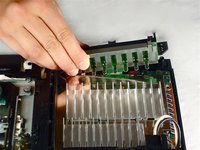
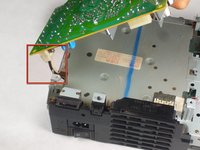
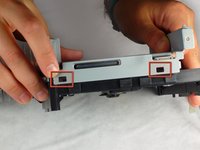
Remove the three blue ribbon cables and one orange ribbon cable by gently pulling on the blue plastic strips.
-
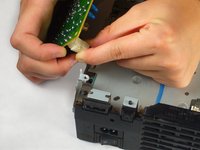
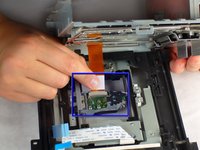
Carefully remove the orange ribbon cable from the laser by gently pulling on the white plastic strip.
-
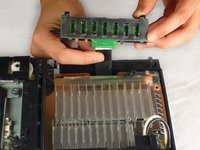
Now the disc drive is free to be removed.
-


To reassemble your device, follow these instructions in reverse order.
To reassemble your device, follow these instructions in reverse order.
crwdns2935221:0crwdne2935221:0
crwdns2935229:055crwdne2935229:0

crwdns2915084:0crwdne2915084:0

Cal Poly, Team 19-1, Maness Fall 2009 crwdns2935289:0Cal Poly, Team 19-1, Maness Fall 2009crwdne2935289:0
CPSU-MANESS-F09S19G1
crwdns2931471:04crwdne2931471:0
crwdns2935297:035crwdne2935297:0
crwdns2947412:04crwdne2947412:0
It helped out a lot I was able to fix my
What replacement drive would you recommend?
How do you know if the DVD drive is a 3 watt or 5 watt?
Are there any "New" DVD drives we could buy?