crwdns2933423:0crwdne2933423:0

Pioneer R1 LCD Display Replacement

crwdns2942213:0crwdne2942213:0

  1. Pioneer R1 LCD Display Replacement, LCD Display: crwdns2935265:01crwdnd2935265:01crwdnd2935265:01crwdne2935265:0
    • Insert your plastic spudger in the opening near the HDMI port.

    • Gently pry the back cover of the R1 from the the front by using the spudger along the edges.

    • Do not pull the back cover straight off the R1 as components of the speakers will be attached to both sides.

  2. Pioneer R1 LCD Display Replacement: crwdns2935265:02crwdnd2935265:01crwdnd2935265:01crwdne2935265:0
    • Lay the R1 flat like an open book.

    • This will prevent the speakers from becoming disconnected from the motherboard.

  3. Pioneer R1 LCD Display Replacement: crwdns2935265:03crwdnd2935265:01crwdnd2935265:01crwdne2935265:0
    • Remove the tape that is holding the motherboard to the display and covering the cable attachments.

    • Peel back just the end of this tape to free the front facing camera.

  4. Pioneer R1 LCD Display Replacement: crwdns2935265:04crwdnd2935265:01crwdnd2935265:01crwdne2935265:0
    • Remove the three 4 mm screws along the base of the motherboard with a Phillips #00 Screwdriver.

  5. Pioneer R1 LCD Display Replacement: crwdns2935265:05crwdnd2935265:01crwdnd2935265:01crwdne2935265:0
    • Disengage the two cable locks using your spudger or your finger nail.

    • Slide the cable free from the disengaged lock.

    • Do not pull across the cables as this may tear and permanently damage it.

  6. Pioneer R1 LCD Display Replacement: crwdns2935265:06crwdnd2935265:01crwdnd2935265:02crwdne2935265:0 Pioneer R1 LCD Display Replacement: crwdns2935265:06crwdnd2935265:02crwdnd2935265:02crwdne2935265:0
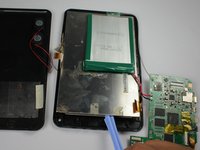
    • Insert your spudger between the LCD display and the touch screen.

    • Gently pry the LCD display from the the touchscreen by using the spudger along the edges.

    • Once disengaged, remove the LCD display from the touchscreen.

  7. Pioneer R1 LCD Display Replacement: crwdns2935265:07crwdnd2935265:01crwdnd2935265:01crwdne2935265:0
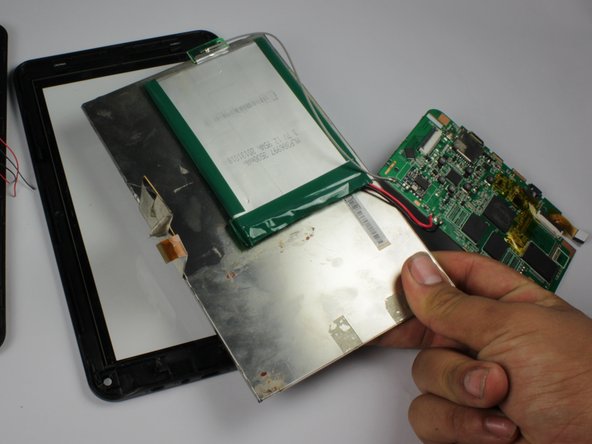
    • Slide a strong thin object, like a thin spudger, between the battery and the display.

    • Slide the object along the length of the battery to remove it from the display.

    • The adhesive holding the battery in place is strong and the battery is quite soft. Take care not to break open the battery.

  8. Pioneer R1 LCD Display Replacement: crwdns2935265:08crwdnd2935265:01crwdnd2935265:01crwdne2935265:0
    • Carefully pry off the component that is taped to the LCD display at the top of the R1.

crwdns2915888:0crwdne2915888:0

To reassemble your device, follow these instructions in reverse order.

crwdns2935227:0crwdne2935227:0
Christopher Rosario

crwdns2935283:002/17/15crwdne2935283:0

411 crwdns2915208:0crwdne2915208:0

crwdns2935297:04crwdne2935297:0

crwdns2915084:0crwdne2915084:0

San Diego State, Team 1-1, Sheppard Winter 2015 crwdns2935289:0San Diego State, Team 1-1, Sheppard Winter 2015crwdne2935289:0

SDSU-SHEPPARD-W15S1G1

crwdns2931471:03crwdne2931471:0

crwdns2935297:07crwdne2935297:0

crwdns2944067:00crwdne2944067:0

crwdns2917038:0crwdne2917038:0

crwdns2936625:0crwdne2936625:0:

crwdns2936751:024crwdne2936751:0 0

crwdns2936753:07crwdne2936753:0 0

crwdns2936753:030crwdne2936753:0 7

crwdns2942667:0crwdne2942667:0 624