crwdns2915892:0crwdne2915892:0
This guide will show you how to remove and replace a dead battery.
crwdns2942213:0crwdne2942213:0
-
-
Unscrew all twelve Hex Head 1.5 (Length-3/8", Head- 1/8") screws using a 1.5mm hex screwdriver.
-
-
-
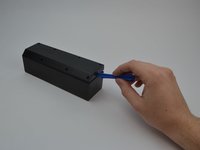
Use a plastic opening tool to pry off the face plate.
-
-
-
Remove the rubber casing by using your fingers to pull off. Be sure not tear or rip rubber casing.
-
-
-
Flip the device upside down and remove all eight Phillips (Length-3/8", Head-1/8") Screws using a standard #1 Phillips screwdriver.
-
-
-
-
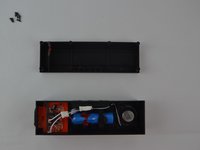
Use plastic opening tool to pry off back plate.
-
Move the plastic opening tool along the the device to further pry open the device.
-
-
-
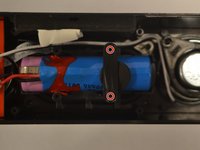
Identify the two Phillips (Length-5/16", Head-1/8") screws holding the battery in place and remove them using a #1 screwdriver.
-
-
-
Remove the ICR18650-26M battery from its position by pulling upwards and out of the casing.
-
-
-
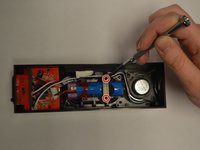
identify the two points that will need soldering.
-
-
-
In this step you will perform the soldering to remove the positive(red) and negative(black) wires).
-
-
-
Once the solder is removed your battery is now removed and can be replaced with the new battery.
Why not cut and splice the wires instead of desoldering from the mother board? Seems a lot easier.
-


To reassemble your device, follow these instructions in reverse order.
To reassemble your device, follow these instructions in reverse order.
crwdns2915084:0crwdne2915084:0

USF Tampa, Team 11-3, Cheng Spring 2016 crwdns2935289:0USF Tampa, Team 11-3, Cheng Spring 2016crwdne2935289:0
USFT-CHENG-S16S11G3
crwdns2931471:05crwdne2931471:0
crwdns2935297:06crwdne2935297:0
crwdns2947412:02crwdne2947412:0
Battery Replacement of the Photove Loudspeaker PH-BTW55
A very good description and easy to do, but: to replace a Battery to have to use a soldering iron is behind every tecnologie - must be „Made in China". Would I have know this on the first place I never would have bought this and I never will!
Why can’t you just cut the wires and then solder the cut wires together rather than de-soldering from the board?