crwdns2915892:0crwdne2915892:0
This guide will show you how to remove and replace a dead battery.
crwdns2942213:0crwdne2942213:0
-
-
Unscrew all twelve Hex Head 1.5 (Length-3/8", Head- 1/8") screws using a 1.5mm hex screwdriver.
-
-
-
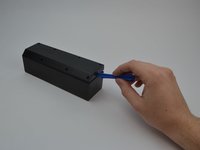
Use a plastic opening tool to pry off the face plate.
-
-
-
Remove the rubber casing by using your fingers to pull off. Be sure not tear or rip rubber casing.
-
-
-
Flip the device upside down and remove all eight Phillips (Length-3/8", Head-1/8") Screws using a standard #1 Phillips screwdriver.
-
-
-
-
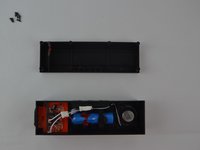
Use plastic opening tool to pry off back plate.
-
Move the plastic opening tool along the the device to further pry open the device.
-
-
-
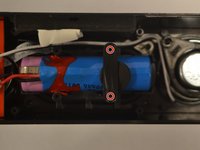
Identify the two Phillips (Length-5/16", Head-1/8") screws holding the battery in place and remove them using a #1 screwdriver.
-
-
-
Remove the ICR18650-26M battery from its position by pulling upwards and out of the casing.
-
-
-
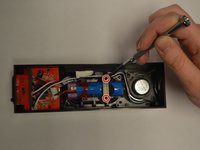
identify the two points that will need soldering.
-
-
-
In this step you will perform the soldering to remove the positive(red) and negative(black) wires).
-
-
-
Once the solder is removed your battery is now removed and can be replaced with the new battery.
-


To reassemble your device, follow these instructions in reverse order.
To reassemble your device, follow these instructions in reverse order.
crwdns2915084:0crwdne2915084:0

USF Tampa, Team 11-3, Cheng Spring 2016 crwdns2935289:0USF Tampa, Team 11-3, Cheng Spring 2016crwdne2935289:0
USFT-CHENG-S16S11G3
crwdns2931471:05crwdne2931471:0
crwdns2935297:06crwdne2935297:0
crwdns2947412:02crwdne2947412:0
Battery Replacement of the Photove Loudspeaker PH-BTW55
A very good description and easy to do, but: to replace a Battery to have to use a soldering iron is behind every tecnologie - must be „Made in China". Would I have know this on the first place I never would have bought this and I never will!
Why can’t you just cut the wires and then solder the cut wires together rather than de-soldering from the board?