crwdns2933423:0crwdne2933423:0

Philips TAS7505 Outer Shell Disassembly

crwdns2942213:0crwdne2942213:0

  1. Philips TAS7505 Outer Shell Disassembly, Philips TAS7505 Outer Shell Disassembly: crwdns2935265:01crwdnd2935265:01crwdnd2935265:02crwdne2935265:0 Philips TAS7505 Outer Shell Disassembly, Philips TAS7505 Outer Shell Disassembly: crwdns2935265:01crwdnd2935265:02crwdnd2935265:02crwdne2935265:0
    • Make sure the speaker is turned off before you begin the disassembly.

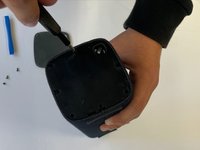
    • Turn the speaker upside down. You will see a rubber base. Use an opening tool to lift up the sides to expose the screws.

  2. Philips TAS7505 Outer Shell Disassembly: crwdns2935265:02crwdnd2935265:01crwdnd2935265:03crwdne2935265:0 Philips TAS7505 Outer Shell Disassembly: crwdns2935265:02crwdnd2935265:02crwdnd2935265:03crwdne2935265:0 Philips TAS7505 Outer Shell Disassembly: crwdns2935265:02crwdnd2935265:03crwdnd2935265:03crwdne2935265:0
    • There will be 4 exposed screws. Make sure to use the Phillips #0 Screwdriver.

    • When the screws are removed, you can use an opening tool to take off the plastic cover.

  3. Philips TAS7505 Outer Shell Disassembly: crwdns2935265:03crwdnd2935265:01crwdnd2935265:03crwdne2935265:0 Philips TAS7505 Outer Shell Disassembly: crwdns2935265:03crwdnd2935265:02crwdnd2935265:03crwdne2935265:0 Philips TAS7505 Outer Shell Disassembly: crwdns2935265:03crwdnd2935265:03crwdnd2935265:03crwdne2935265:0
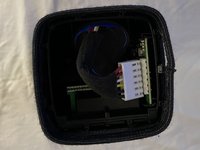
    • Now that you have removed this cover, there is another cover. This cover has a total of 9 screws that can be removed with a Philips #0 screwdriver.

    • Once all these screws are removed, you can take off the cover

  4. Philips TAS7505 Outer Shell Disassembly: crwdns2935265:04crwdnd2935265:01crwdnd2935265:03crwdne2935265:0 Philips TAS7505 Outer Shell Disassembly: crwdns2935265:04crwdnd2935265:02crwdnd2935265:03crwdne2935265:0 Philips TAS7505 Outer Shell Disassembly: crwdns2935265:04crwdnd2935265:03crwdnd2935265:03crwdne2935265:0
    • You can now see the inside of the speaker but you aren't done yet.

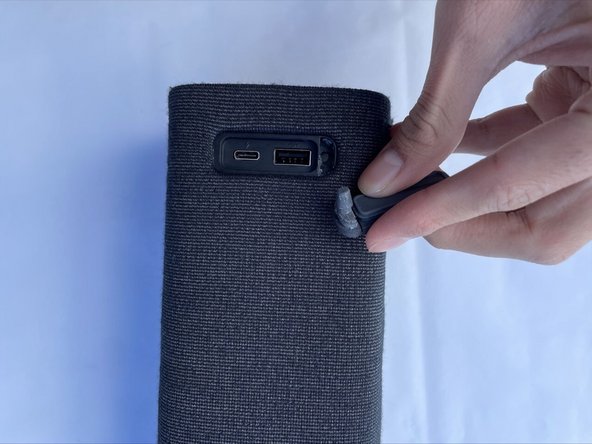
    • Remove both rubber stands that hold up the device horizontally (one of these stands is a cover for the USB ports).

  5. Philips TAS7505 Outer Shell Disassembly: crwdns2935265:05crwdnd2935265:01crwdnd2935265:01crwdne2935265:0
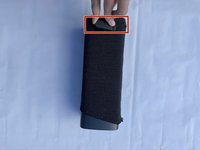
    • Once you pull these out, you can pull the whole sleeve to expose the infrastructure of the device.

crwdns2915888:0crwdne2915888:0

To reassemble your device, follow these instructions in reverse order.

Joseph Hernandez

crwdns2935283:009/26/22crwdne2935283:0

171 crwdns2915208:0crwdne2915208:0

crwdns2935295:0crwdne2935295:0

crwdns2915084:0crwdne2915084:0

CSU Los Angeles, Team 5-2, Adachi Fall 2022 crwdns2935289:0CSU Los Angeles, Team 5-2, Adachi Fall 2022crwdne2935289:0

CSULA-ADACHI-F22S5G2

crwdns2931471:05crwdne2931471:0

crwdns2935297:05crwdne2935297:0

crwdns2944067:00crwdne2944067:0

crwdns2917038:0crwdne2917038:0

crwdns2936625:0crwdne2936625:0:

crwdns2936751:024crwdne2936751:0 0

crwdns2936753:07crwdne2936753:0 2

crwdns2936753:030crwdne2936753:0 22

crwdns2942667:0crwdne2942667:0 361