crwdns2915892:0crwdne2915892:0
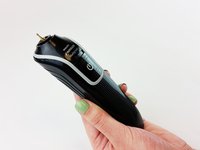
This guide will demonstrate how to change the battery of a Philips Norelco MultiGroom 3100. Tear down/reassembly requires a plastic spudger and soldering equipment.
crwdns2942213:0crwdne2942213:0
-
-
Remove the comb from the top of the trimmer.
-
-
-
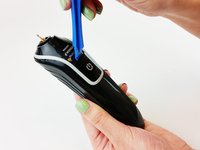
Grip the attachment and twist it counterclockwise until you hear a click.
-
Pull the attachment up to remove it from the trimmer.
-
-
-
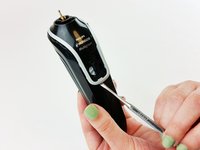
Hold the trimmer upright so it is facing you.
-
Insert the plastic opening tool in the gap at the top of the power button.
-
-
-
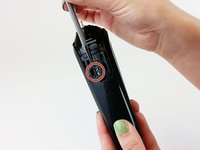
Apply pressure to pry off the power button.
-
-
-
-
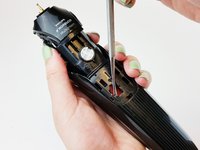
Insert the spudger into the bottom of the gray bezel and begin to gently pry it off.
-
-
-
Insert the spudger in the indicated hole and apply a tilting force to loosen the outer casing.
-
Pull upward on the top of the inner housing to remove it from the outer casing.
-
-
-
Grab the upper casing firmly and pull to seperate from lower casing.
-
-
-
Once upper casing is removed, use plastic spudger and insert into the side tabs to free battery casing.
-
Once tabs are freed, pull battery casing from upper casing.
-
-
-
Insert plastic spudger into battery brackets individually. "Wiggle" the bracket out of place
-
-
-
Use a soldering gun and apply heat to the battery contact tabs until solder is malleable.
-
Once solder is malleable, carefully insert a plastic spudger beneath the tab and over the battery to pry battery away from the contact tab.
-
-
-
Once contact tabs have been removed from the battery, the battery can now be removed by hand or by use of a plastic spudger.
-
Locate new battery and prepare for soldering in next step.
-
-
-
Make sure battery is safely secured and re-solder the battery contact tab onto new battery.
-
Check that contact tab is re-soldered onto the original solder.
-
Once solder is dried and cool, toggle the power switch (not the power button) to check that the device is functional.
-


crwdns2935221:0crwdne2935221:0
crwdns2935229:016crwdne2935229:0
crwdns2915084:0crwdne2915084:0

IUPUI, Team S1-G5, Freund Fall 2017 crwdns2935289:0IUPUI, Team S1-G5, Freund Fall 2017crwdne2935289:0
IUPUI-FREUND-F17S1G5
crwdns2931471:04crwdne2931471:0
crwdns2935297:02crwdne2935297:0
crwdns2947412:010crwdne2947412:0
Capitalize Battery in the Title
Go ahead and upload the picture of the device.
Be sure to submit to iFixit for their comments when done.
Also include prerequisite guides
For the Multigroom QG3380 (which I bought at Costco in Canada), there are some differences. Don’t remove the power button – not needed. Pry off the silver frame – very hard not to break some clips. It uses two 750 mAh AAA NiMH batteries (Suppo HSY-AAA0). I’ve ordered 900 mAh batteries with clips to replace these.
Where did you order the replacement batteries ?
I had mine from Japan, QG3380 too many clips broke off and indeed don’t remove the power button on that one.