crwdns2942213:0crwdne2942213:0
-
-
Remove the comb from the top of the trimmer.
-
-
-
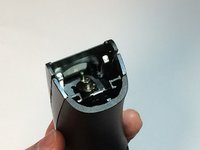
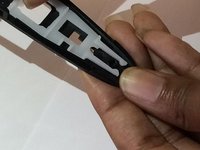
Place your thumb underneath the blade and push upward to remove it.
-
-
-
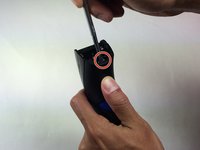
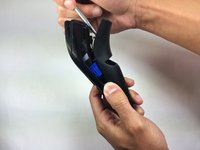
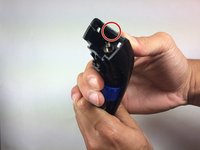
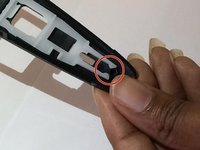
Hold trimmer towards you as shown in the diagram.
-
Insert your prying tool/metal spudger into the marked area.
-
-
-
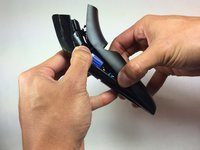
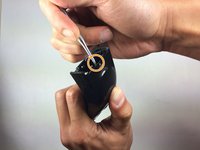
Apply gentle pressure and begin prying open the back panel.
-
Separate the panel one notch at a time. Listen carefully as you're prying the panel apart and notice each individual notch release.
-
-
-
-
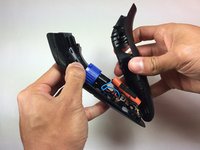
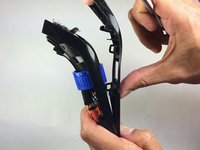
Pull the trimmer apart using your hands once the panel is at least halfway apart.
-
Pull the wires attached to the battery off of the power connectors before completely removing the back panel.
-
-
-
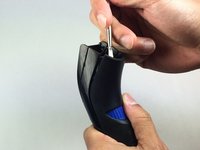
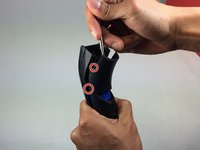
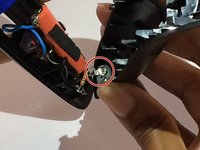
Hold the trimmer towards you.
-
Place the metal spudger tool in the marked area.
-
-
-
Apply gentle pressure and begin prying the front panel.
-
Separate the front panel one notch at a time.
-
-
-
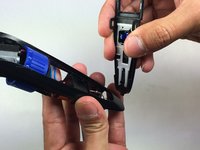
Pull the trimmer apart using your hands once the panel is at least halfway apart.
-
-
-
Remove the front panel completely from the rest of the beard trimmer.
-
-
-
Rotate the front panel so that the power switch is facing away from you.
-
-
-
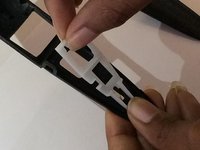
Push the white plastic frame upward to remove it from the notch.
-
Pull the white plastic frame off the front panel of the beard trimmer.
-
-
-
Remove the power switch from the front panel once the white plastic frame is removed.
-


To reassemble your device, follow these instructions in reverse order.
To reassemble your device, follow these instructions in reverse order.
crwdns2935221:0crwdne2935221:0
crwdns2935227:0crwdne2935227:0
crwdns2915084:0crwdne2915084:0

USF Tampa, Team 15-2, Blackwell Fall 2015 crwdns2935289:0USF Tampa, Team 15-2, Blackwell Fall 2015crwdne2935289:0
USFT-BLACKWELL-F15S15G2
crwdns2931471:04crwdne2931471:0
crwdns2935297:014crwdne2935297:0