crwdns2915892:0crwdne2915892:0
We will show how to replace the housing of the device, on both the front or rear. This guide will be useful if the housing is cracked or broken, not so much so if the device itself does not work. No special skills are required for this easy fix! Prior to beginning the assembly please purchase replacements from the links provided on the troubleshooting page.
crwdns2942213:0crwdne2942213:0
-
-
Remove the two T8 2 mm Phillips screws on the back housing.
-
-
-
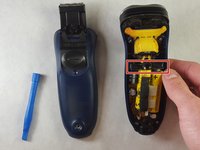
Separate the back housing and the front housing using the plastic opening tool.
-
-
-
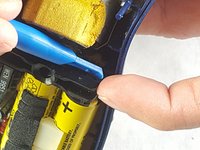
Using the plastic opening tool, carefully pry the inside of the middle bracket towards the outside of the housing in order to remove it.
-
-
-
-
Remove the two T8 2 mm screws near the bottom of the device.
-
Remove the bracket the screws were holding in place.
-
-
-
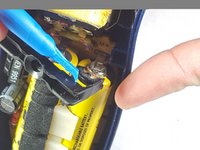
Insert the plastic opening tool into the charging port and push inwards.
-
-
-
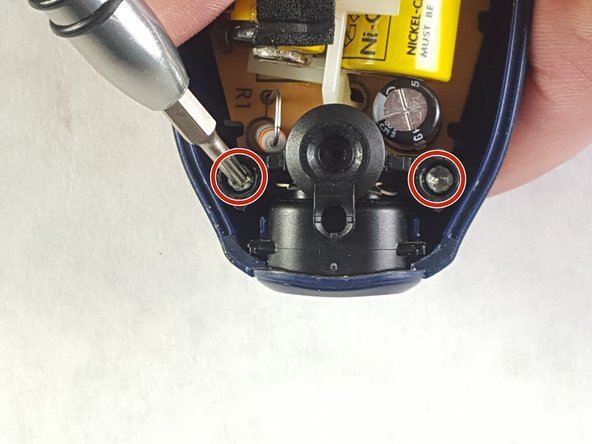
Remove the two T8 2 mm screws near the top of the device shown here.
-
-
-
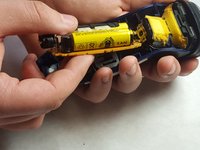
After sliding it forward, the whole assembly will separate from the rear housing.
-
-
-
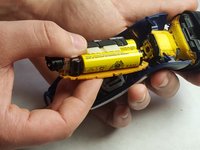
The housing and the inside assembly should be completely separated.
-


Now, you can put the new housing on. To reassemble your device, follow these instructions in reverse order.
Now, you can put the new housing on. To reassemble your device, follow these instructions in reverse order.
crwdns2915084:0crwdne2915084:0

IUPUI, Team 3-2, Harley Spring 2016 crwdns2935289:0IUPUI, Team 3-2, Harley Spring 2016crwdne2935289:0
IUPUI-HARLEY-S16S3G2
crwdns2931471:04crwdne2931471:0
crwdns2935297:06crwdne2935297:0