crwdns2915892:0crwdne2915892:0
The housing cover must be removed to clean the mechanics. You can also open it to replace the sewing lamp if you do not have the special tool for this (any more).
crwdns2942213:0crwdne2942213:0
-
crwdns2935267:0crwdne2935267:0Mahi Driver Kit - 48 Bit Driver Kit$39.95
-
The top cover is only held in place by a screw (Torx T25H) with washer. The screw is not screwed into the cover, but only clamps it in place (with the washer).
-
To see the screw, fold up the handle of the sewing machine. The screw is located approximately in the middle of the back half of the gap between the sewing machine arm and the cover on the left.
-
Use a Torx T25H screwdriver to loosen the screw.
-
-
-
-
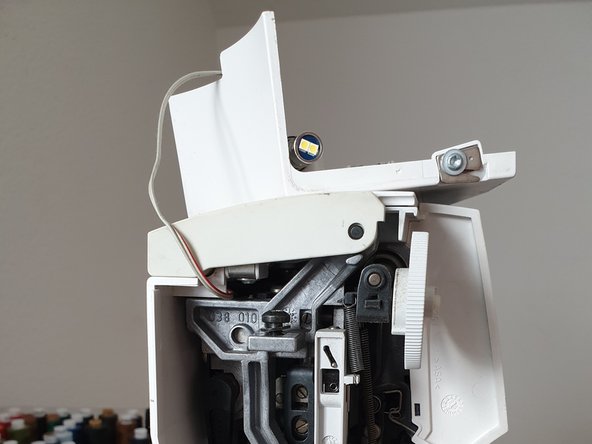
Open the cover as if you were opening a book.
-
At the back runs the cable for the sewing light; be careful not to accidentally tear it off.
-
Release the cable for the sewing light from its 4 retaining clips on the inside of the cover with your fingers.
-
Place the cover on the sewing machine arm so that the cable is not strained.
-
-
-
To be able to reattach the cover later, align it with the housing and reinsert the cable for the sewing light into the four retaining clips.
-
Loosen the screw that clamps the cover a little more.
-
Slide the washer up to the screw head so that you can slide the plastic part of the cover underneath it. You may have to hold the washer up while doing this. This is a bit tricky; it works quite well with the pointed tweezers.
-
Replace the cover and push it as close as possible to the right side of the sewing machine arm.
-
Use a Torx T25H screwdriver (or the blunt tweezers) to retighten the screw.
-


Congrats! You’re done!
Congrats! You’re done!
crwdns2934873:0crwdne2934873:0
100%

crwdns2934883:0carlotremoladacrwdne2934883:0 crwdns2934875:0crwdne2934875:0
crwdns2934877:0crwdne2934877:0 ›

crwdns2915084:0crwdne2915084:0

German Translators crwdns2935289:0German Translatorscrwdne2935289:0
Community
crwdns2931471:042crwdne2931471:0
crwdns2935297:01,539crwdne2935297:0