crwdns2933423:0crwdne2933423:0

Parrot Skycontroller 2 Power Port Replacement

crwdns2942213:0crwdne2942213:0

  1. Parrot Skycontroller 2 Power Port  Replacement, Power Port: crwdns2935265:01crwdnd2935265:01crwdnd2935265:03crwdne2935265:0 Parrot Skycontroller 2 Power Port  Replacement, Power Port: crwdns2935265:01crwdnd2935265:02crwdnd2935265:03crwdne2935265:0 Parrot Skycontroller 2 Power Port  Replacement, Power Port: crwdns2935265:01crwdnd2935265:03crwdnd2935265:03crwdne2935265:0
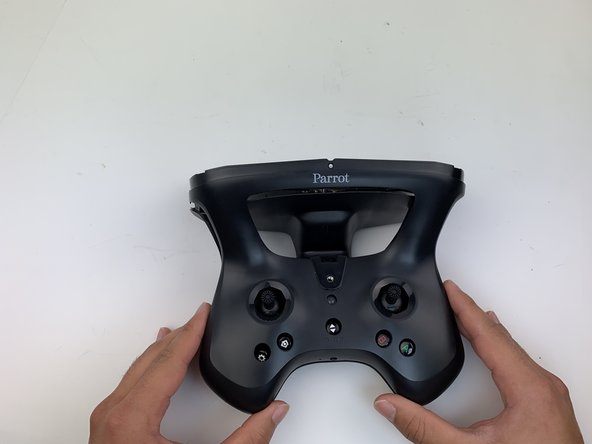
    • Flip the controller upside down.

  2. Parrot Skycontroller 2 Power Port  Replacement: crwdns2935265:02crwdnd2935265:01crwdnd2935265:01crwdne2935265:0
    • Remove one 9mm screw using a #4 flathead screwdriver.

  3. Parrot Skycontroller 2 Power Port  Replacement: crwdns2935265:03crwdnd2935265:01crwdnd2935265:03crwdne2935265:0 Parrot Skycontroller 2 Power Port  Replacement: crwdns2935265:03crwdnd2935265:02crwdnd2935265:03crwdne2935265:0 Parrot Skycontroller 2 Power Port  Replacement: crwdns2935265:03crwdnd2935265:03crwdnd2935265:03crwdne2935265:0
    • Insert the plastic opening tool into the top of the battery cover and pry upwards to lift the cover.

    • Remove the cover by pulling up and out.

  4. Parrot Skycontroller 2 Power Port  Replacement: crwdns2935265:04crwdnd2935265:01crwdnd2935265:03crwdne2935265:0 Parrot Skycontroller 2 Power Port  Replacement: crwdns2935265:04crwdnd2935265:02crwdnd2935265:03crwdne2935265:0 Parrot Skycontroller 2 Power Port  Replacement: crwdns2935265:04crwdnd2935265:03crwdnd2935265:03crwdne2935265:0
    • Pull the connectors out by gently pushing the tabs and pulling up on the connector.

    • Disconnect the battery from the remote by pressing the white tab and pulling apart.

  5. Parrot Skycontroller 2 Power Port  Replacement: crwdns2935265:05crwdnd2935265:01crwdnd2935265:02crwdne2935265:0 Parrot Skycontroller 2 Power Port  Replacement: crwdns2935265:05crwdnd2935265:02crwdnd2935265:02crwdne2935265:0
    • Remove the battery from it's brackets by pulling up gently on the ends of the battery.

    • Some force may be required to separate the battery from it's brackets.

  6. Parrot Skycontroller 2 Power Port  Replacement: crwdns2935265:06crwdnd2935265:01crwdnd2935265:01crwdne2935265:0
    • Remove the seven black 11mm screws using the Torx TR6 screwdriver.

    • There is a hidden screw located behind the sticker in the battery compartment.

    • Pull back the sticker with your finger nail and remove the one black 11mm screw using the Torx TR6 screwdriver.

  7. Parrot Skycontroller 2 Power Port  Replacement: crwdns2935265:07crwdnd2935265:01crwdnd2935265:03crwdne2935265:0 Parrot Skycontroller 2 Power Port  Replacement: crwdns2935265:07crwdnd2935265:02crwdnd2935265:03crwdne2935265:0 Parrot Skycontroller 2 Power Port  Replacement: crwdns2935265:07crwdnd2935265:03crwdnd2935265:03crwdne2935265:0
    • Remove the seven silver 4mm screws from around the edge of the top panel using the Torx TR6 Screwdriver.

    • The opposite side to the third picture has a screw located on each side of the USB port.

  8. Parrot Skycontroller 2 Power Port  Replacement: crwdns2935265:08crwdnd2935265:01crwdnd2935265:01crwdne2935265:0
    • Remove the battery compartment plate by pulling up and out.

  9. Parrot Skycontroller 2 Power Port  Replacement: crwdns2935265:09crwdnd2935265:01crwdnd2935265:01crwdne2935265:0
    • Remove the top plate by pushing on the corners with your hand.

    • Be careful to not pull too hard on the cable.

  10. Parrot Skycontroller 2 Power Port  Replacement: crwdns2935265:010crwdnd2935265:01crwdnd2935265:03crwdne2935265:0 Parrot Skycontroller 2 Power Port  Replacement: crwdns2935265:010crwdnd2935265:02crwdnd2935265:03crwdne2935265:0 Parrot Skycontroller 2 Power Port  Replacement: crwdns2935265:010crwdnd2935265:03crwdnd2935265:03crwdne2935265:0
    • Remove the face plate by pulling up and out.

  11. Parrot Skycontroller 2 Power Port  Replacement: crwdns2935265:011crwdnd2935265:01crwdnd2935265:03crwdne2935265:0 Parrot Skycontroller 2 Power Port  Replacement: crwdns2935265:011crwdnd2935265:02crwdnd2935265:03crwdne2935265:0 Parrot Skycontroller 2 Power Port  Replacement: crwdns2935265:011crwdnd2935265:03crwdnd2935265:03crwdne2935265:0
    • Make sure the controller is flat, then proceed to desolder the power port.

    • Desolder the four connection points surrounding the charging port.

    • Remove the power port from the controller.

    • For help with soldering best practices, check out our How to Solder and Desolder Connections guide.

    • Excessive heat can damage the power port, so do not apply the soldering iron to the component for too long.

crwdns2915888:0crwdne2915888:0

To reassemble your device, follow these instructions in reverse order.

crwdns2935227:0crwdne2935227:0

Jonathan Epperly

crwdns2935283:001/26/20crwdne2935283:0

193 crwdns2915208:0crwdne2915208:0

crwdns2935295:0crwdne2935295:0

crwdns2915084:0crwdne2915084:0

Embry-Riddle Aeronautical University, Team S6-G1, Watkins Spring 2020 crwdns2935289:0Embry-Riddle Aeronautical University, Team S6-G1, Watkins Spring 2020crwdne2935289:0

ERAU-WATKINS-S20S6G1

crwdns2931471:04crwdne2931471:0

crwdns2935297:05crwdne2935297:0

crwdns2944067:00crwdne2944067:0

crwdns2917038:0crwdne2917038:0

crwdns2936625:0crwdne2936625:0:

crwdns2936751:024crwdne2936751:0 0

crwdns2936753:07crwdne2936753:0 1

crwdns2936753:030crwdne2936753:0 8

crwdns2942667:0crwdne2942667:0 423