crwdns2915892:0crwdne2915892:0
This guide provides the steps to remove the back cover. This process is necessary to access many of the components inside.
crwdns2942213:0crwdne2942213:0
-
-
Locate the bay door for the battery on the left side of the laptop.
-
-
-
Slide the latch to the right and then down to unlock it.
-
Pull out the battery.
-
-
-
Flip the device upside down with the handle facing away from you.
-
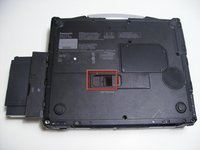
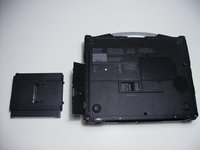
Open the optical drive bay by sliding its latch to the right.
-
Locate optical drive release mechanism on the bottom of the laptop.
-
-
-
-
Push the exposed switch to the left to eject the optical drive.
-
-
-
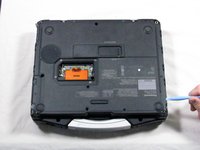
Begin by turning the laptop upside down with the handle towards you.
-
Use a Phillips size 0 screwdriver to remove the 4 screws holding down the ram cover.
-
-
-
Remove the panel and set it aside.
-
Use a Phillips size 0 screwdriver to remove these 8 small screws.
-
-
-
Use a Phillips size 1 screwdriver to remove the remaining 8 screws.
-
-
-
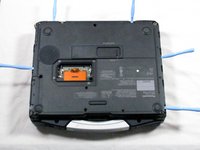
Use a plastic opening tool to release, but NOT remove, the back cover because it is sealed with adhesive.
-
-
-
Slowly lift the cover so that you can disconnect the red and white wires connecting the speaker to the sound card.
-
-
-
Now the back cover should be off and you can access the inside of the casing.
-
To reassemble your device, follow these instructions in reverse order.
To reassemble your device, follow these instructions in reverse order.
crwdns2935221:0crwdne2935221:0
crwdns2935229:03crwdne2935229:0
crwdns2947410:01crwdne2947410:0
thanks for this crucial tuatorial >


