crwdns2915892:0crwdne2915892:0
Use this guide to replace the LCD screen which is housed in the camera's back cover.
crwdns2942213:0crwdne2942213:0
-
-
Remove the eleven 3 mm screws securing the covers to the ZS3.
-
-
-
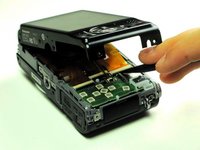
Use the flat end of a spudger to pry apart the back cover from the rest of the unit as shown.
-
-
-
-
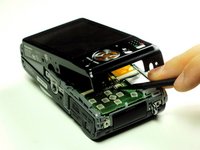
Using your fingernail or a spudger, flip up the ZIF locking flap on the two LCD ribbon cable sockets that connect the back cover to the rest of the unit.
-
-
-
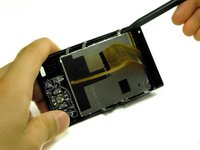
Remove the two LCD board ribbon cables out of their sockets.
-
-
-
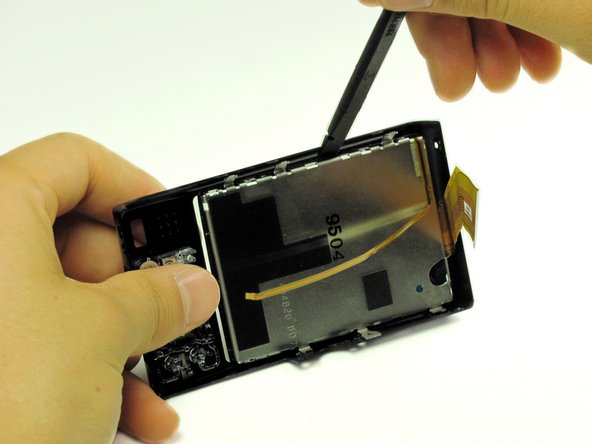
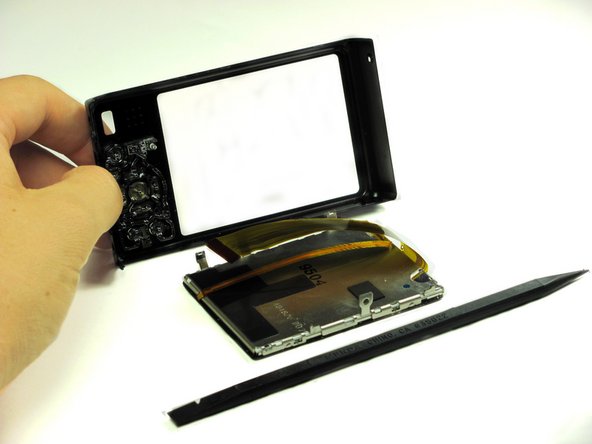
Take the back panel and use the flat end of the spudger to pry the LCD screen from the back cover.
-


To reassemble your device, follow these instructions in reverse order.
crwdns2935221:0crwdne2935221:0
crwdns2935229:03crwdne2935229:0
crwdns2935287:0crwdne2935287:0

Cal Poly, Team 13-60, Johann Spring 2013 crwdns2935289:0Cal Poly, Team 13-60, Johann Spring 2013crwdne2935289:0
CPSU-JOHANN-S13S13G60
crwdns2931471:03crwdne2931471:0
crwdns2935297:010crwdne2935297:0
crwdns2947412:02crwdne2947412:0
It would be helpful if images of an inoperating screen were included. My screen shows many multi-colored lines - is it a broken screen or a bad board. The camera still shoots pictures.
Really useful guide. However, it's not quite complete: you do have to take the screen assembly apart once you've removed it from the back cover. It's not that difficult to do with the spudger, as all the metal bits around the screen just prise apart, but the 10-15 minutes quoted turned into an hour or so for me once I'd got it all back together again.