crwdns2942213:0crwdne2942213:0
-
-
Remove the battery and memory card from the device.
-
-
-
Remove 4 screws from the right side of the camera.
-
There are two 3.4mm screws at the top.
-
There are two 2.2mm screws at the bottom.
-
-
-
Remove the single 3.4mm screw on the left side of the camera.
-
-
-
-
Remove 5 screws from the base of the camera.
-
There are two 2.2mm screws next to the battery compartment.
-
There are three 4mm screws around the tripod mount.
-
-
-
Slowly slide the back cover away from the device
-
-
-
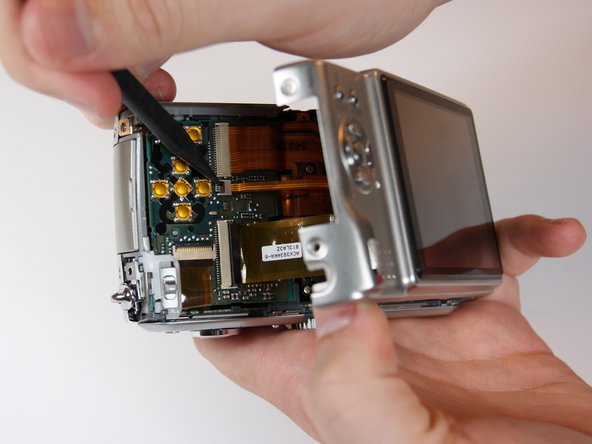
Detach both ribbon cables using a spudger.
-
Use the tip of the spudger to lift the black clip upward, unlocking the ribbon cable.
-
-
-
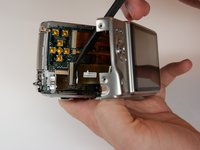
Remove the back casing from the camera.
-
-
-
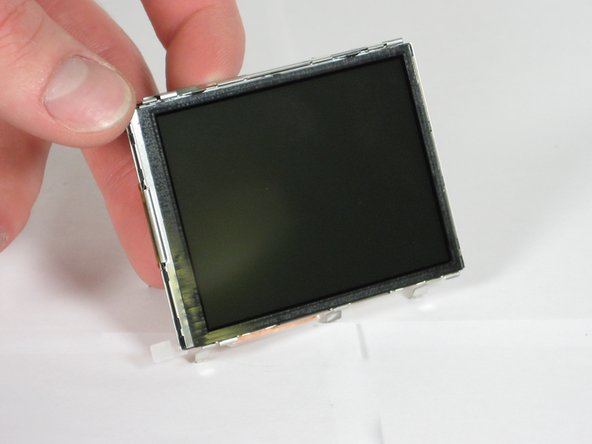
Use a spudger to release the 3 clips between the LCD case and housing.
-
Put the tip of the spudger in the gap between the clip and housing, then lift up gently to unclip.
-
Gently lift the LCD from the case, making sure none of the 3 clips reattach.
-


To reassemble your device, follow these instructions in reverse order.
crwdns2935221:0crwdne2935221:0
crwdns2935229:015crwdne2935229:0
crwdns2935287:0crwdne2935287:0

Cal Poly, Team 9-21, Regan Fall 2010 crwdns2935289:0Cal Poly, Team 9-21, Regan Fall 2010crwdne2935289:0
CPSU-REGAN-F10S9G21
crwdns2931471:04crwdne2931471:0
crwdns2935297:021crwdne2935297:0
crwdns2947412:05crwdne2947412:0
If you want to go the easy route as shown above, then buy the LCD/backlight kit from Panasonic. Otherwise, if you buy the bare LCD (99% of online retails sell the bare LCD, no kit) then you have a 30 minute install on your hands. The bare LCD is nested within a metal/plastic frame which is nested in the backlight frame which is where the above tutorial ends. You'll need dextrous fingers to get the frames off of each other or else you risk bending the frame. Btw, DO NOT remove any tape. Removal of tape is not necessary and may cause visual or circuitry problems.
This guide also works for the TZ7, slightly different screw arrangement but otherwise the process is identical.
I had a bare LCD kit so the last step was trickier than the guide shows, the note above is accurate, the extra frames are quite flimsy so care is required. But I am no watchmaker and I managed it ok; it is just a bit slower than the guide shows.
Totally agree with the above notes, however the circuit tapes on mine were under the adhesive tape on the backlight, meaning this had to be lifted in the one area to release the circuit tape off the LCD glass. Make a good note of the orientation of the LCD / Backlight glass parts in the frame as there is a metal frame, plastic surround, gasket and the two glass parts all to get back together the right way up and round. Lay it out and make a note if needed as you take it apart and it should work ok - I did find pushing the 2 conductor parts back into the circuit board quite tricky.
Guys,
Thank you SO MUCH !
It is really great to be able to rely on these tutorials !
I have just replaced the screen of my beloved TZ5 in 30mn (being extra cautious).
Keep it up !
/Patrice
Hi, I have the white screen effect on my LUMIX TZ5. I disassembly following your precious instructions and I discover that the flat connector is broken . I suggest to complete the guide with the where to buy a new one LCD Display. Thanks in advance