crwdns2915892:0crwdne2915892:0
This is a fairly simple camera to take apart, just requiring a little care and patience. You will need a small cross-head screwdriver, and if you need to remove the sensor this will require a Torx screwdriver. A plastic spudger or opening tool is also useful to have.
crwdns2942213:0crwdne2942213:0
-
-
Remove 2 screws on the right hand side of the case.
-
Remove 2 screws on the left hand side of the case.
-
-
-
Remove 2 screws on the bottom of the case, adjacent to the tripod mount. Note that these screws are slightly shorter than the previous ones and so should be kept separate.
-
Ease off the case back. You can help it off by inserting a spudger in the crack on all sides to ease it, especially either side of any points where it seems reluctant to come.
-
-
-
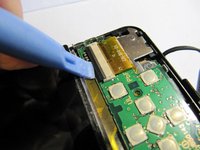
Gently lift the locking bar on the LCD ribbon, then ease the ribbon out of the socket.
-
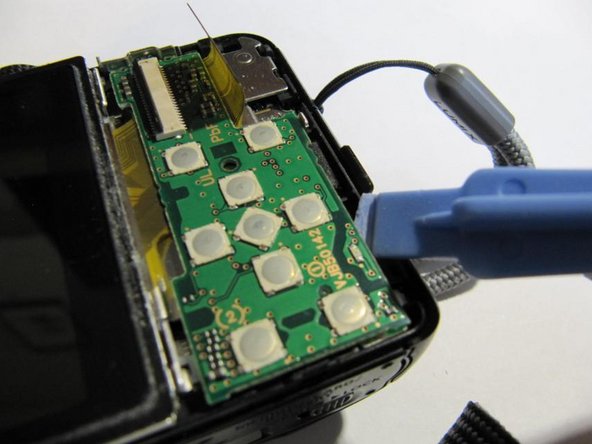
Lift the buttons board by inserting a spudger under the bottom right hand edge. This will detach it from a connector beneath.
-
-
-
-
Release a clip on the left hand side of the LCD and hence lift the LCD out.
-
-
-
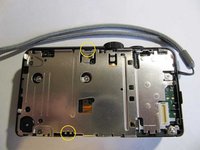
Remove 3 black screws from the mid plate.
-
Remove one silver screw from the right hand side of the mid plate.
-
Remove the mid plate, carefully releasing it from plastic clips on the top and bottom edges.
-
-
-
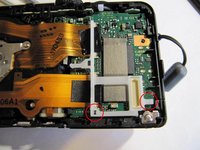
Remove a white nylon retainer. This clips onto the main logic board beneath it at two places.
-
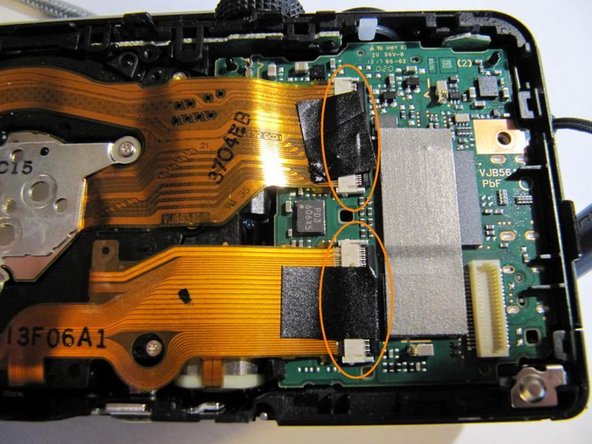
Gently peel off the black tape on the two ribbons running to the main logic board from the lens assembly.
-
Gently lift the clamping bars on the connectors and ease out the ribbons.
-
-
-
If required, you can now lift out the lens assembly.
-
If you suspect dust or contamination on the sensor or IR filter you can go on from this stage to clean them without removing the lens.
-
The symptoms are one or more dark patches at the same place in all images and at all levels of optical zoom, but getting bigger and possibly moving out of the image on digital zoom. If the patches are fuzzy then the contamination is probably on the IR filter but if well defined, it's more likely on the sensor itself.
-
A video at https://youtu.be/0nmwt0frZns shows the procedure for a different but similar model of Lumix camera. One difference is that you will need a small Torx rather than cross-head screwdriver (I think T4 or maybe T3 but unfortunately I forgot to make a note of which).
-
With the lens removed you may be able to test the zoom by applying a 3V battery to the terminals on the bottom of the zoom motor, which is mounted on the side of the lens. Reverse the polarity of the battery to reverse the direction of motion.
-
-
crwdns2935267:0crwdne2935267:0Tweezers$4.99
-
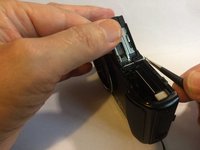
Open the battery compartment door and pull out the hinge pin with a pair of tweezers. To avoid the spring coming off, do not pull the pin right out but only far enough to release the door from the camera body.
-
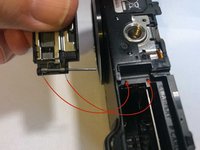
To reassemble, locate the spring ends as shown then close the door before attempting to push the hinge pin back.
-


To reassemble your device, follow these instructions in reverse order.
To reassemble your device, follow these instructions in reverse order.
crwdns2935221:0crwdne2935221:0
crwdns2935227:0crwdne2935227:0

crwdns2915084:0crwdne2915084:0

Restart Project crwdns2935289:0Restart Projectcrwdne2935289:0
Local Repair Groups
crwdns2931471:022crwdne2931471:0
crwdns2935297:0366crwdne2935297:0