crwdns2915892:0crwdne2915892:0
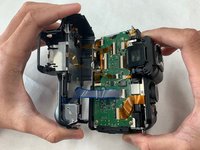
Panasonic Lumix DMC-G5 Motherboard replacement is required if the motherboard is damaged. This guide requires removal of several small screws and detachment of ribbon cables.
crwdns2942213:0crwdne2942213:0
-
-
Remove four JIS #000 screws from the bottom part of the camera.
-
-
-
Remove two JIS #000 screws from both sides of the camera.
-
-
-
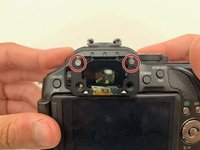
Remove two JIS #000 screws under the viewfinder.
-
-
-
-
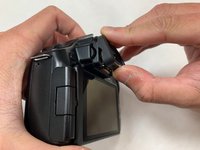
Remove the viewfinder lid.
-
Then, remove the two JIS #000 screws on the viewfinder.
-
-
-
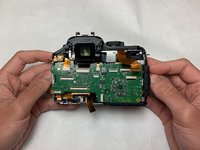
Gently remove the back panel from the camera.
-
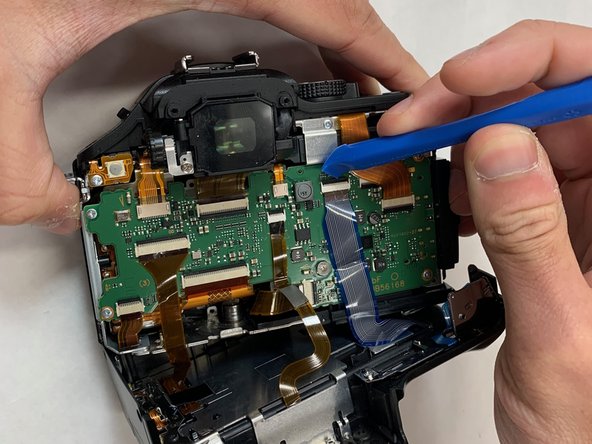
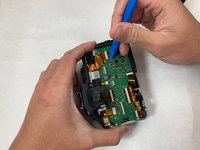
Unclip the ribbon cable from the motherboard using Wide Plastic Opening Tools and pull the cable gently.
-
-
-
Remove the JIS #000 screws on the motherboard.
-
-
-
Unclip the ribbon cable using the Wide Plastic Opening Tool on the motherboard.
-
Gently pull out the cable.
-
-
-
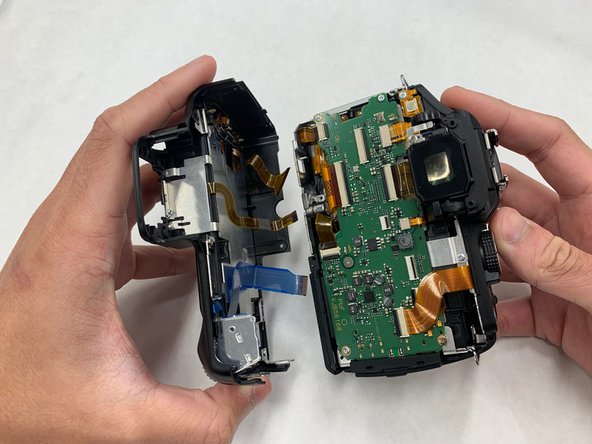
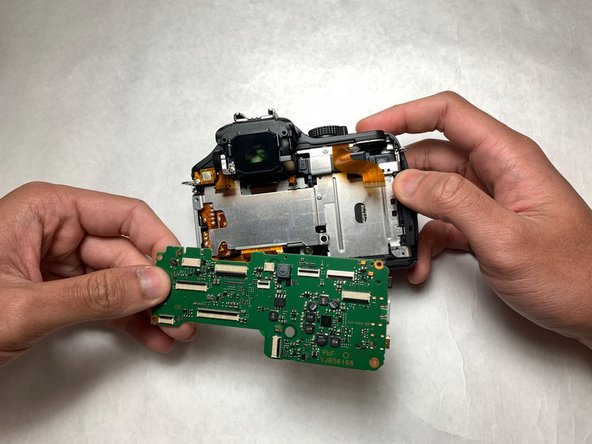
Pull out the motherboard from the camera.
-


To reassemble your device, follow these instructions in reverse order.
crwdns2935287:0crwdne2935287:0

IUPUI, Team S1-G4, Harley Summer 2019 crwdns2935289:0IUPUI, Team S1-G4, Harley Summer 2019crwdne2935289:0
IUPUI-HARLEY-SU19S1G4
crwdns2931471:03crwdne2931471:0
crwdns2935297:08crwdne2935297:0
crwdns2947410:01crwdne2947410:0
Dear Khairul Samsudin - this is great, thank you so much.
Can I ask about another classic repair for the Lumix G5?
As with many lumix cameras, the rear thumbwheel on the Lumix G5 is a weak point and frequently fails - usually the “push in” movement that should change functions failes in the “pushed in” position.
Plese can you see if you can create a “fix” for this? It classically fails at about year 2-3, when the camera is out of warranty and the repairs cost from Panasonic is more than a secondhand G5 on eBay will cost!
Best wishes - Paul in the UK