crwdns2942213:0crwdne2942213:0
-
-
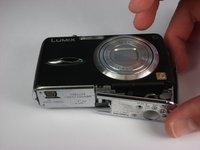
Locate the memory card and battery card latch on the bottom of the camera.
-
Slide the latch to the open position.
-
-
-
Open the battery latch, and slide the battery release lever to the right.
-
-
-
Remove the three 4.6 mm screws on the bottom of the camera using a Phillips #00 screwdriver.
-
-
-
Remove the single 3.2 mm screw on the left side of the camera using a Phillips #00 screwdriver.
-
-
-
-
Remove the two 3.2 mm screws on the right side of the camera using a Phillips #00 screwdriver.
-
-
-
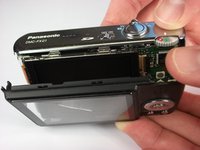
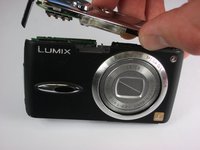
Gently remove the back casing.
-
Start at the bottom and carefully pry towards the top to get this piece free.
-
-
-
Gently lift up the LCD screen.
-
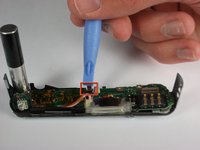
Using a plastic prying tool, flip up the latch that holds the thin ribbon in place.
-
It should fall out on its own or with a gentle tug.
-
-
-
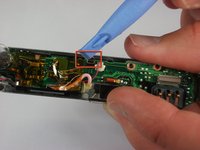
Gently tug the thicker ribbon to remove it from its housing.
-
-
-
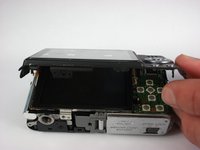
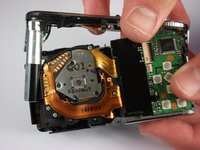
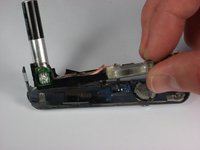
Carefully remove the upper assembly, which houses the buttons and the flash battery.
-
-
-
Pry bars back gently as shown.
-
Fingers can be used but tool is shown for clarity.
-
-
-
After, releasing all the components, gently remove the flash assembly from the casing.
-
-
-
Remove the 1.2 mm screw from the settings wheel.
-
-
-
Replace buttons.
-
Replace the "On/ Off" button with the prongs facing away from the flash.
-


To reassemble your device, follow these instructions in reverse order.
crwdns2935221:0crwdne2935221:0
crwdns2935229:02crwdne2935229:0
crwdns2935287:0crwdne2935287:0

Cal Poly, Team 9-22, Regan Fall 2010 crwdns2935289:0Cal Poly, Team 9-22, Regan Fall 2010crwdne2935289:0
CPSU-REGAN-F10S9G22
crwdns2931471:04crwdne2931471:0
crwdns2935297:08crwdne2935297:0
crwdns2947410:01crwdne2947410:0
Olá ! Sugiro ter cuidado com a carga do capacitor do flash, melhor descarrega-lo com auxílio de uma lâmpada ou resistor
para evitar um choque elétrico.