crwdns2933423:0crwdne2933423:0
crwdns2947577:0crwdnd2947577:0crwdne2947577:0

Panasonic KX-TG6641 Base Display Screen Replacement

crwdns2942213:0crwdne2942213:0

    1. Panasonic KX-TG6641 Base Display Screen Replacement, Base Display Screen: crwdns2935265:01crwdnd2935265:01crwdnd2935265:01crwdne2935265:0
      • Use a Phillips #0 screwdriver to remove five screws from the back cover.

      crwdns2952109:0crwdne2952109:0

      crwdns2917038:0crwdne2917038:0

    2. Panasonic KX-TG6641 Base Display Screen Replacement: crwdns2935265:02crwdnd2935265:01crwdnd2935265:01crwdne2935265:0
      • To remove the back cover, use an iFixit opening tool and wedge the tool in between the loosened back charging case and the front plate.

      • Wiggle to loosen, be careful to not pry too hard as it could cause damage.

      crwdns2952109:0crwdne2952109:0

      crwdns2917038:0crwdne2917038:0

    3. Panasonic KX-TG6641 Base Display Screen Replacement: crwdns2935265:03crwdnd2935265:01crwdnd2935265:02crwdne2935265:0 Panasonic KX-TG6641 Base Display Screen Replacement: crwdns2935265:03crwdnd2935265:02crwdnd2935265:02crwdne2935265:0
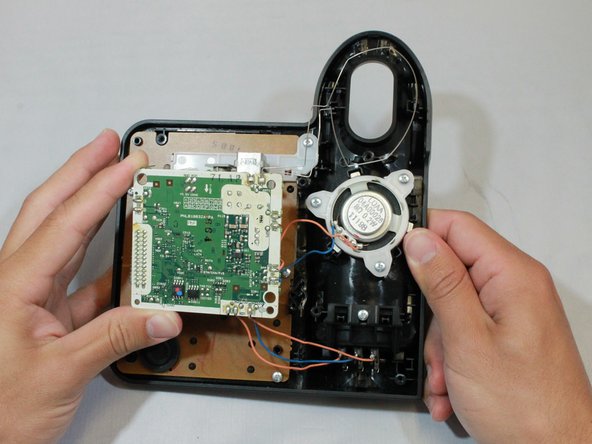
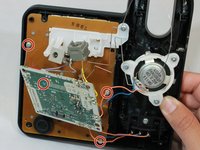
      • To access the display screen, use a Phillips #0 screwdriver to remove the screw on the bottom right corner of the electrical panel.

      • Unclip the wires hooked into the base.

      • It's not necessary to desolder the wires.

      crwdns2952109:0crwdne2952109:0

      crwdns2917038:0crwdne2917038:0

    4. Panasonic KX-TG6641 Base Display Screen Replacement: crwdns2935265:04crwdnd2935265:01crwdnd2935265:01crwdne2935265:0
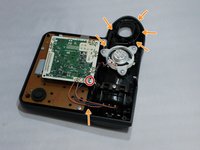
      • Disconnect the two phone cable connectors.

      • Use a Phillips #0 to remove the screw that is fixed in the plastic holder for the connectors.

      crwdns2952109:0crwdne2952109:0

      crwdns2917038:0crwdne2917038:0

    5. Panasonic KX-TG6641 Base Display Screen Replacement: crwdns2935265:05crwdnd2935265:01crwdnd2935265:02crwdne2935265:0 Panasonic KX-TG6641 Base Display Screen Replacement: crwdns2935265:05crwdnd2935265:02crwdnd2935265:02crwdne2935265:0
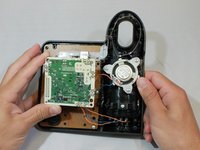
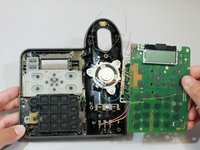
      • Move the electrical panel to the side.

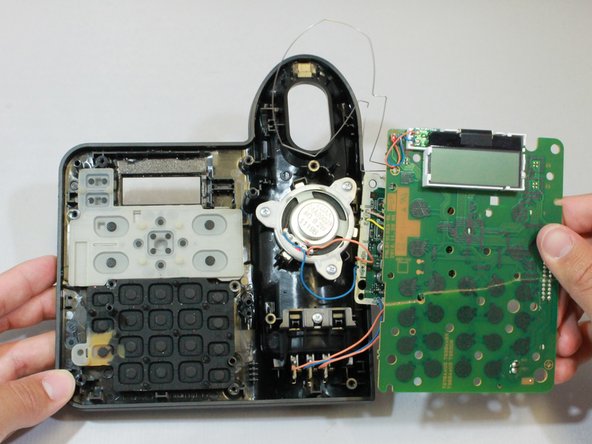
      • Use a Phillips #0 to remove the four screws from the brown board and lift it to access the display screen.

      • Be aware, there is a screw under the control panel, it is indicated with the central red circle.

      crwdns2952109:0crwdne2952109:0

      crwdns2917038:0crwdne2917038:0

    6. Panasonic KX-TG6641 Base Display Screen Replacement: crwdns2935265:06crwdnd2935265:01crwdnd2935265:01crwdne2935265:0
      • Remove the current display screen from the electric panel.

      • Follow this process in reverse to replace the new display screen in its place.

      crwdns2952109:0crwdne2952109:0

      crwdns2917038:0crwdne2917038:0

crwdns2915888:0crwdne2915888:0

To reassemble your device, follow these instructions in reverse order.

crwdns2935221:0crwdne2935221:0

Joseph Byrne

crwdns2935283:004/08/19crwdne2935283:0

481 crwdns2915208:0crwdne2915208:0

crwdns2935297:04crwdne2935297:0

crwdns2935287:0crwdne2935287:0

Eastern Washington University, Team S1-G2, Rowley Spring 2019 crwdns2935289:0Eastern Washington University, Team S1-G2, Rowley Spring 2019crwdne2935289:0

EWU-ROWLEY-S19S1G2

crwdns2931471:04crwdne2931471:0

crwdns2935297:060crwdne2935297:0

crwdns2947412:00crwdne2947412:0

crwdns2917038:0crwdne2917038:0

crwdns2936625:0crwdne2936625:0:

crwdns2936751:024crwdne2936751:0 1

crwdns2936753:07crwdne2936753:0 15

crwdns2936753:030crwdne2936753:0 64

crwdns2942667:0crwdne2942667:0 811