crwdns2915892:0crwdne2915892:0
My Panasonic DP-UB150 4k player stopped reading discs completely after a short period of skipping and freezing when playing. This guide shows how I replaced the laser and got it working again.
I'm fairly certain this guide also applies to the DP-UP154, DP-UB159 and DP-UB450 models as well. They appear to have almost identical internals.
The replacement laser can be obtained from AliExpress (look for SF-BD417 51PYY10) or as an official Panasonic part (SXA0041-SER).
-
-
Press the eject button to open the disc tray.
-
Unplug the power adaptor to leave the tray open.
-
Unplug any other cables.
-
-
-
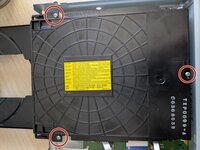
Remove the 3 Phillips screws from the back of the case.
-
Slide the top case up and back to remove it.
-
It helps if you pull the left and right sides out a bit to clear the base.
-
-
-
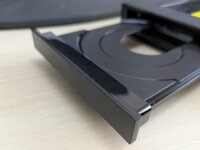
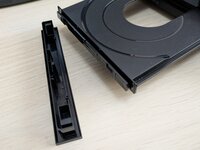
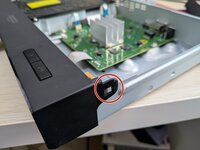
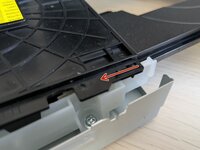
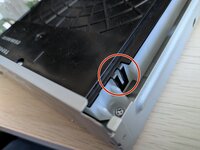
Unclip the front of the disc tray.
-
Support the tray while you unclip the front.
-
It should slide up and off.
-
-
-
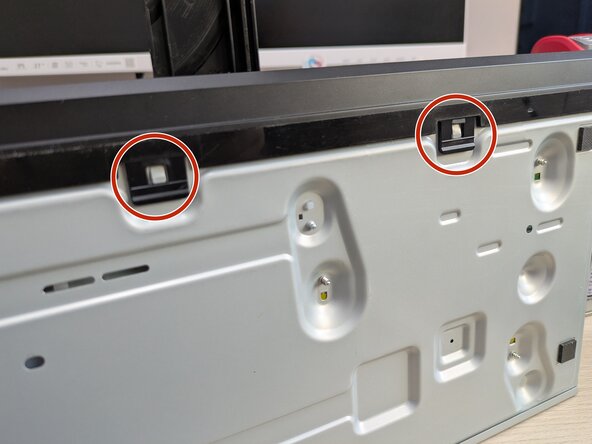
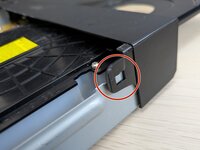
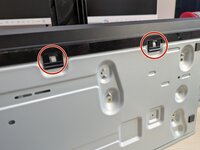
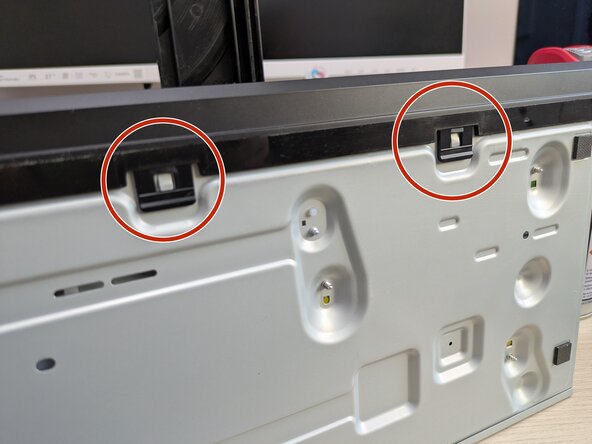
Release the latches on the left and right sides plus the two underneath.
-
Slide the front off and guide it over the open disc tray.
-
-
-
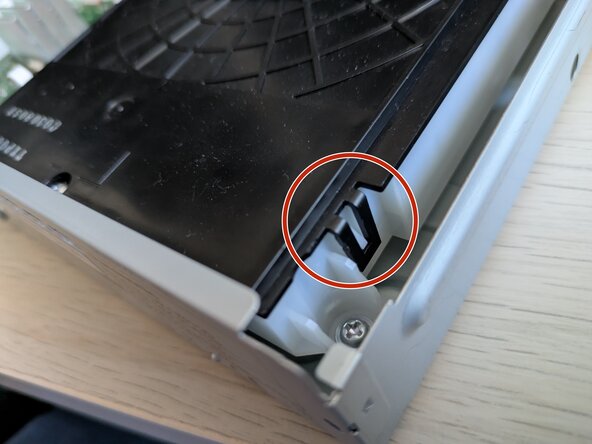
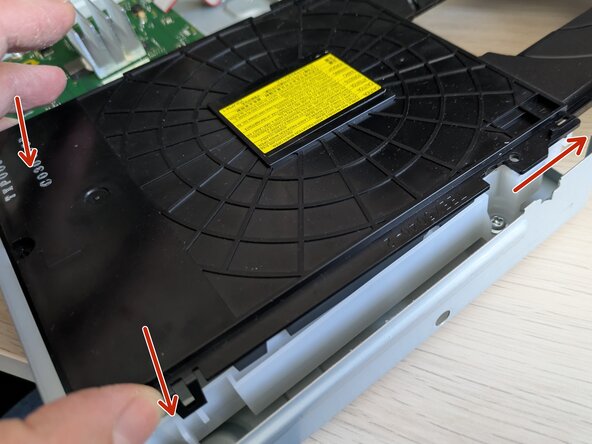
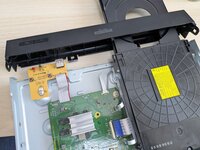
Remove the 3 Phillips screws from the drive lid.
-
Unlatch the left and right sides.
-
-
-
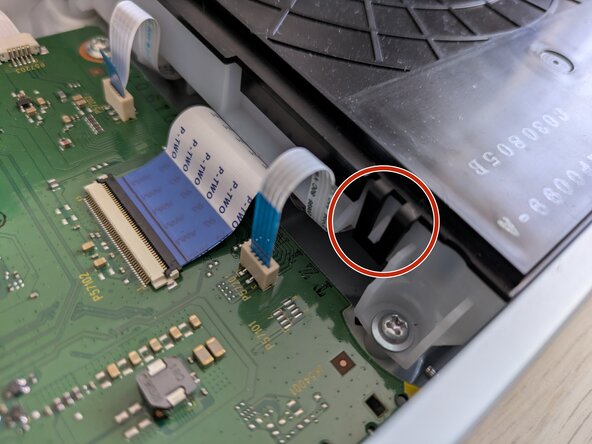
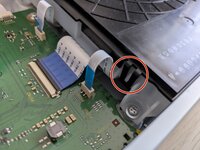
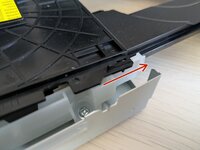
Lift the drive cover slightly up at the rear.
-
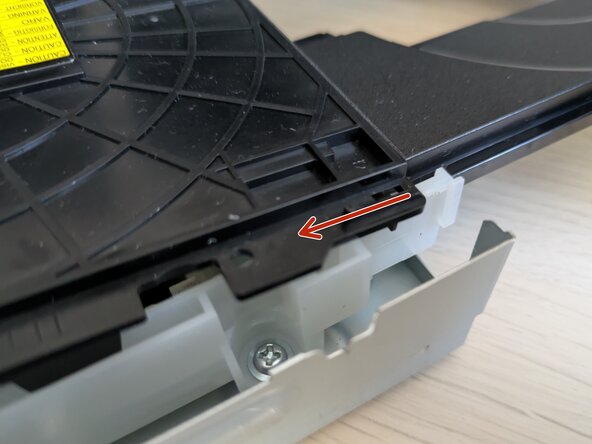
Slide it back to clear the retaining slots at the front.
-
-
-
-
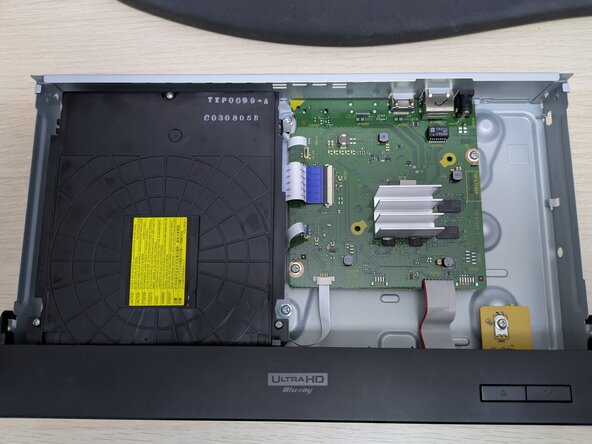
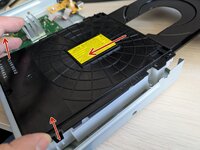
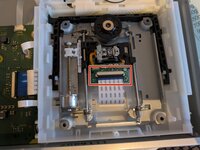
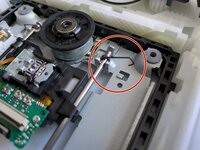
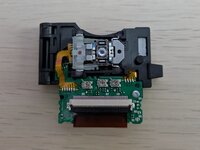
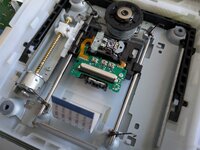
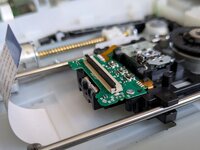
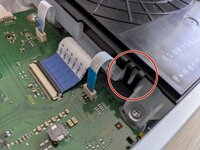
With the drive open you should now see the laser unit mounted on rails and driven by a motor.
-
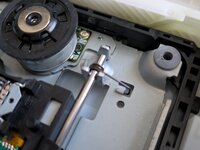
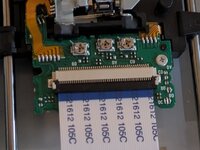
Gently open the black retaining clip on the laser unit ribbon connector.
-
Disconnect the ribbon cable.
-
-
-
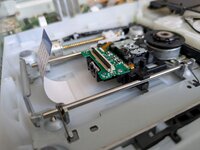
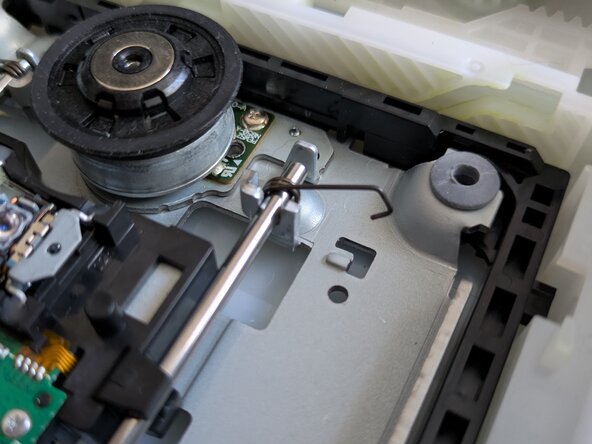
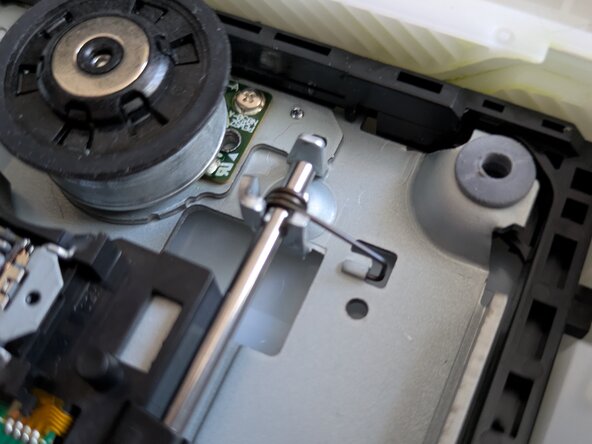
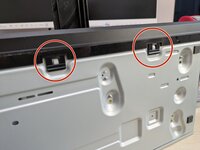
Unhook the 4 spring clips holding the rails in place. There are 2 clips per rail.
-
You may need to use a screwdriver to guide the hooks free so be very careful not to damage the delicate ribbon cable.
-
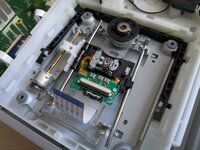
With the rails free you can now lift them and the laser unit out of the drive.
-
-
-
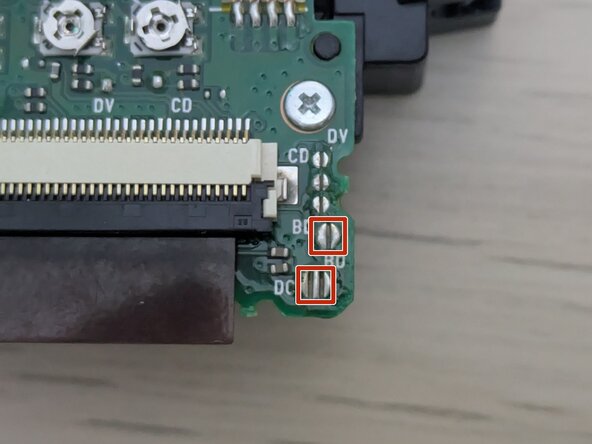
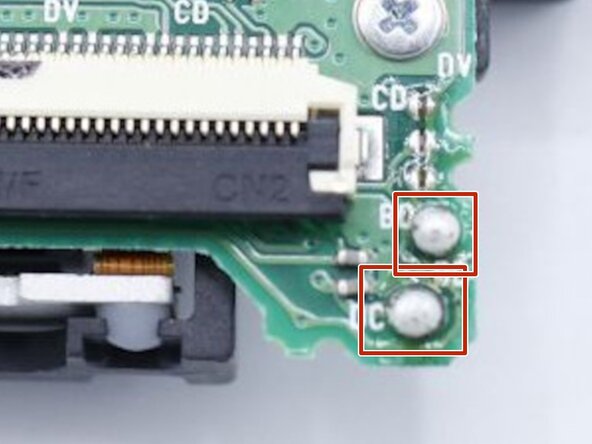
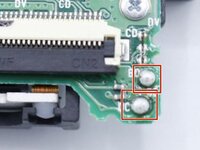
My "new" laser appeared to be used so I didn't need to remove any antistatic solder points.
-
A parts catalogue (https://fixpart.co.uk/product/panasonic-...) shows solder across a couple of points on the lower right hand side of the laser.
-
If these are present on your new laser you need to remove them with a soldering iron. You may get away with just touching the iron onto them but don't be surprised if you need to use some desoldering wick.
-
-
-
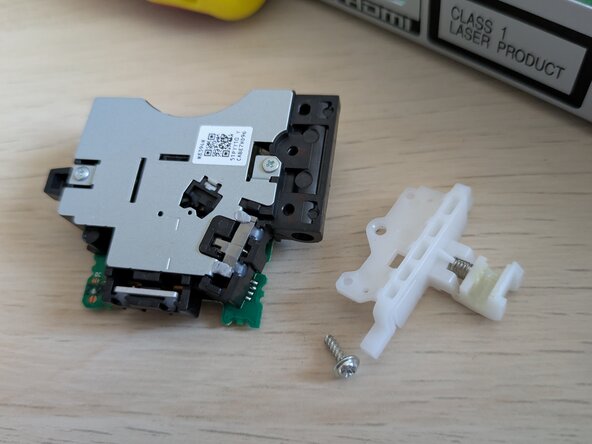
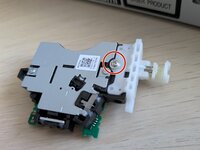
Turn the old laser unit over. Remove the screw holding the white motor arm in place. Fit it to the new laser unit.
-
-
-
Mount the laser on the rails. Add a spring clip to the end of each rail.
-
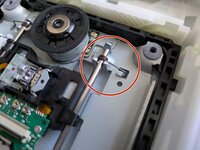
Insert back into the drive while making sure the white arm on the side of the laser unit engages with the worm gear.
-
Hook each of the spring clips into place. Make sure the clips are under tension and aren't loose.
-
You may need to use a screwdriver to push them into place. Be careful not to damage the ribbon cable.
-
-
-
Gently open the black retaining clip on the laser unit ribbon connector.
-
Insert the ribbon connector and make sure it is lined up and square.
-
Close the black retaining clip.
-
-
-
Now is a good time to make sure the laser lens is clean!
-
Gently clean it with a cotton bud/Q-tip and some isopropyl alcohol.
-
-
-
Refit the drive cover by sliding the front in first to engage the retaining slots. Then lower the rear into place.
-
-
-
Make sure the left and right latches are clicked into place.
-
Refit the 3 Phillips screws
-
-
-
Slide the case front over the open drive tray.
-
Make sure the button pushers are lined up with the switches on the orange board.
-
Clip the case front in place. Latches are on the left and right sides with two underneath.
-
-
-
Refit the top case.
-
Refit the 3 Phillips screws.
-


Hopefully your player should now be working ok!
Hopefully your player should now be working ok!