crwdns2942213:0crwdne2942213:0
-
-
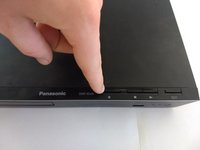
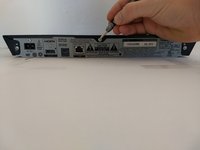
First, before powering off, press the eject button to open the tray.
 crwdns2952109:0crwdne2952109:0
-
-
-
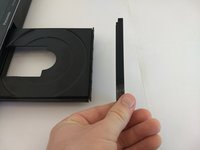
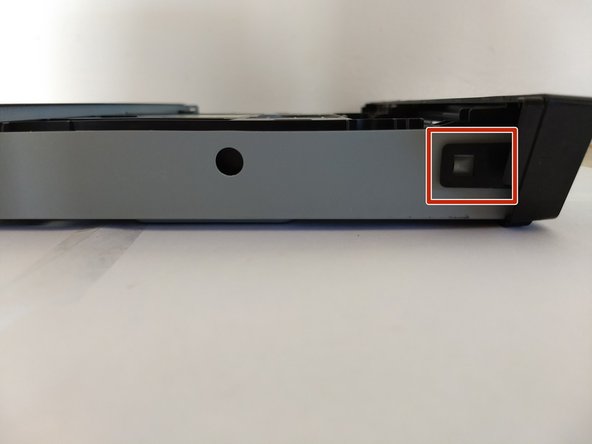
Remove the front cover of the tray.
-
Do so by gently pushing it out, away from the player, ensuring the pictured tabs clear the tray.
-
Then slide it vertically up and away.
-
-
-
Press eject button to close the tray.
-
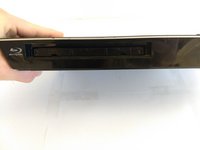
Make sure to unpower and unplug device before continue work on other fixes.
-
-
-
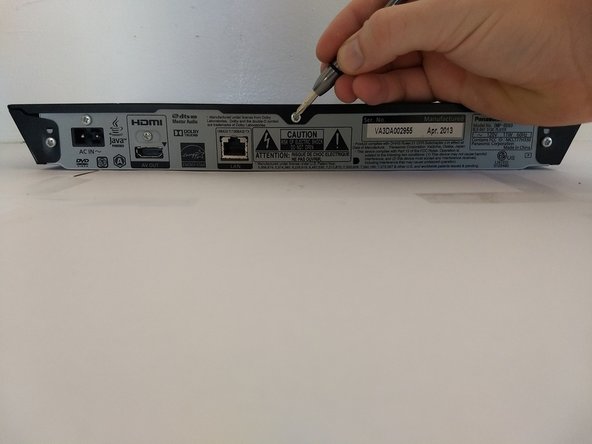
Using a Phillips #1 screwdriver, unscrew the back three screws.
-
-
-
-
Slide the top panel horizontally to remove it.
-
-
-
Locate 6 tabs across the device.
-
2 are on the bottom, 1 is on the left and right, and 2 are are on the inside.
-
-
-
Pop the 6 markers out.
-
Then take off the cover.
-
-
-
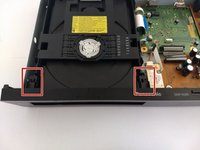
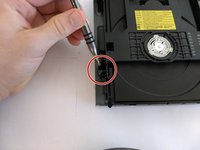
Remove screws surrounding disk drive that attach it to outer cover.
-
-
-
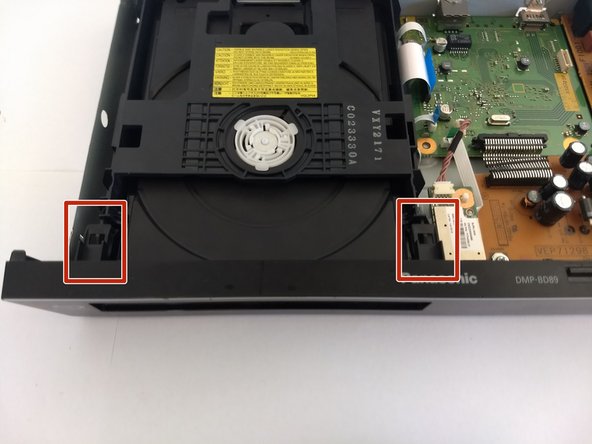
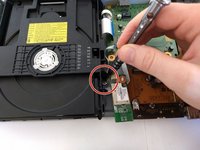
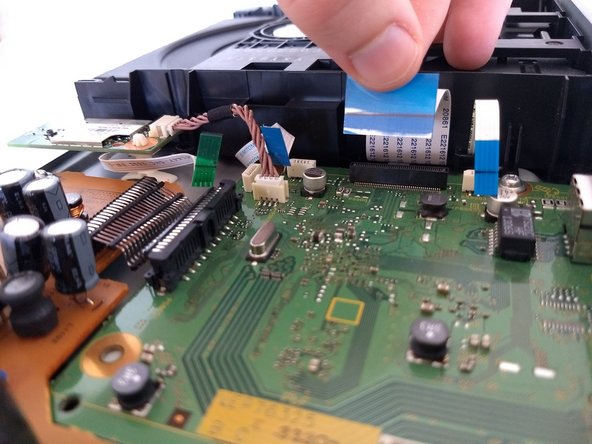
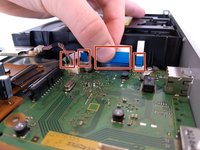
Remove the one green andthree blue tabs pictured that connect the disk drive to the board. Try to do so carefully, to avoid damage to the hardware.
-
-
-
Carefully take the drive out of the device. Note where the feet need to go back in for reassembly.
-


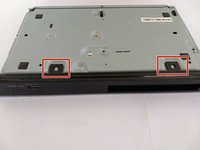


To reassemble your device, follow these instructions in reverse order. Ensure the feet of the disk drive go back in the holes.

crwdns2935287:0crwdne2935287:0

UC Santa Barbara, Team S2-G9, Weedon Fall 2017 crwdns2935289:0UC Santa Barbara, Team S2-G9, Weedon Fall 2017crwdne2935289:0
UCSB-WEEDON-F17S2G9
crwdns2931471:04crwdne2931471:0
crwdns2935297:04crwdne2935297:0