crwdns2915892:0crwdne2915892:0
Step by step guide for replacing your damaged LCD Display.
crwdns2942213:0crwdne2942213:0
-
-
-
Remove the battery and memory card from the device.
 crwdns2952109:0crwdne2952109:0
-
-
-
Remove the single .5mm screw on the left side of the camera.
-
-
-
Remove 4 (0.5mm) screws from the right side of the camera.
-
There are two screws at the top.
-
There are two screws at the bottom.
-
-
-
Remove 5 screws from the base of the camera.
-
There are two (0.2mm) screws next to the battery compartment.
-
There are three (0.5mm) screws around the tripod base mount.
-
-
-
-
Slowly open the back cover away from the device
-
The wrist strap bar can easily be lost so now is a good time to remove it.
-
-
-
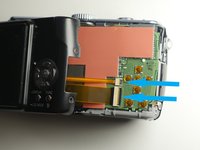
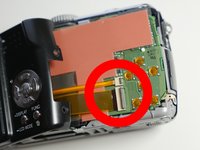
Detach both ribbon cables using a spudger or other method.
-
Lift the black clip upward, unlocking the ribbon cable
-
Once the clip is in the up position you can slide the cable out. Release cable by pulling the cable out.
-
-
-
Screw Arrangements
-
Make sure you organize your screws to make re-assembly easier.
-
-
-
Remove the back casing from the camera.
-
-
-
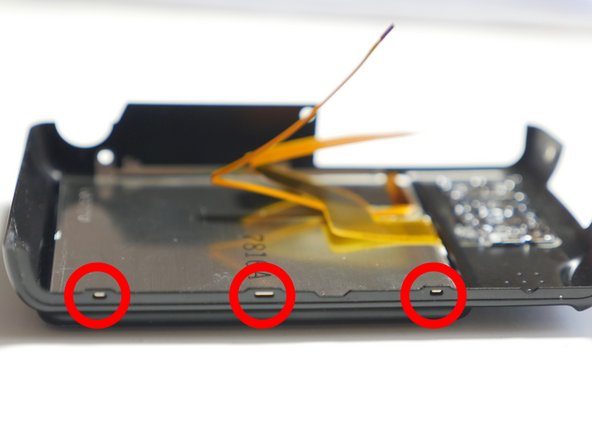
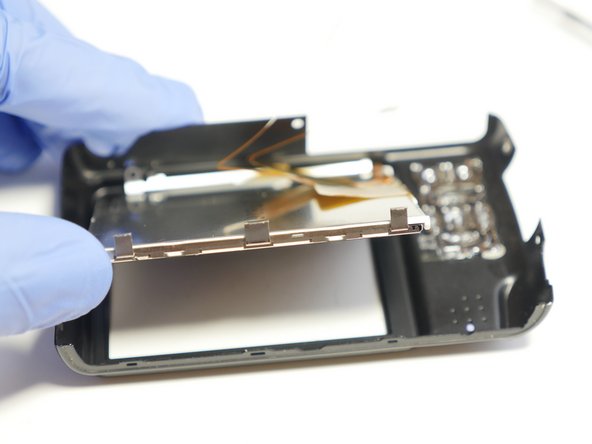
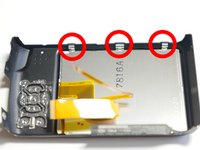
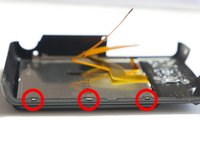
Use a spudger or other tool to release the 3 clips between the LCD case and housing.
-
Note: when re-assembly all 3 clips need to be seated in the grooves as shown in the 2nd picture.
-
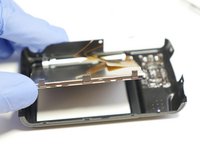
Lift LCD out as shown in 3rd picture
-
-
-
Swap out your old LCD with the new LCD
-
You can purchase your LCD with Backlite or Without. It is much easier if your purchase the LCD with Backlite.
-
Panasonic Lumix DMC-TZ3 LCD Display Replacement Part VYK2C31
-
-





To reassemble your device, follow these instructions in reverse order.
crwdns2935221:0crwdne2935221:0
crwdns2935227:0crwdne2935227:0

crwdns2947412:03crwdne2947412:0
Very well presented and helpful - thank you.
It sems important to use the correct screwdriver and my impression is that the screws are JIS rather than Philips.
So far I have been unable to locate a replacement screen with back light (I assume the back light is connected by the narrower ribbon cable).
George Winspur - crwdns2934203:0crwdne2934203:0 crwdns2950251:0crwdne2950251:0
I Like my Panasonic DMC-TZ3 , paid 300 way back in 2007 and has flawlessly perfect, till I Dropped it in the case …
IT still take pictures, store on Memory, etc all functions work , and can down load to computer ..
BUT the Back LCD I can barely see unless I put a LIGHT to it ….
SO I assume I screwed the Back Light, … can anybody help ?
Gary Trembley - crwdns2934203:0crwdne2934203:0 crwdns2950251:0crwdne2950251:0
Hi…. the backlite cable might have come loose or damaged. I would disassembly the unit and re-insert the backlite cable to see if that does the trick.. Otherwise you would have to invest in a new Display ASSY or backlite. A used backlite or Display assy is not that expensive and easy to replace..
Sales Cameraparts4you - crwdns2934203:0crwdne2934203:0 crwdns2950251:0crwdne2950251:0
