crwdns2915892:0crwdne2915892:0
Is your logic board acting illogical? Fix it!
crwdns2942213:0crwdne2942213:0
-
-
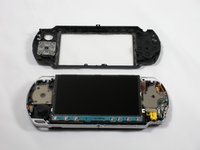
Place PSP face down, so that the UMD Drive is facing upwards.
-
Locate the battery door and open.
-
Remove the battery from inside.
-
-
-
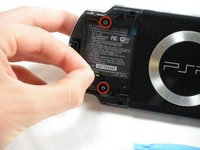
Locate the sticker in the battery compartment labeled: "En: Warranty Void if Seal Damaged."
-
Remove the sticker using the PSP Opening Tools.
-
-
-
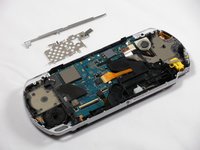
Remove four 5 mm Phillips from the case.
-
-
-
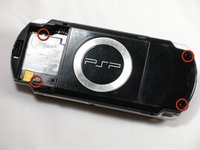
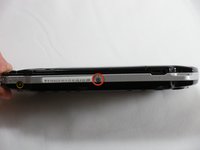
Remove the following screws from around the bezel:
-
Two 4 mm Phillips
-
One 5 mm Phillips
-
-
-
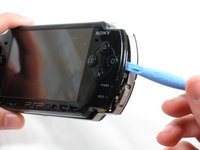
Gently pry the front bezel away from the casing using a PSP opening tool.
-
Start on the right hand side of the PSP bezel, and carefully work the tool around the side.
-
-
-
-
Remove the home bar by gently prying on the left and right sides of it with the opening tools. Lift the bar out of the device.
-
-
-
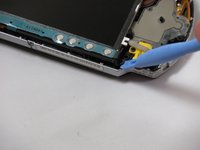
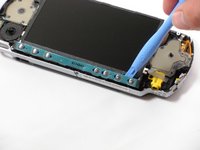
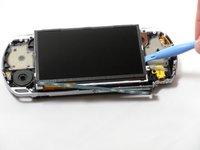
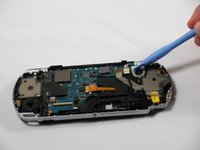
With the home bar out of the way, gently pry up the display using the opening tools.
-
Lift the black tabs of the ribbon cable connectors using a opening tool. Pull the ribbons out towards the bottom of the PSP to disconnect.
-
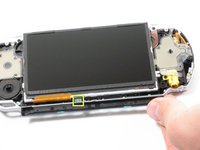
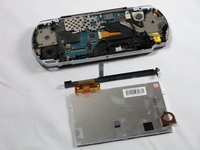
Gently lift out the display.
-
-
-
Remove two 4.5 mm Phillips screws from the left-hand side of the PSP.
-
Slide off the left trigger along with the plastic bracket underneath.
-
Carefully pry off left trigger button using opening tools.
-
-
-
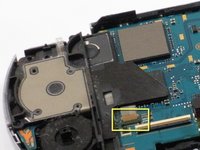
Use an opening tool to lift up the brown tab on the connector and remove the cable horizontally.
-
Gently remove the memory card slot by pulling it straight out.
-
-
-
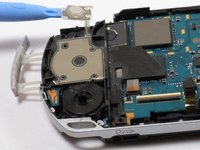
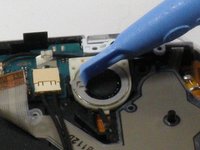
Use the opening tools to press the tab on the left-hand side of the speaker to release it.
-
Remove the speaker by twisting it counter-clockwise (to the left, like a screw).
-
-
crwdns2935267:0crwdne2935267:0Tweezers$4.99
-
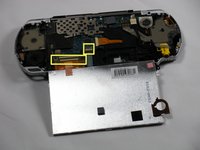
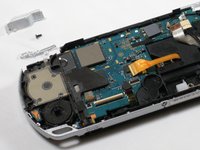
Remove the following four connections:
-
Two ribbon cables -- flip up latch and remove horizontally.
-
One wire clamp -- use an opening tool to pry it up vertically.
-
One wiring harness -- use your fingers, a PSP opening tool, or tweezers to disconnect the connector horizontally.
-
-
-
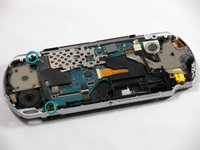
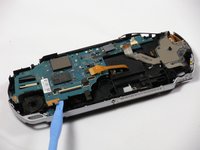
Remove metal shields by gently lifting them with an opening tool.
-
-
-
Using an opening tool, delicately raise the logic board from its base.
-


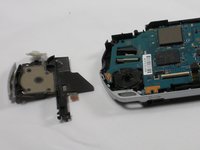


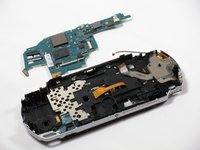
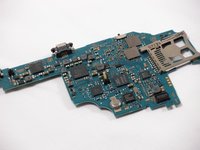
To reassemble your device, follow these instructions in reverse order.
To reassemble your device, follow these instructions in reverse order.
crwdns2935221:0crwdne2935221:0
crwdns2935229:031crwdne2935229:0

crwdns2915084:0crwdne2915084:0

Cal Poly, Team 6-3, Maness Fall 2009 crwdns2935289:0Cal Poly, Team 6-3, Maness Fall 2009crwdne2935289:0
CPSU-MANESS-F09S6G3
crwdns2931471:05crwdne2931471:0
crwdns2935297:037crwdne2935297:0
crwdns2947412:05crwdne2947412:0
How do I know whether my Logic Board is functioning properly or not?
how can I change that little refill on the motherboard
how-do-i-repair-the-screen-conntors
My psp is not turning on when battery is inserted even when plugged to electricity...and again if the battery is inserted to it the charging light turns on..Pls help m
What do you call the connector that joins lcd to the board small one 4pin?