crwdns2933423:0crwdne2933423:0

PSP 2000 Front Casing Replacement

crwdns2942213:0crwdne2942213:0

  1. PSP 2000 Front Casing Replacement, Battery: crwdns2935265:01crwdnd2935265:01crwdnd2935265:03crwdne2935265:0 PSP 2000 Front Casing Replacement, Battery: crwdns2935265:01crwdnd2935265:02crwdnd2935265:03crwdne2935265:0 PSP 2000 Front Casing Replacement, Battery: crwdns2935265:01crwdnd2935265:03crwdnd2935265:03crwdne2935265:0
    • Place PSP face down, so that the UMD Drive is facing upwards.

    • Locate the battery door and open.

    • Remove the battery from inside.

  2. PSP 2000 Front Casing Replacement, Front Casing: crwdns2935265:02crwdnd2935265:01crwdnd2935265:01crwdne2935265:0
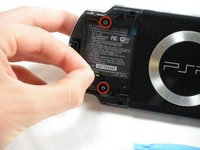
    • This step requires the removal of the warranty sticker. Removing the sticker will void the warranty. According to the FTC removing this will not void your warranty.

    • Locate the sticker in the battery compartment labeled: "En: Warranty Void if Seal Damaged."

    • Remove the sticker using the PSP Opening Tools.

    • Under the sticker is a 5mm Phillips screw needed in the next step.

  3. PSP 2000 Front Casing Replacement: crwdns2935265:03crwdnd2935265:01crwdnd2935265:02crwdne2935265:0 PSP 2000 Front Casing Replacement: crwdns2935265:03crwdnd2935265:02crwdnd2935265:02crwdne2935265:0
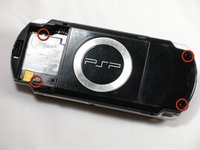
    • Remove four 5 mm Phillips from the case.

    • If the screws stick in the case, you can use a magnetized screwdriver to draw them out.

  4. PSP 2000 Front Casing Replacement: crwdns2935265:04crwdnd2935265:01crwdnd2935265:02crwdne2935265:0 PSP 2000 Front Casing Replacement: crwdns2935265:04crwdnd2935265:02crwdnd2935265:02crwdne2935265:0
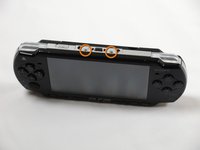
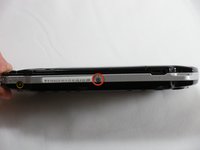
    • Remove the following screws from around the bezel:

    • Two 4 mm Phillips

    • One 5 mm Phillips

    • The two shorter 4 mm screws are on the top of the PSP; the longer 5 mm screw is on the bottom.

  5. PSP 2000 Front Casing Replacement: crwdns2935265:05crwdnd2935265:01crwdnd2935265:02crwdne2935265:0 PSP 2000 Front Casing Replacement: crwdns2935265:05crwdnd2935265:02crwdnd2935265:02crwdne2935265:0
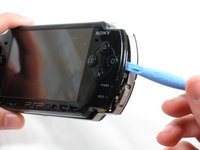
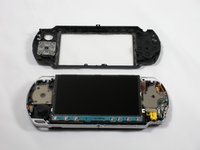
    • Gently pry the front bezel away from the casing using a PSP opening tool.

    • Start on the right hand side of the PSP bezel, and carefully work the tool around the side.

    • If you want to clean the control buttons or D-pad, you can easily pop them out once the faceplate is off and wipe them clean.

crwdns2915888:0crwdne2915888:0

To reassemble your device, follow these instructions in reverse order.

crwdns2935229:013crwdne2935229:0

pepe32290

crwdns2935283:010/19/09crwdne2935283:0

1,573 crwdns2915208:0crwdne2915208:0

crwdns2935297:04crwdne2935297:0

crwdns2915084:0crwdne2915084:0

Cal Poly, Team 6-3, Maness Fall 2009 crwdns2935289:0Cal Poly, Team 6-3, Maness Fall 2009crwdne2935289:0

CPSU-MANESS-F09S6G3

crwdns2931471:05crwdne2931471:0

crwdns2935297:035crwdne2935297:0

crwdns2917034:0crwdne2917034:0

Does the front casing also have the plastic glass screen on it as well? Or is that separate?

Arthur - crwdns2934203:0crwdne2934203:0

crwdns2917038:0crwdne2917038:0

crwdns2936625:0crwdne2936625:0:

crwdns2936751:024crwdne2936751:0 6

crwdns2936753:07crwdne2936753:0 52

crwdns2936753:030crwdne2936753:0 214

crwdns2942667:0crwdne2942667:0 26,264