crwdns2915892:0crwdne2915892:0
This guide will teach you how to use the soldering technique to remove the desired LED from the logic board and replace it with a new LED. Be careful when soldering because there is chance of damaging the controller.
crwdns2942213:0crwdne2942213:0
-
-
Loosen the seven 11 mm Phillips #0 screws located on the back of the controller.
-
-
-
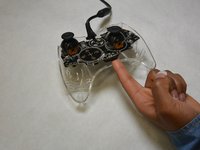
Using a plastic opening tool, pry the back cover from the front.
-
-
-
-
Remove the top cover from the bottom and place next to each other.
-
-
-
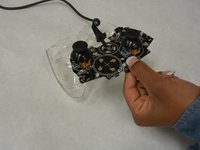
Remove the logic board from the controller casing by lifting up and pulling out.
-
-
-
Locate the LED (s) that needs to be replaced.
-
Once the LED has been located, flip the logic board to the other side and locate the pins associated with the LED that needs to be replaced.
-
-
-
Desolder the LED from the logic board.
-


To reassemble your device, follow these instructions in reverse order.
crwdns2935221:0crwdne2935221:0
crwdns2935227:0crwdne2935227:0

crwdns2935287:0crwdne2935287:0

IUPUI, Team 3-1, Harley Fall 2015 crwdns2935289:0IUPUI, Team 3-1, Harley Fall 2015crwdne2935289:0
IUPUI-HARLEY-F15S3G1
crwdns2931471:04crwdne2931471:0
crwdns2935297:05crwdne2935297:0